Full, Fast, Extended Live Video Transcript
Extend your reach for results by extending your sets. The complete transcript breaking down my Full, Fast, Extended method.

Extend your reach for results by extending your sets. The complete transcript breaking down my Full, Fast, Extended method.

Note: This tutorial video was recorded as a live Facebook event. The text below is an edited transcript of the tutorial intended to provide members with a convenient means of referring to and further researching the topics and content detailed in the video.
Today we're doing my Full, Fast, Extended Workout Day 2. I post these online—these are my own personal workouts that I'm doing, they're full-body training. I won't go on into too much detail why I do full-body training, but research shows—and the anecdotal evidence shows—it is far superior for losing body fat, and it may even be more effective for muscle mass and strength gains in some cases
What I've been doing with my full-body training is use it as a tutorial to take you through literally the gamut of almost every training and intensity technique imaginable. Many are old school ones that I upgrade or update with new science to make it a bit harder, like my 3x3 Rest Rundown. Old school strength training technique, 3 sets of 3—but I spruced it up a bit by adding my Rest Rundown.
With my Full, Fast, Extended Workout, we're doing extended sets. Now, what are extended sets? For those of you who don't know what extended sets are, they're basically supersets, or more specifically compound sets. A compound set is just a superset done for the same muscle group—so a superset would be chest and back done back to back; compound set would be two chest exercises done back to back.
What is specific about the extended set version of compound sets is it's not just two random chest exercises. There' s a pattern, and it's about biomechanics. The first exercise you're going to do is the easiest version of that exercise. For example, I'm going to start with cable crossover. However, as we all know doing cable crossovers from a high pulley is far easier than doing them from a low pulley. Upper pecs are a bit weaker, so with an extended set what I’m going to do is I'm going to start on the weaker version—low pulley cable crossovers—take that to muscle failure, and then I'm going to immediately change the cable—with the same weight—to the high position. Where I was fatigued on low pulley cable crossovers with the same weight, I can now take that same weight and continue doing reps, just a different style. And so that's basically what extended set are.
If you think about other ways to work chest, you can think about an incline versus a flat bench. You're going to be weaker on the incline, so you'd start with an incline then move to the flat bench. With pulldowns, it might be a wide grip versus an underhand grip—you're far stronger on the underhand grip. So that's the real essence of the extended sets.
And the nice thing about my Train with Jim series is you get five days to try different types of extended set routines. And that's what the real fun of the Train with Jim series is about. Not only are you getting the results that I'm getting, but you guys are learning new techniques every single week that you can then go and apply to any type of training. I post my photos or my videos doing the actual workout as my accountability, to show I'm not skipping my workouts. You guys are my inspiration and my motivation—you guys are the ones that I'm holding myself accountable to—and we should all have someone that we hold ourselves accountable to, because we know what happens when we hold ourselves accountable: It's often very easy to sort of look the other way on ourselves and say "Oh, missed today's workout, nobody really knows." No, everybody's going to know because if you don't post your workout, you didn't do it.
Let's jump right into it. The best way to show you what extended sets are about is to take you through the workout. For those of you following along, this is Day 2 of Full, Fast, Extended, starting with the cable crossover low pulley. You're going to select a weight that allows you to hit about 12 to 15 reps on the first one, and the rep range is kind of important because you want to be fatigued. Now some exercises, you're going to find that on your extended set version the weight that you're using on the first exercise might be very light—that's fine, you're just going to do extra reps. The point is to really get the muscle fatigued so when you get to that second exercise you're not as strong as you normally are and that lighter weight is going to be harder.
I failed at 15, so I pretty much picked the right weight here. Now we're going to immediately go up to the high position—because I can no longer do reps from the low position—but with the same weight. I can now continue doing reps as standard cable crossovers, and what the nice thing here is I'm just going to take this to muscle failure. Not only is this allowing me to take that set past muscle failure and keep training the chest, but I'm hitting different areas of the pecs. So for example, the low pulley I'm focusing more on upper chest; with the high pulley, focusing more on the lower pecs. And what you're going to do is you're going to keep this quick, so you've got 60 seconds max in between these extended sets. We're going to do two of these, so two cable crossovers. I'm going to say time's up and jump right into my next set, because we waste little time in The JYM.
Now you won't be able to get close to 12 if you truly went to muscle failure. One thing you'll notice is I'm using an open grip when I'm doing both versions of the cable crossover. Most JYM Army members know why, but for those of you who don't, it's so that I focus more on the pecs. What does the chest do? Well, it brings the arms together. So I'm pushing the handles together with an open grip. If I use a closed grip where I grab onto the handles, what happens is I tend to squeeze, and then what you start doing is initiating the movement with the arms. That cheats the pecs, so here with the open grip it's all chest, and you'll feel the difference. Really focus on squeezing together at that bottom position. And just like that, we're done with chest, 4 sets basically blasted off in a couple of minutes.
So now we go to the next exercise. People ask "How much rest do you need to take between exercises?" None. You really don't need any rest, because we're moving—the way I have these exercises scheduled, set up here on the list, is that we did a pushing exercise—pecs—now we're doing back, so the back should not be fatigued by any means by what we did with the chest.
Now what we're going to do is move over to standing straight-arm pulldowns. And here the extended set is going to go from a rope handle or a chain. When you do your straight-arm pulldowns with a rope, you'll notice that it's a bit harder than doing them with a straight bar because you can't push down, almost like the triceps—using the rope is far harder than using a straight bar on triceps pressdowns, because you get to use other assistance muscles to help push it down, whereas when you're using the rope—at least with the straight-arm pulldown—you're using more lats.
We'll start 12 to 15 with the rope. So once we get to failure with the rope, now I simply switch the attachment over to the straight bar. And now even though I hit failure with the rope, I'll be able to bang out a few more reps with this version. Alright, we get about a minute rest now or less. Like I said, I want to keep this workout moving. The great thing about straight-arm pulldowns is it's one of the few isolation exercises or single-joint exercises for back. Typically when we do back we're either doing rows—so we have movement at the shoulder and the elbow, right? So we have a multi-joint movement. Same with pulldowns. Straight-arm pulldown is the only back exercise where the elbow joint isn't involved.
So the arms are hardly involved—long head of the triceps is involved a bit because it attaches above the shoulder—so this is a great way to finish off or pre-exhaust your lats. And because the movement is done with your elbows in front of the body to behind the body, it's hitting more of the lower lat muscle fibers. So now we've got to go back—just don't forget—go back to the harder version, the rope version.
Done with back, alright. Now we've done chest, we've done back. What's left for our major muscle groups in the upper body? Shoulders. However, before we move to shoulders I'm actually going to throw legs in to give the shoulders a little more of a break. Remember, we already trained chest—shoulders are involved in most chest exercises. So what I've done here is provided a little bit more of a break for shoulders before we hit them, by doing legs.
So legs is a problem for me. I've got front squat and back squat—for those of you who are aware, I had four knee surgeries this year—I'm still recovering. As far as my ability to do squats, not fully able to go down all the way. So what I'll do is, I'm going to do some box squats. The main issue I have is with the negative portion, the lowering, I can't—this knee just doesn't track well and so it's pretty difficult for me to lower into a squat. So don't watch my form, I'm just going to show you guys the basics of the front squat and the back squat while we give the delts just a little bit of a break here.
Front squat clearly is harder to do than the back squat—the other thing I wouldn't recommend doing is a front squat without sleeves on to hold the bar on your shoulders better. This'll slip off pretty easily. If you know how to do your front squats, you really don't even need to hold it, you literally could put your hands out and just rest the bar right on your delts. Now I'm not going to do 12 to 15 here because pretty much one is enough for me. So for those of you who don't have a healing knee, you're going to do your front squat 12 to 15 reps, then immediately go into back squats. Anyone who remembers Super Shredded 8—sound familiar? It's brutal. Absolutely brutal. But that's the gist—I'm going to call that one set of both for the knee. It's really all I can take right now, but I'm getting back. So we're going to do two of those, 12 to 15 on the front, immediately go into your back squat—now we can move into our shoulder exercise.
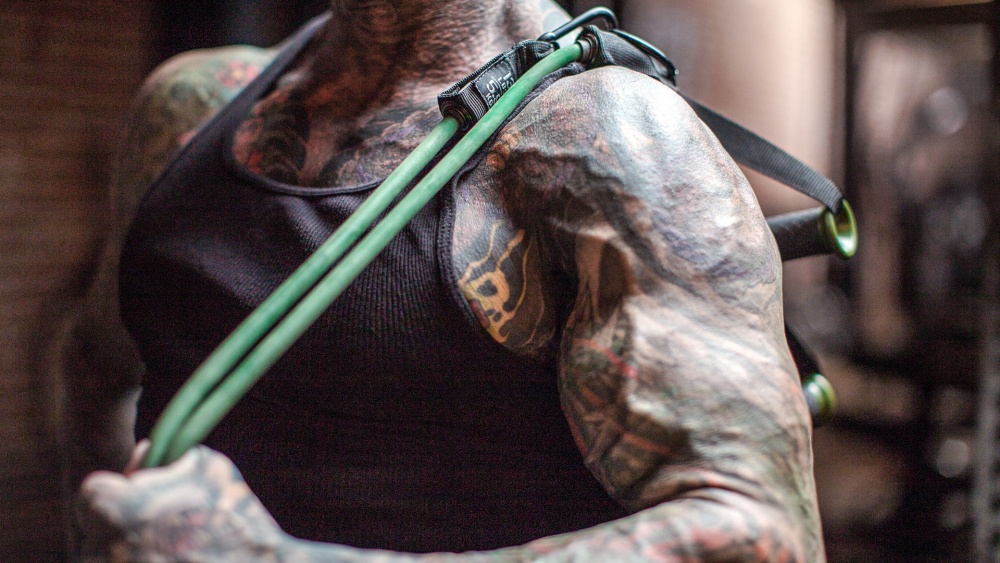
So we're going to have rear delt flies with cable lateral raises. We'll come right over here to the cable station and we're going to start with our standing rear delt flies. Now one thing with the cable rear delt fly is you don't need to bring your hands together. The rear delts don't do much through this part of the range of motion. It's really from about arms at shoulder width back, where the rear delts come into play. So don't bother crossing the arms in the front, you can stop right about here.
Then I reach muscle failure, I'm going to go right into regular lateral raises using the same exact weight. Like I said, the goal is to really minimize your rest periods. Most of these workouts can be done in under 45 minutes. This is where you start feeling it—and my shoulders are toast. Move right into traps now. So we're going to do what I call my cable prone shrug, with the cable behind-the-back shrug.
With the prone shrug, you're basically mimicking this movement here—this is your prone shrug. Now what that does is it hits more of the middle traps, and so you could mimic on a cable—the nice thing with the cable is we don't have to get into a more horizontal position, because we're not fighting gravity. We have the pulley system. We don't have to get into the same position, we can just mimic it with cables.
One of the easiest ways is you could put the rope and basically, you're going to—it's that short of a movement, it's basically a—from this position, a horizontal shrug. You don't want to try bending the arms, keep the arms straight and really focus on just squeezing the shoulder blades—bring your shoulders back and squeezing the shoulder blades together. It's an awkward movement because it's so short but you'll feel it the next day.
And then I'll use the ropes to do my behind the back shrugs. With the shrug behind-the-back on the cable, the closer you get to the pulley the more vertical resistance you're going to get, and so that'll mimic more like a standard free weight shrug. The further you step in front of the pulley, you'll see the angle changes, and now I'm pulling more in a horizontal position which can help to hit different muscle fibers in the traps versus just standard free weight versions. So play around with your stance on the behind-the-back shrug with the cable version. Then I'll just go immediately right into the next thing.
You can also play with the height on this as well—try it horizontally, or try a little bit more of a vertical, and then in addition to the middle traps you'll also be working some of the upper trap. But it's your call. Like I said, same with the behind-the-back cable version—try standing at different positions and you'll feel how it hits the traps differently.
Alright, traps are done. Up next we get a little break from the upper body—now we're going to go over to calves. So we're going to do seated calves—toes turned in for the first version, and then toes straight. Now the calves are kind of harder to really do with the extended set, because there's not a lot of versions of calf raises. I've got to go really light because I can't rest too much weight on my knee, so let's try two 25s here. Now this will be too light for me, but again I'm limited to what I can rest on my knee at this stage, but—the point I want to make here is what I've done with the calves is— there aren't many calf exercises. There's seated, there's standing, there's leg press, there's donkey—you don't have many versions to change around with the extended sets, so what I've done is change foot position, and the way you position the toes.
We're typically strongest with the toes just pushing straight forward when we're doing calf raises, and that hits both heads in the gastrocnemius: The medial on the inside, and the lateral on the outside. The more I turn my toes in and my heels come out, the more I'm targeting the lateral head; the more I turn my toes out, the more I'm hitting the medial head. And we typically are weaker when we're focusing more on one head versus the other. So these tend to be weaker calf raises—toes in or toes out—than straight ahead. We can use that in the extended version by starting with toes out. So that means that we're going to bring—on this, because I'm limited on how wide I can go—I'm going to bring my heels in, have the toes out when I do it.
With the seated calf raise, we're really not hitting the gastroc—that upside-down heart-shaped muscle—anyway, we're really focusing on the underlying soleus. But again, changing up your foot position changes the biomechanics. It's slightly different muscle fibers, and like I said makes this version much harder. Then when you hit failure here, you're going to bring the toes straight forward and finish doing your calves. And really that's all I can do, I'm pretty limited on my calf and leg training because of the knee right now. But you get the point, you're going to do two of these.
The one thing I will say about calves is that when you're doing your calf raises, a lot of people don't feel their calves, they feel what are known as deeper underlying muscles that assist the calves. So when they train calves they don't actually feel the calves, they don't really feel sore the next day. it's because they're really not using the calf muscles they're using those deeper underlying muscles that assist.
One of the best ways—if you don't feel your calves—is to make sure that when you do your calf raises—you see how my toes are up?—you're basically pulling your toes up as you do the calf raise. So what you're doing is using the tibialis anterior to pull your toes up, and what this is doing is forcing you to hinge at the ball of the foot. Now you don't want to be—you'll hear a lot of people say "Oh you want to get up on your toes"—the calves don't move the toes, so if you're using your toes in your calf raises you're really not using your calves. You want to be pushing on the ball, and so pull up the toes and focus on pushing the ball of your foot into the ground, or onto the platform that you're doing your calf raises on.
So now we've done calves, and the nice thing is for the upper body we still have arms left. But with the calves thrown in between the rest of the upper body, we've now given the arms a little bit of a rest because we use our triceps for a lot of chest and shoulder exercises; we use our biceps for a lot of the back exercises, although the exercises that I chose today don't really use the biceps and triceps that much. Other workouts it will, but we're still getting the arms a little bit of extra rest before we move right in.
So now we're going to start with triceps, and we're going to do what I call a prone dumbbell kickback. All this is is a two-arm kickback. Because with extended sets we want to be moving fast, right? So we don't want to be doing single-arm exercises where we're getting a rest from arm to arm, we want to be able to hit both and then move right into the next exercise. So how do you do a dumbbell kickback—which is normally a one-arm exercise—with two arms? Well, you do it on the bench. So what you're going to do is lie face down—you can add a bit of an incline—and just make sure that your upper arms are parallel to the ground. Then you're just going to do your triceps kickbacks.
Then we go right into dumbbell lying triceps extensions. So right on the same bench—I'm just going to flatten it. And the other nice thing about extended set training is if you're in a busy gym, if you'll notice I banged out two triceps exercises with the same equipment—I didn't need to change weight—same equipment. You don't have to worry about somebody stealing your dumbbells between the two triceps exercises, because you're using the same exact weight. It's quite convenient even if your gym is really busy.
Now we move on to biceps. The other thing I'll say about the Train with Jim series is—if you'll notice, what I'm using for weight today—pretty light, right? Obviously for the leg stuff I have no option. But we're going on the lighter side this week. If you're following along, last week we were going very heavy, 3x3s; this week, we're on the lighter side. The nice thing about the Train with Jim is not only are you learning new techniques but I have them scheduled so that you're changing rep ranges and weight used all the time. So you're constantly changing it up from week to week, because we know change is the best way to make continual progress.
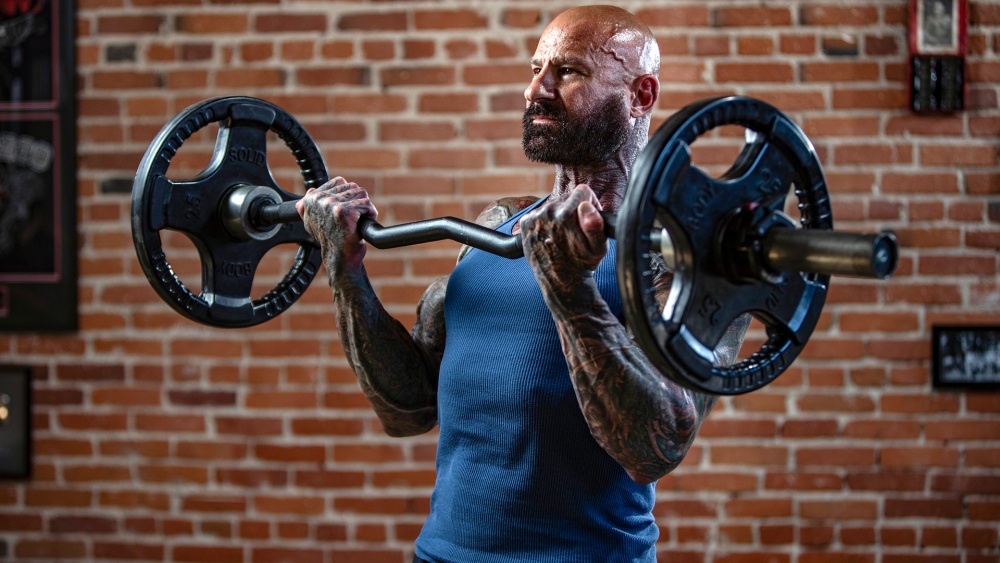
So for biceps: incline dumbbell curl extended set with standing. So I'll take these to failure, and then I'll stand up which will allow me to get a few more reps. We've got biceps, forearms, and then abs we'll finish with. Now you could do these one arm at a time or two, it's up to you. I'm going to do alternating because my bis are dead. Who out there has already completed this one today? You guys ahead of me? I don't train until after 4 because when it's time to feed the beast it's time to train the beast. Train in your feeding window.
By the way, the other nice thing about the extended set training—besides the burn—is the pump. The pump is real. Now for those of you who notice, I'm supinating on my curls and the reason for this is the biceps don't just flex the arm—they're also involved in supinating, so as you flex the arm and supinate, it maximizes biceps involvement. A little trick I do on my curls to maximize the amount of resistance on that supination is I tend to hold the dumbbell with my thumb all the way to the weight, so I have a little space between the pinky meaning it's a little heavier on this side. When I do my curl I'm going to have more resistance on that supination because it's a bit heavier on this side, due to the length of that lever arm.
Up next: Forearms. So now standing barbell reverse wrist curl and barbell reverse wrist curl. And really you're not going to need much weight on here if any. You're just literally going to hold—instead of holding the bar in front of your thighs, you're just going to increase the horizontal portion of the arms by bringing it up just a little from the body, allow the wrists to hang and then you're basically going to do a reverse wrist curl. Then you're going to move from the standing version which is a little harder to do, to the seated version.
And even this for me right now, that's pretty tough believe it or not. 45lbs after the biceps. So if you find that even a plain barbell is too much for your fatigue, you can either try a lighter barbell, a shorter barbell, or move right over to dumbbells and here, the same concept. You're going to hold them slightly in front of the body and do your wrist curls. Then, when you've reached failure there, 12 to 15, you'll do seated.
After forearms we finish with abs: hanging leg raises for 12 to 15 and then lying leg raises. So you're lying—I'm going to talk about lying versus hanging—and it's all about gravity. It's about manipulating the body to either increase or decrease resistance. Gravity is vertical, so the more vertical we are the more resistance we're going to have; the more horizontal we are, the less resistance. One of the easy things to do if you have trouble on hanging leg raises is you can do leg raises—the horizontal position is pretty easy right? There's not much resistance. Obviously the more vertical, the harder it is. Because of my knee I can't really—that's too much stress—but you guys get the point, this is much harder. So what's in between completely vertical and completely horizontal? That incline. So what you can do is do your hanging leg raises—if they're too hard on the vertical—do them on an incline or a decline.
Basically what you're going to do now is—I showed you here, the more horizontal is easy. The more vertical you go, the harder it gets, and so if you find the hanging leg raise is too much for you, you can do the decline version. And that's the whole gist between the hanging and lying. So you're going to do your hanging—and don't worry if you can't get 12 to 15 here, most people can't—you can also do these on the incline. Do the incline and then the flat instead of doing the full leg raises. Like I said, I can't really do these because it puts too much stress on the knee. You're going to do those to failure, and then you're going to go right into your horizontal or lying leg raise. And here, too, if you find that this is too easy for you—you're really good on the hanging leg raises?—then instead of moving to a flat, lying leg raise, move to the incline afterward for your extended set and do that. And that's your workout.
So typically—even though it's 20 exercises and I spent a bit of time talking—you can typically do this close to 35, under 40 minutes for most people. 20 exercises, completely blasted every major muscle group in your body, in 40 minutes, with a new technique. That's the key, that constant change and staying accountable.
Alright guys, on my social media pages—Facebook, Twitter, Instagram—I post these workouts every single day. These are my personal workouts, so you usually get them the day of the workout because even though we know what we're doing for that week, we may not know the workout until I decide it on that day. So that's the nice thing, that you're not only learning these techniques but you're literally doing my own personal training program with me, which is why it's called Train with Jim. Stay JYM Army Strong.
Related Articles

This 5-day, full-body routine turns the intensity up a notch with a new version of extended sets.

Transcript of the live rundown of the final week of the New Year's Challenge and my Small Angles Full-Body program.

The transcript of my live Facebook video session explaining my Full-Body Tabatas program.

New research reveals how IF may enhance mental clarity, memory, and brain health—here’s how it works.
Foundations
Featured Meal Plans
Muscle Hypertrophy: Build Muscle Fast
Rethink Your Rep Range
The Science of Strength Bands
Training
Nutrition
Supplementation
Health