Exercises for Bigger, Stronger Legs
All of my best tips, tricks, exercises, and workout routines for building bigger, stronger legs.

All of my best tips, tricks, exercises, and workout routines for building bigger, stronger legs.

One of the most common refrains in bodybuilding is "Never skip leg day". It's also advice that's commonly ignored. Because we use them every day to support the majority of our body weight, the muscles of the leg can be difficult to develop and that discourages many from working them at all. To really add size and strength to your legs, you need to hit them hard with a variety of techniques. Below you'll find no shortage of methods and workouts for targeting your quads, hamstrings, calves, and even glutes. Add them to your repertoire and you'll get a leg up (pun intended) in all areas of development.
The general rule in gyms everywhere is that when you do squats, you should go down until the thighs are at least parallel with the floor.
I'm not a big believer in general rules, especially when it comes to weight lifting. Most "experts" feel that you should never perform less than parallel squats. This, however, only shows their lack of understanding of muscle biomechanics. People fear what they don't understand. But I know that even half squats have their benefits.
For instance, research shows that you are significantly stronger in the top half position of the squat. That means to place extra overload on the quads to instigate more muscle growth and strength gains, half squats may be a good idea to do from time to time. Another study found that the vastus medialis (tear drop muscle) of the quads was maximally stimulated during half squats. So those trying to bring up the teardrop muscle would be well served to include some half squats from time to time.
What's interesting about doing squats to parallel is the fact that this is NOT even the full range of motion during this movement.
Squatting down well past parallel—what some intimately call "ass-to-grass squats" or deep squats—is actually the full range of motion during a squat. So why don't most people do full range of motion (ROM) squats? Well, there are several reasons.
The first is that most people lack the flexibility to go that low. The second reason is that they are very hard to do and can limit the amount of weight you can use. And the third reason is that most people have been misinformed that they will damage the knees. But there is no evidence that full ROM squats done with proper and controlled form leads to knee damage. That's like saying that doing a full curl to the top position will damage your elbows. In fact, several long-term studies suggest that doing full ROM squats does not have negative effects on knee ligament stability or place the knee joint at risk of injury. Plus, they have been shown to reduce stress on the spine.
Research suggests that doing full ROM or "deep" squats may be more beneficial for developing bigger, stronger, more powerful quads.
In one such study, researchers from the University of Alberta (Canada) calculated what is known as the "net joint movement"—or NJM—of the ankles, knees, and hips during squats to parallel (about 105 degrees of knee flexion) and full ROM squats (about 120 degrees of knee flexion). This technique is used in biomechanical studies to determine the minimum muscular torque required by the muscles that move that joint.
In other words, the NJM of the knee joint determines the amount of force supplied by the quads. The more force, the more muscle activity. And the more force supplied, the stronger the muscle can get. The more muscle activity involved, the greater the potential for muscle growth.
They reported that the NJM of the knee joint was approximated 20% greater during full squats as compared to parallel squats. Similar results on NJM of the knee joint during full squats versus parallel squats were also reported earlier by Swedish researchers in a 1996 study. This can have a major impact on leg strength and size. In fact, more recently published study in the Journal of Strength and Conditioning Research by German researchers reported that doing full squats for 10 weeks significantly increased vertical jump height, while doing half squats did not. And one study presented at the 2008 Annual Congress of the European College of Sport Science reported that subjects performing full squats for 12 weeks had a significantly greater increase in thigh muscle growth compared to those doing shallow squats.
Based on these studies it does make sense to try and increase your ROM in the bottom position of the squat for better strength and muscle growth—but that’s easier said than done. The first step would be to work on flexibility in your quads, hamstrings, glutes and calves. Static stretching (hold and reach style) works well for this, but be sure to do this AFTER your workouts, as research shows that doing static stretching before workouts can limit muscle strength and power.
You can also work on increasing your ROM in the bottom of the squat by doing box squats using boxes that progressively get shorter over time. Since most gyms don't have a variety of box sizes you can also use an adjustable decline bench. Start with a flat bench to get used to doing box squats and then progressively increase the decline until you feel comfortable going deep in the squat with a loaded barbell on your back. You can also do this with a decline bench that is not adjustable simple by standing further back for higher squats and progressively moving forward on the decline bench to go lower.
I also suggest that you consider doing squats with shoes that have a raised heel, such as Olympic weightlifting shoes, or even work boots. Or you can place a 2 x4 board or weight plates under your heels.
Be sure to start off light with deep squats. I suggest you start your leg workouts with 2 or 3 sets of lightweight squats trying to go as deep as possible. This will serve as both a warm-up and a method for increasing your ROM in the squat. Then follow with your typical 3-4 sets of squats with heavy working weight and not worrying about how deep you past parallel. Over time, you will find that your heavy sets of squats get deeper and your leg strength and size gets greater.
Bryanton, M. A., et al. Effect of squat depth and barbell load on relative muscular effort in squatting. J Strength Cond Res. 2012 Oct;26(10):2820-8.
Wretenberg, P., et al. Joint moments of force and quadriceps muscle activity during squatting exercise. Scand J Med Sci Sports 3: 244–250, 1993.
Hartmann, H., et al. Influence of squatting depth on jumping performance. J Strength Cond Res. In press.
Chandler, T. J., et al. The effect of the squat exercise on knee stability. Med Sci Sports Exerc 21: 299-303, 1989
Panariello, R. A., et al. The effect of the squat exercise on anterior-posterior knee translation in professional football players. Am J Sports Med 22: 768- 773, 1994
Hartmann, H, et al. Literature-based load analysis of the squat. Int J Sports Med, in press.
Hartmann, H., et al. Analysis of the load on the knee joint and vertebral column with changes in squatting depth and weight load. Sports Med. 2013 Oct;43(10):993-1008.
Raastad, T., et al. Effects of heavy strength training with deep or shallow squats on muscle cross sectional area and muscle function. 13th Annual Congress of the European College of Sport Science, 2008,
Those of you who follow my training advice know that I'm a big believer in the benefits of the squat. It's called the "King of Exercises" for a reason, you know. Normally I recommend that you use a typical shoulder-width stance when you squat to maximize growth of all the leg muscles—quads, hamstrings and glutes.
Many bodybuilders believe that using a narrow stance (hip-width or closer) on squats places more focus on the vastus lateralis, or outer quad muscle, which develops the outer sweep of the thighs. The same bodybuilders also believe that a very wide stance (about twice that of a shoulder-width stance) better targets the vastus medialis, or teardrop muscle, which is the quad muscle just above the inside of the kneecap. They also believe that the wide stance hits more of the glutes.
So is this bro science or real science? Researchers from the University of Padova in Italy decided to find that out. They had trained lifters squat while either using a regular stance (shoulder-width), a narrow stance (hip-width), or a wide stance (twice shoulder-width) while they measured muscle activity of three of the four different quad muscles—vastus lateralis (outer quad muscle), vastus medialis (tear drop muscle located inside and above the knee cap) and rectus femoris (front quad muscle), as well as the glutes and hamstrings.
They reported in the Journal of Strength & Conditioning Research that the narrow stance increased muscle activity of the vastus medialis by about 10%. The wide stance, on the other hand, increased muscle activity of the glutes by 40% and slightly increased muscle activity of the vastus lateralis by 10% (see graph below) .
While this research supports what bodybuilders knew all along regarding the glutes and a wide stance, it debunks the common belief that a narrow stance increases focus on the outer quads (vastus lateralis) and a wide stance focuses more on the teardrop muscle. The study found the opposite to be true.

For overall leg growth that focuses on all the quad, hamstring, and glute muscles, stick with a shoulder-width stance when you squat. If you need to work on building more of the outer part of the quads, try using a wide stance. If you need to build more of the teardrop muscle, try using a narrow stance. And if you want to build up your butt, then definitely use a wide stance on squats.
Paoli, A., et al. The effect of stance width on the electromyographical activity of eight superficial thigh muscles during back squat with different bar loads. biomechanical comparison of back and front squats in healthy trained individuals. Journal of Strength and Conditioning Research 23(1):246-250, 2009.
I've said it before and I'll say it again—squats are the king of all leg exercises.
Those who want massive and strong legs must squat! But if your goal is to bring up your quadriceps specifically, then there is a right way and a wrong way to squat. No, I am not talking about exercise technique. I am actually talking about the amount of weight that you use. According to new research from the University of Alberta, how heavy you go on squats can make all the difference in what area of the legs you use.
The Canadian researchers had trained male and female lifters perform squats with their 25-rep max, their 20-rep max, their 12-rep max, their 8-rep max and their 4-rep max while analyzing their biomechanics on the squat.
They reported at the 2011 annual meeting of the National Strength & Conditioning Association that the quadriceps reached their maximum ability to contribute to squatting performance with the 8-rep max weight. When the subjects squatted with their 4-rep max weight, the involvement from the quads actually decreased. However involvement from the hams and glutes continued to increase as the weight increased.
The basic message from this study is that when you squat with a weight that is heavier than you can do for 8 reps, quad involvement decreases, and your hamstrings and glutes take on the majority of the load. So, if your goal is to specifically bring up your quads, stick to doing sets of 8 reps or higher. Of course, you should be sure to alter rep range, doing sets of about 8-10 reps in some workouts, sets of 12-15 reps in other workouts, and even sets of 20 reps and higher in some workouts. But if your goal is to bring up your hamstrings and/or glutes, then squatting with heavier weight that limits you to as few as 3-4 reps per set may be beneficial.
Bryanton, M. A., et al. Effect of relative intensity on lower extremity joint moments during parallel squats: Preliminary data. Annual Meeting of the National Strength & Conditioning Association, 2011.
While box squats may be an exercise you rarely, if ever do, they are used routinely by the world's best powerlifters, strongmen competitors, and other strength athletes.
Since these are men and women who squat FAR more weight than the average gym goer, you have to wonder why they are so popular with this hardcore crowd—and why you aren't doing them. But any powerlifter can tell you that the main reason they do box squats is because they work wonders to boost your squat strength. Another reason is that they teach you how to squat properly by allowing you to sit back into the squat. Personally, I use them a lot to remove stress off of my lower back, which hampers my squat due to the fact that I have a hemivertebra (a large chunk of spine missing).
While all these anecdotal reports are fine and dandy, researchers at Appalachian State University (Boone, NC) wanted to see if there was any measurable benefit to box squats as compared to standard squats. So they tested the muscle power and force production of trained male lifters when they did a regular squat or a box squat. And they did see a difference. They reported in the NSCA's Journal of Strength and Conditioning Research that when the guys did the box squat they were able to produce more muscle force and power than when they did the regular squat.
From this study it looks like one way that box squats can help to boost your squat strength is by allowing you to squat with more strength and power, which over time can carry over into allowing you to have more strength and power on regular squats.
So start using box squats when you train legs. I often start my leg workouts with a few sets of box squats. Then I remove the box and perform several sets of standard squats. I suggest you try this every other workout, as you don't want to become too dependent on the box.
Place a box that is about knee height, or one that is low enough to allow your legs to reach parallel with the floor when you are in the bottom position of the squat (butt on the box). You can also use a bench in place of the box. I often set my adjustable bench on decline to allow me get down into a full squat in the bottom position. Stand a few inches in front of the box with the loaded bar supported on your back just as you would for a normal squat. Squat down, driving your glutes back to sit back onto the box. This movement should mimic sitting down on a chair. The key is to not truly sit on the box. Instead, as soon as your butt touches the top of the box, reverse the direction to drive your body back up to the start position.
McBride, J. M., et al. Comparison of kinetic variables and muscle activity during a squat vs. a box squat J Strength Cond Res 24(3):779-84, 2010.
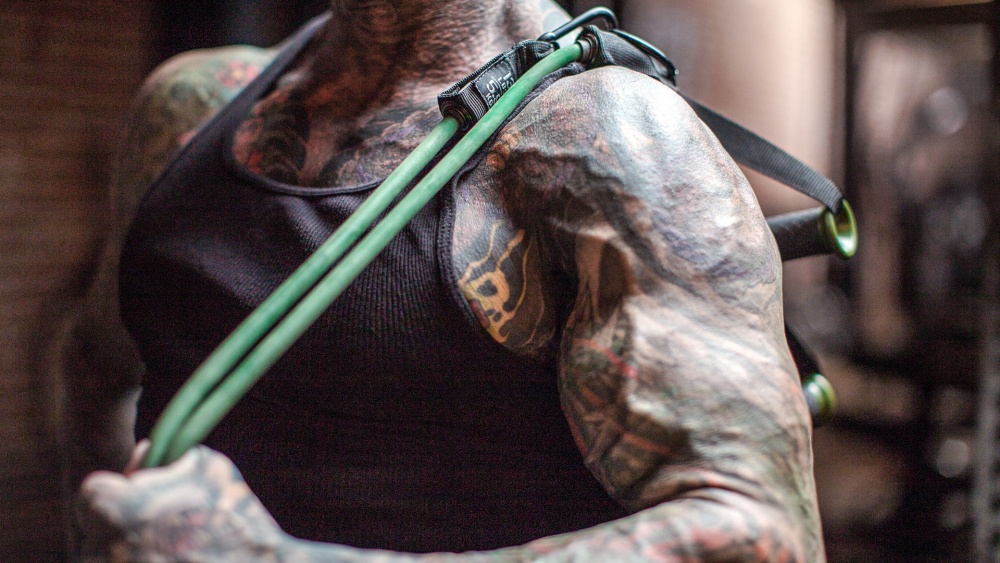
If you squat regularly, you know that at some point you can only go so heavy and always make sure that technique is employed at every attempt. Variation is key and if you know much about my philosophy and how i train I ALWAYS make sure to add variations of exercises. The Bands provide not only a good way to mix it up and get creative, but they provide so much more benefit than meets the eye.
The research performed on elastic resistance suggests that not only does elastic resistance offer similar benefits to free-weight resistance, but it actually has several benefits that outweigh (pun intended) those of free weights. This means that a program using elastic tubing resistance can provide similar benefits to a program that uses free-weight resistance, such as increased muscle strength, increase muscle tone and size and decreased body fat. In addition, a program that uses elastic tubing resistance can also provide benefits that are not offered by free-weight resistance programs, such as more functional strength, better injury prevention, greater ability to change muscle emphasis during exercises, greater muscle power development and easier use.
Those of you who have been members of JimStoppani.com for some time now know that I recommend using explosive exercises, such as jump squats, to help you build more power in your legs, which can not only increase their strength, but also help to increase muscle size.
You may also know that I typically recommend that you do these explosive exercises first in your workout. That's because to maximize power development you want to perform these explosive moves when the fast-twitch muscle fibers are not fatigued and are at their strongest. If you do explosive exercises, such as jump squats, after fatiguing the target muscles with another exercise—let's say regular squats—then the fast-twitch muscle fibers will not be able to contract with the same amount of power and not only will you jump lower, but your ability to build power will be compromised.
However, a new study shows that there may still be some benefit to doing jump squats after regular squats.
New Zealand researchers had trained male athletes perform four different workouts that consisted of jump squats and heavy squats using their 3-rep max weight. In one workout they did 3 sets of 3 jump squats followed by 3 sets of heavy squats. In another workout, they first did the 3 sets of heavy squats followed by the 3 sets of jump squats. For the other two workouts they did either 6 sets of heavy squats without any jump squats, or 6 sets of jump squats without any heavy squats.
They discovered that when the athletes did the heavy squats first followed by the jump squats, their testosterone levels increased by about 5% more than when they did the jump squats first followed by the heavy squats. And doing both jump squats and heavy squats in any order increased testosterone levels more than when doing just heavy squats alone or just jump squats alone.
Doing both heavy weight for low reps and light weight for explosive reps in the same workout, regardless of the order, is a technique called Complex Training. Research shows that this combination produces the best gains in muscle strength and power, and may also produce gains in muscle size. This is the main reason why I often recommend using complex training by starting your leg workouts with jump squats or chest workouts with power push-ups.
One of the keys to why complex training works may be because it appears to boost testosterone levels the highest, regardless of the order in which you do the exercises. I typically prefer doing the explosive exercise first to take advantage of muscle power and as a way to warm-up the muscle before the heavier sets. However, this study suggests that you might be able to get a slightly higher boost in testosterone by doing the explosive move after the heavy exercise. So on leg days, you may want to occasionally swap the order and do squats followed by a few sets of jump squats.
Beaven, M. C., et al. Acute salivary hormone response to complex exercise bouts. Journal of Strength and Conditioning Research 25(4):1072-1078, 2011.
I’m not one to proclaim that you HAVE to do any one exercise. Yes, the barbell back squat is the “King of Exercises” and I’m as big a fan of the move as anyone. But if for whatever reason you don’t want to do back squats and/or you feel that doing them increases your risk of injury to an extent you’re not comfortable with, then don’t do squats in the traditional sense.
I do strongly recommend, however, that you include some form of squatting motion in your training program on a regular (at least weekly) basis, as it’s a fundamental movement not only in the realm of training and athletics, but in real life as well.
I know barbell squats can be tough on people’s lower backs and knees—trust me, I’ve had some major back issues myself. But there are many different squatting variations that can relieve the strain on these vulnerable areas and provide a stimulus to the glutes, quads, hamstrings, core and the rest of the body comparable to putting a barbell on your back and banging out reps.
Below are six such exercises. Plug any one of these moves into your leg routine or any of my featured programs where “squat” shows up and you can reap (mostly) the same strength and muscle-building benefits offered by the “king.” (Note: To see photos of the movements, simply click on the exercise name of the one you want to see.)
Why It’s Sub-Worthy: It’s still a barbell squat, but the position of the bar on the front of the shoulders makes a huge difference. First off, front squats place a higher proportion of tension on the quads versus the glutes as compared to back squats, so it’s a great exercise for anyone looking to bring up his or her thighs. But more importantly for those with lower back issues, front squats force the torso to remain more upright than do back squats (otherwise the bar will fall forward and drop to the floor), thus relieving some of the strain on the spine.
How To Do It: Stand inside a power rack with a barbell resting across your front delts and upper chest. Cross your arms over your chest to build a “shelf” for the bar, unrack it and step back to clear the rack. (Feel free to use a clean/rack grip if that’s your preference.) Keep your chest up and back flat, eyes focused forward. With your abs tight, bend your knees and hips as if to sit in a chair until your thighs are past parallel with the floor. Reverse direction by driving through your heels and pressing your hips forward.
Extra Point: For a great leg routine that features front squats instead of back squats, check out the workout below. You'll also notice a couple other exercises from this article (#2 and #5 below) in the workout.
Why It’s Sub-Worthy: At first glance, this exercise may look a bit odd, like I’m doing a deadlift the wrong way—because the bar is behind my legs instead of in front. But this is by design; in fact, the barbell hack squat has been around for many decades, a lot longer than the hack squat machine you see at most commercial gyms these days. What I like about this move is that, because the weight is behind you, there’s less strain placed on the lower back compared to a standard deadlift because you’re not forced to lean so far forward—the hack squat makes it much easier to keep your weight back over your heels, just as you’d want it be when doing a regular barbell squat. This is a key benefit for anyone with lower back issues (like myself).
How To Do It: Assume a shoulder-width stance in front of a barbell sitting on the floor behind you. Bend your knees and hips to lower yourself and grasp the bar with a shoulder-width grip. Your palms can either be both facing forward or staggered so that one faces forward and the other faces back—whatever you prefer. Begin with your back flat (not rounded) and spine in a neutral position, then explosively extend your hips and knees to stand up with the weight, pulling the bar up the backs of your legs. Finish in a fully upright position with your shoulders back and chest out, then reverse the motion to return the bar to the floor, and repeat for reps. Make sure to keep your back flat throughout the motion, on both the positive and negative portions of each rep.
Extra Point: One common issue people have when trying to do hack squats is that the bar gets stuck during the rep, hitting the backs of the thighs and disrupting the motion. In most cases, this is due to an incorrect hand placement, so it's an easy fix. I cover the technique with Mike McErlane in the below video .
Why It’s Sub-Worthy: This exercise is often referred to as the Jefferson “deadlift,” but the upright nature of the torso when doing it resembles a squat more than a traditional deadlift, where you’re forced to lean further forward because the bar is in front of both legs. (With this version you’re straddling the bar.) That upright torso is the main reason people with bum lower backs will like the Jefferson.
How To Do It: Straddle a loaded barbell sitting on the floor running lengthwise between your feet. Squat down to pick up the bar and grab it with a shoulder-width grip, one hand in front of you and one hand behind. With your core tight, chest out and back flat, stand up with the bar by forcefully extending the hips and knees, pressing through the heels. Reverse the motion, letting your glutes track backward, to lower back down. When your thighs reach parallel or the bar touches the floor, drive back up to the standing position.
Extra Point: Jefferson and barbell hack squats are pretty similar movements. Another related exercise you can try is the hex bar deadlift. Check out a quick video demonstration of it here on my YouTube page.
Why It’s Sub-Worthy: Zerchers are another great squat variation for taking stress off the lower back—the bar sitting significantly lower on the body (at the midsection, not up high on the back) reduces the compressive forces on the spine considerably. More than that, similar to front squats, Zercher squats require you to maintain a more upright torso, and they also allow you to achieve a greater depth at the bottom.
How To Do It: Rack a bar well below shoulder height in a power rack. Position the bar in the crooks of your elbows with your arms bent at least 90 degrees. Unrack the bar, step back with it and start in a standing position with the bar up against your torso. Bend at the knees and hips, letting your glutes track backward, to lower yourself into a squat. When your quads reach parallel with the floor, drive back up forcefully through your heels to the standing position.
Extra Point: One common dilemma with this exercise is how to do it when you don't have a squat rack available, like if you're training at home and have little more than a barbell and some plates. Here's a simple solution to this...
Why It’s Sub-Worthy: This exercise goes by several different names, perhaps because it’s something of a cross between a squat and a lunge—the latter because the feet are staggered with one directly in front of the body and the other directly behind. It’s this lunge orientation that allows you to keep your torso perpendicular with the floor and thus clear from the excessive forward lean that often causes lower back strain. Also, the one foot being behind allows you to plant the front foot as far forward as you need to keep that front knee safe from undue stress. And with one-leg/Bulgarian split squats, you have the option of either putting a barbell on your back or holding dumbbells, whatever you prefer.
How To Do It: Stand with a barbell resting on your upper traps, holding it with a shoulder-width grip. Rest the top of your right foot on a flat bench 2-3 feet behind you. Maintain the natural arch in your lower back and keep your head facing forward. Bend your right knee and hip to lower your body until your right thigh is parallel with the floor. Reverse the direction, driving up forcefully through the right heel to the start position. Perform the desired number of reps, then repeat on the left leg.
Extra Point: You can also do this exercise holding dumbbells. In fact, that's probably the best way for a beginner to start off on this exercise since there's a balance component here due to the staggered foot stance. With dumbbells, if you start to lose your balance you can easily bail out on the lift by simply dropping the weights to the floor. Another beginner-friendly version of this move is the Smith machine one-leg squat (Bulgarian split squat).
Why It’s Sub-Worthy: Anyone who bashes the Smith machine for not being “functional” hasn’t opened up his or her mind to find all the function this training tool has to offer. Where squats are concerned, the Smith machine offers a couple great benefits in particular: (1) It allows you to safely overload the lower body muscles with heavy weight to spark new gains in both size and strength; and (2) it lets you adjust the position of your feet to target different areas of the legs. For example, placing your feet further forward (something you can’t do with a barbell) targets the glutes for those who want to emphasize that area. This forward foot position also reduces shin angle to take pressure off the knees. Think of it the same way you would lunges, where taking a larger step forward keeps the knees from tracking over the toes.
How To Do It: Stand erect with the bar across your upper back, feet shoulder-width apart, knees slightly bent and toes turned out slightly. Rotate the bar to unrack it. Keeping your eyes forward and abs tight, bend at the knees and hips to slowly lower your body as if sitting down in a chair. Descend until your quads have at least reached parallel with the floor, then forcefully drive through your heels, extending your hips and knees, to return to the standing position.
Extra Point: Below is my video tip breaking down the pros and cons of Smith Machine squats.
If you don’t like training legs with a barbell, then maybe this workout isn’t for you. But if you’re looking for serious mass and strength to drive through any barrier, this old school, hardcore leg buster should do the trick. This routine is not for the faint of heart—it’s an all-barbell grinder that will leave you wanting a walker to leave the weight room and quite possibly doing the “Stoppani Shuffle” in the days that follow.
We all know that heavy, low-rep sets build strength and that slightly lighter, moderate-high-rep sets increase size in the legs. This workout does both, thus maximizing your time under tension while improving strength.
Before jumping in, get a good warm-up by starting with 5-10 minutes on a stationary bike and then performing a dozen bodyweight squats to get the blood flowing prior to moving to the bar for your squatting sets. Make every set count by choosing weights that force you out of your comfort zone and bring you close to failure. Make sure to work in a rack with safety bars, or train with a partner who you trust to provide a good spot.
Take your time with this routine. If you need 2-3 minutes rest between sets, you’ve likely chosen a good weight to work with. If a minute or less suffices, you probably need to go heavier.
This workout isn’t about moving quickly between sets or relaxing on a leg press or leg extension machine. For serious growth, patience and hard work are keys. Take your reps deep (at least thighs parallel to the floor), control your body position, draw your abs in and keep your core tight, and this routine will give you everything you need to build thicker tree trunks.
*On your second to last set (8 reps), perform a narrow stance squat by bringing your feet about six inches closer together than normal; on your last set (8 reps), use a wide stance, positioning your feet about six inches wider than normal.
One of the difficult tasks we all face in the gym is heading into the gym for that ever so dreaded LEG DAY. Of course, we know that the legs are the one area that help other areas grow. After all, no one wants to be the Light Bulb guy with a big upper body and pencil stick legs. For myself, personally, I love Leg Days. That is what this program is designed to offer. Allowing you a well-structured program that enables you to now look forward to the Leg training sessions. Below you will find one of my personal favorites and I encourage you All to follow it. Leave me feedback.
In keeping with my recent theme of compound sets (see my back and chest compound set training workouts), it's time to address the lower body. So for the legs, I'm giving a spark of intensity to an otherwise typical squat workout as a means of targeting the quads and adding some size and thickness to this crucial muscle group.
In the back and chest workouts, I paired big multi-joint movements (bent-over rows and incline presses, respectively) with comparable bodyweight exercises (inverted rows, push-ups). Rather than doing the same for the lower body by pairing barbell or Smith machine squats with bodyweight squats, I'm instead adding in an isolation exercise—the compound set here will be squats and leg extensions.
I'm writing up the workout to be barbell squats followed immediately by leg extensions, but you have some options here: First, feel free to do whatever variation of squat you prefer. Of course, the standard barbell back squat is the "king of exercises," but you can swap that out for Smith machine squats, front squats, or barbell hack squats if you like. That's totally up to you.
Second, you have the option of changing the order of exercises in the compound set. My workout has squats followed by extensions, which is technically considered "post-exhaustion", where a multi-joint exercise is followed by an isolation exercise for the same muscle group, but you can instead choose to make it a pre-exhaust workout by doing the leg extensions first in the compound set, followed by squats. (Read my Pre-Exhaust Primer article for more on this great training technique.)
I designed this workout to be fairly heavy and challenging on the squats to promote a solid base of muscle-building and strength, then lighter on leg extensions to promote hypertrophy with higher reps (since legs also respond well to high rep counts) and illicit a great burn in the quads. So make sure you pick a weight for squats that will have you coming close to failure in the 8-10-rep range and a weight on extensions that will allow you to get at least 15 reps. Take the extensions to failure, even if it means going past 20 reps.
Because your quads will be pretty fatigued after the first compound set or two, I strongly suggest setting the safety pins on a squat rack or power rack to just below the bottom of your range of motion (thighs at parallel or below with the floor) in case you fail mid-set. Or, as I mentioned above, you can do Smith machine squats instead; just make sure you set the safety pins here, too.
Whether you decide to do the workout as written or tweak it to fit your individual preferences, it will provide quite a blast of intensity to your quads. Of course, there's never anything wrong with doing your sets of squats on their own as straight sets, but every now and then it's good to switch things up and shock those large muscles. In this workout, I also included hamstring work to be done after the squat/extensions compound sets and other big leg moves.
One quick note regarding terminology: I often use the terms "compound set" and "superset" interchangeably, which is why you'll see the latter term used in the workout chart. A compound set is a type of superset, so sometimes I like to simplify things and just use the term "superset." Rest 2-3 minutes between compound sets (supersets) of squats and extensions; rest 1-2 minutes between sets of all other exercises.
Good luck with this workout—and enjoy the quad burn!
Training legs is important for maximizing strength and muscle mass and for not being that guy (or girl) whose biceps are bigger than his quads. (Seriously, that's not a good look.) But short shorts went out of style long ago and what's fashionable today are long inseam shorts that cover up the quads almost completely.
One area that often remains visible, however, is the vastus medialis muscle that hangs down on the inner side of the knee. In bodybuilding lingo, this is called the "teardrop," because when it's fully developed, that's exactly what it resembles. Unlike the aforementioned guy's bird legs, the teardrop is definitely a good look.
Hitting the teardrop doesn't just happen automatically with any leg exercise, though, which is why the vastus medialis is often underdeveloped. There are a few exercises and techniques you can do to place more focus on this area. First, don't go so heavy on barbell squats. One study found that keeping the weight lighter and the reps relatively high while squatting allowed for more focus on the quads and less on the hamstrings. So that's a way to make sure you're emphasizing the right muscle group in the first place.
To zero in a little further, exercises that specifically target the teardrop are leg presses (shown in one study to place the most emphasis of all leg movements on the vastus medialis) and leg extensions, in which the feet are turned outward during execution. If the teardrop is an area you want to bring up, these two specific movements should be part of your leg workout every week, if not twice weekly.
With leg extensions, the technique tweak is pretty easy: At the beginning of the set, turn your feet so your toes are angled out to the sides (as opposed to pointing straight ahead or straight up as you'd normally do) and keep them in this position for the entire set.
With leg presses, place your feet shoulder-width apart in the center of the platform. After unhooking the safety latches, slowly lower the weight to bring your knees toward your chest, but stop when your knees are at 90 degrees. Pause a moment before pressing through your heels to return the weight to the start position (legs extended but not locked out).
With either exercise, I can't stress enough the importance of a strong mind-muscle connection. If the teardrop is what you want to develop, put all your focus on this area during every rep of every set to achieve maximum contraction. As they say, if you put your mind to it, you can accomplish anything!
Here's a teardrop-focused quad workout to try. As you can see, all three exercises are ones I discussed above. Keep the weight on squats moderate and follow these exercises with whatever hamstring and/or calf workout you like.
I like lunges because they're one of the few multi-joint, free-weight exercises that you can do for legs.
In essence, they're actually one-legged squats. However, unlike squats, lunges have the added benefit of having a large eccentric (negative) component. Think about it: When you do a lunge, you take a huge step forward and then land on that front leg. That landing, with the weight of your body and the added weight of a barbell, dumbbell, or even weight vest, places a huge amount of eccentric stress on the legs, which causes a lot of muscle damage—the good kind of damage that results in muscle growth and strength gains).
But if you're using the lunge as a quadriceps exercise, you may have it all wrong, at least according to research from Sweden.
Swedish researchers had competitive soccer players complete a lunge workout twice per week for 6 weeks. This workout consisted of 4 sets of walking lunges done for 12 reps per set. The researchers tested the muscle strength of the athletes' hamstrings and quads at the start of the study and at the end of the 6 week study. The reported in the Journal of Strength and Conditioning Research that the lunge workouts increased hamstring strength by 35%. For the quadriceps, they found that there was not a significant increase in strength after the 6 weeks of lunges.
The results from this study suggest that while the walking lunge does involve both the hams and quads, it places more emphasis on the hamstrings than the quads. So the lunge seems to be a better hamstring exercise than quad exercise. It makes sense when you consider the lunge. You take a huge step forward and drop down until your front leg is at least parallel with the floor. And because your back leg is behind you, it allows you to keep the weight, and your center of gravity far back. This would be similar to doing Smith machine squats with your legs placed way out in front you, which research has shown to involve more of the hamstrings and glutes.
I like to use lunges as a segue exercise between my more quad-focused work and my hamstring-focused work. So for example, I might do squats, leg presses, hamstrings, lunges, Romanian deadlifts, and leg curls, in that order.
To do the walking lunge, hold a set of dumbbells and stand with a hip-width stance. Take a large step forward (about half your body height) landing on the heel and dropping your body down until your front leg is parallel with the floor or lower. Push off the ball of your foot with your back leg and pull your body up with your front leg by driving through your heel until your back leg meets your front leg and you are standing fully upright. Repeat by stepping forward with the opposite leg. Keep alternating legs until you run out of space or reach muscle fatigue. If you run out of space before reaching muscle fatigue, turn your body 180 degrees and do walking lunges back to the place you started at. Continue until reaching muscle fatigue.
Watch my video on the walking lunge below:
For a leg workout that I designed to show you how to use the walking lunge in your leg workouts, click on the link below for my Quads and Hams Focus workout:
Jonhagen, S., et al. Forward lunge: A training study of eccentric exercises of the lower limbs. Journal of Strength and Conditioning Research 23(3): 972–978, 2009.
Usually when we talk about major mass-building exercises for the legs we focus on squats and lunges (including all the different variations of these movements), with the leg press getting some mention as well.
But there’s another big lower body compound move that doesn’t get nearly as much attention as it deserves: Step-Ups.
The step-up—whether done with a barbell on your back or holding dumbbells or kettlebells—is a great exercise for a variety of reasons: Bodybuilders use it to develop hamstring and glute mass; powerlifters use it as an assistance exercise for squats; and the “functional fitness” crowd (namely, CrossFitters) loves the step-up for its carryover into the real world as well as to other big lifts.
In other words, step-ups pretty much have unanimous approval by all training disciplines. So why don’t more people do them? One reason, which I address in the below video, is that many guys think of step-ups as a “girly” exercise. First of all, most guys could stand to train their quads, hamstrings and glutes with the same vigor as do females, so maybe “girly” is a complimentary term. More importantly, step-ups are anything but a “softcore” exercise. If you’ve ever done step-ups and really pushed the envelope with a challenging weight, you know what I’m talking about. Step-ups can be brutal—every bit as tough as any set of squats or lunges you’ll do.
All that said, I want to share a few key tips on performing step-ups most effectively. Before I do, let’s be clear about the major areas being targeted here. Research has shown that step-ups put more emphasis on the glutes and hamstrings than the quads. This makes it a great complement to more quad-focused exercises like front squats and barbell hack squats.
Now for my step-up tips…
With any major compound move for the legs, you want to achieve adequate range of motion. For squats and lunges, this means going down until your thighs are at least parallel with the floor. Same thing with step-ups—you want that working side quad to be around parallel.
To achieve this, you need to being stepping up to a certain height box or bench. My recommendation is to use one that’s around knee height. For many people (especially tall individuals), a standard weight bench will be a bit too low. If possible, find a slightly higher plyometric box at your gym and use that. In the below video, you’ll see that I have an adjustable stepping platform in my at-home gym that I can raise and lower as needed, but this isn’t something you see at most commercial gyms.
If all you have at your gym is a standard bench that’s well short of knee height, be resourceful and try to find a way to raise the surface, like putting 45-pound plates underneath it to make it higher. Just make sure it remains stable; the last thing you want is a wobbly bench when doing step-ups—that’s not safe.
When you step up onto the bench or box, don’t let your heel hang off of it—this isn’t a calf raise. Just like with squats and lunges, you want to be pressing up through the heel when doing step-ups; this will be impossible if your heel is off the platform and suspended in midair. At the very least, make sure your heel is at the front edge of the bench or box, if not further forward.
This tip is related to the previous one. And again, I’ll liken the step-up to a lunge. When doing lunges, you’re always instructed to take a big step forward so that the front knee doesn’t extend past your foot, right? Same thing with step-ups. The biggest mistake I see people make on this exercise is that they have their feet too close together in the down position—the front foot is up on the box and right at the edge, and the back foot is practically up against the box/bench. When your foot is planted on the bench/box, and before you’ve lifted the back foot off the floor to step up, you want to have some space between your feet.
There are two ways to achieve. The first way is simply to step onto the middle of the plyo box, where your heel is well past the edge instead of flush with it. If you’re stepping up to a bench, however, we’re probably talking about a much narrower surface, so there’s only so far you can step forward onto it without your foot going off the front of the bench.
In this case, the solution is to adjust your starting position (where your back foot is on the floor before you step up) so that your foot is further away from the bench. When doing this, you’ll also need to make sure that when you step back down after each rep, you’re stepping down to the original foot position further back.
The whole reason you’re doing this is to keep your weight back as you step up. This forces the glutes and hamstrings of the front leg to have to pull with more force to lift your body up. As I mentioned earlier, step-ups target the hams and glutes more than the quads; with this technique, you’re emphasizing these muscle groups even more.
Another thing this does is take pressure off the knee of the front leg—just like with taking a big step on lunges to make sure the knee doesn’t go past the toes. Preventing undue strain on the knees is always a high priority when doing compound movements for the legs, be it squats, lunges or, in this case, step-ups.
As great of a compound move as the step-up is, I still recommend starting off most of your leg workouts with some form of squat or even leg press. Step-ups, in my mind, are a classic “segway” exercise like lunges—a great transition move between the more quad- and glute-centric exercises and pure hamstring isolation moves.
So if you’re training quads, glutes, and hamstrings in the same workout—as opposed to having separate quad-focused and glute/hamstring-focused workouts like many professional bodybuilders do—it would make sense to sandwich step-ups between your quad/glute exercises and your hamstring ones. That's exactly what I did in designing the below workout—barbell hack squats and leg presses done first, then step-ups, followed by Romanian deadlifts and leg curls.
This a great, well-rounded leg routine that hits the quads, glutes, and hamstrings, with step-ups serving as a seamless transition from quads and glutes to hamstrings. Yet at the same, the step-ups serve as a third major compound move, making this a great workout for building both strength and size in the lower body.
In this video, I cover all these step-up technique points and offer a visual demonstration of them:
There's no debating the fact that variety is the key to continued gains, and one place that you surely want variety is in your exercise selection. When it comes to legs, squats should be the cornerstone in your program, yet step-ups are another great exercise that you should consider adding—but probably rarely do. Most women are smart and realize the value of step ups. Yet most guys view the step up as a woman's exercise. It's silly because when you break it down, the step up is technically a one-legged squat. And I'll say it again, squats are the king of all leg exercises—whether that is with two legs or one leg.
A recent study compared muscle activity of the major leg muscles. This included the glutes, outer hams (biceps femoris), inner hams (semitendinosus), inner quads (vastus medialis/tear drop), outer quads (vastus lateralis), and front quads (rectus femoris/front sweep) during four different versions of step ups: Regular step-ups, lateral step ups, diagonal step ups, and crossover step ups. All step ups were done using a 6-rep max weight.
They found that the glutes and hams (both inner and outer) were best targeted with the standard step up.
However, all the quadriceps muscles were better targeted with the diagonal step up.
So definitely consider adding a variety of step-ups into your leg training day, not to mention for your HIIT and/or cardioacceleration. They are basically a good way to do a one- legged squat. Sure, you can't go as heavy and impress everyone in the gym, but that's because it's a tougher exercise and done with one leg, which requires balance. But as the research shows, it clearly targets the leg muscles. Plus, you can do different varieties to focus more on the hams or the quads.
To focus more on the hamstrings and glutes, do regular step ups with the bench or box in front of you and stepping straight up onto it. To focus more on the quads, do diagonal step ups. This involves stepping up onto the box or bench with the working leg at about a 45-degree angle to the back leg.
Consider adding these to your leg workouts by placing them between your quad-focused work and hamstring focused work. For example, if you do squats, leg presses, leg extensions, and leg curls, after leg extensions do two sets of diagonal steps ups for quads followed by two sets of regular step ups for hams and glutes and then finish with leg curls.
Click on the link below for a workout that I designed that shows you how to incorporate step ups in your leg workouts:
And here's another video I did on the topic of step-ups:
Simenz, C. J., et al. Electromyographical analysis of lower extremity muscle activation during variations of the loaded step-up exercise. J Strength Cond Res. 26(12):3398-3405, 2012.
If you've ever done the workouts in my Train Like Jim workout series, you likely noticed that in #4 (legs and calves) I supersetted reverse hamstring extensions with back extensions. This is a great technique to blast the hamstrings and glutes.
If you're wondering how to do this superset complex, this video will lay it all out for you. And if you haven't tried my Train Like Jim #4 (Legs and Calves) then download this workout below to see how you can work this training tip into your leg workouts.
If you train at home, as many do, you may find yourself working with limited equipment. One muscle group that you may think is difficult to target properly when training at home is the hamstrings. But actually, if you have dumbbells and/or a barbell, the following make great hamstring exercises—squats, deadlifts, Romanian deadlifts, and walking lunges.
Another good hamstring exercise that you can do—even if you don't have barbells or dumbbells—is the bench bridge. To do the bench bridge, lie on the floor next to a bench with your back flat on the floor and your heels up on the bench. Your knees and hips should each form 90-degree angles. You can keep your arms at your sides on the floor or place them across your chest.
Press your heels into the bench as you contract your hamstrings and glutes to extend at the hips to lift your glutes up until your torso and upper legs are in a straight line with just your upper back touching the floor. Your torso and thighs should form about a 45-degree angle with the floor. Hold this top position for a second and squeeze your hamstrings and glutes as hard as you can. Then slowly lower your glutes back to the floor and repeat for reps.
You have two options to increase the resistance during the bench bridge. One is to do this exercise with just one leg. To do this start in the same position as you would the two-legged bench bridge. But only keep one foot on the bench while you extend the other leg straight out over the bench. Press the heel on the bench into the benche to lift your glutes off the floor until you are in the top position. Hold this for a second and then lower yourself back to the floor. Repeat for reps with that same leg. Then switch legs. While both the two-legged version and the one-legged version of the bench bridge are a great way to work your core, the one-legged version does an even better job for obvious reasons.
Another way to increase resistance on the bench bridge is by holding a weight plate on your abs. The closer you hold the weight plate towards your thighs, the more resistance the plate will provide. And if you don't have a bench you can simply do the standard bridge by keeping your feet flat on the floor and performing the same move with one or two legs, and with or without a weight plate. You can also use a barbell over your hips for added resistance.
Even if you do have access to a variety of leg curl machines, the bench bridge makes a good exercise to do to hit the hams and glutes from a unique angle. It's harder than it looks when you do it right. It also makes a great exercise to do when you are traveling and don't have access to a gym. You can do the bench bridge right in your hotel room with your feet up on a chair. Or do the standard bridge with your feet flat on the floor.
To see me demonstrate the bench bridge—as well as the one-legged version, the weighted version, and the standard version—watch this video.
For those who train at home and don't have access to a leg curl or any other machines, try the following at-home leg workout. Rest 1-2 minutes between exercises except for bench bridges, for which you’ll rest 1 minute.
Take a poll among gym goers and ask them what the toughest body part is to get growing, and I bet at least 75% of them will say the calves. But perhaps the problem isn't the stubbornness of this muscle group – maybe people just aren't training the calves the right way!
Known technically as the gastrocnemius muscles, the calves are composed of two different heads. (The soleus is also part of the calf musculature, but it's deep to the gastrocnemius and mostly hidden from view.) The medial head of the gastroc makes up the inner part of the calf, while the lateral head makes up the outer part. Both heads converge onto the Achilles tendon and work together to extend the foot at the ankle, such as during standing calf raises.
Yet despite the fact that the two calf heads work together, new research from Armstrong State University (Savannah, Georgia) shows that you can focus more on one head over the other by simply turning your toes in or out. This practice used to be considered "bro science," but now it's real science.
The Armstrong State team had weight-trained subjects do 10 reps of standing calf raises with their toes pointed straight ahead, turned in or turned out while they measured the muscle activity of the two different gastrocnemius muscle heads. They reported in the Journal of Strength & Conditioning Research that when subjects did calf raises with their toes pointed in, the muscle activity of the outer calves was significantly greater than the inner head, which means the outer head was doing the majority of the work.
Conversely, they found that when subjects did calf raises with their toes pointed out, the muscle activity of the inner calves was greater than the outer calves, meaning that the inner calves were doing the majority of the work.
They also found that when calf raises were performed with the toes pointed straight ahead, the medial head (inner calf) was doing the majority of the work. This was the most surprising finding in the study. You would think that with the toes pointed straight ahead, both heads of the gastroc would be evenly targeted. But as it turns out, the medial head, because it's generally bigger and stronger than the lateral (outer) head, takes on the brunt of the load.
If you have one area of your calves lagging behind the other, you can focus more on that head by simply changing your foot position when you do calf raises. For most people, though, a good idea is to make sure you do some sets of calf raises with your toes pointed in to better hit the outer head of the calves. For example, on all calf exercises you do (not just standing calf raises, but other exercises like seated calf raises and leg press calf raises, too), try doing at least four sets – two sets with your toes pointed in and two sets with toes pointed forward. Or, to really hit all areas, do six sets – two sets with toes pointed in, two sets with toes pointed forward and two sets with toes pointed out.
Below is what a calf workout implementing these tips might look like. Do it 2-3 times per week. Tacking it onto the end of your leg workout after quads and hamstrings will work, but you can do it on an upper body day if you want, too. Also, you don't have to train calves last in your workout; if you want to prioritize it, do the calf routine first in your workout to ensure you're putting everything into it.
Feel free to plug in whatever calf exercises you want into this workout. Just make sure you keep it varied – don't do the same two calf exercises every workout. To promote growth in the calves, you need to constantly change things up. And even though I didn't list it (because it hits the soleus muscles more than the gastrocs), feel free to sub in seated calf raises.
Perform the first two sets with toes pointed in, the next two sets with toes pointed straight ahead, and the last two sets with toes pointed out.
Take every set to failure. The calves are constantly working throughout the day, so they need a lot of stimulation to grow.
Do every rep through a full range of motion. If you reach failure before hitting the prescribed rep count (15-20 or 25-30), it means you went too heavy. But that's okay – just drop the weight real quick and continue repping out until reaching failure again. Sometimes it takes a drop set to hit your reps!
Riemann, B. L., et al. Medial and lateral gastrocnemius activation differences during heel-raise exercise with three different foot positions. J Strength Cond Res. 2011 Mar;25(3):634-9.
Got a stubborn pair of calves that won't get bigger? I've got a great technique that may just shock them into growing: rest-pause/drop set training. This high-intensity method will leave your calves in severe pain but will also leave them no other option but to grow.
Here's how you'll do it: Start with leg press calf raises. With one 45-pound plate on each side of the machine, do 30 reps or as many as you can before reaching failure if less than 30. Add a plate to each side, rest one minute and do another 30 reps (or to failure). Continue in this fashion – resting one minute and adding another plate per side on each successive set – until you can no longer complete 10 full range of motion reps.
Then the real training takes place. After your last set, perform a rest-pause by racking the weight and resting 15 seconds before performing as many reps as you can until reaching failure again. Do a total of three rest-pauses in this manner. Then, do a drop set by immediately stripping off one plate from each side. After reaching failure, do three more rest-pauses with this new weight. Keep doing drop sets, stripping off one plate per side at a time, and three rest-pauses with each weight, until you’re back down to just one plate per side.
For the first week or two, stop here, as your calves won’t be able to handle much more work in one workout. After that, follow leg press calf raises with seated calf raises using the same technique to blast the deeper soleus muscles and maximize overall calf size. Use this technique 2-3 times per week with at least a full day of rest between calf workouts, and alternate the order you perform the exercises by doing seated calf raises first every other workout. Also, consider swapping out leg press calf raises with standing or donkey calf raises. Follow this plan for 4-6 weeks... and enjoy your much-improved calves!
How many sets you do will depend on how many plates it takes you to fail at 10 reps. Here, I'm using the example of failing to reach 10 full ROM reps for the first time at three plates per side.
As mentioned above, seated calf raise rest-pause/drop sets can be performed after leg press calf raises, but I don't recommend doing this right off the bat.
Related Articles

Stuck in a leg-training rut? This 6-week program attacks the quads, glutes and hammies from every conceivable angle to build a bigger, stronger lower body.

Can't get to the gym but want to hit legs hard to grow new muscle in the lower body? Try this at-home workout, no weights required.

One simple technique tweak could lead to greater quad growth on the leg extension exercise.

New research confirms that leg day isn’t just for building bigger quads.
Foundations
Featured Meal Plans
Muscle Hypertrophy: Build Muscle Fast
Rethink Your Rep Range
The Science of Strength Bands
Training
Nutrition
Supplementation
Health