Beginner to Advanced: Phase 4 Overview
My detailed rundown of the final phase of Beginner to Advanced

My detailed rundown of the final phase of Beginner to Advanced

In the final 3 weeks of the program, you’ll return to training 4 days per week. This 4-day split—composed of chest and triceps, back and biceps, legs, and shoulder and trap workouts—will have you adding even more exercises to each muscle group.
Weight will increase or decrease depending on the exercise, as was the case in previous phases of the program. To make things even more challenging, in Phase 4 rest times will also change for high-rep exercises, dropping from 2-3 minutes down to just 1 minute between sets. When you’ve finished with Week 12, you should not only be leaner, stronger, and bigger than you were at the start of Beginner to Advanced, you should also be ready to tackle any of the dozens of featured workouts and other programs I’ve designed to help you achieve your goals and reach for your true potential as an advanced lifter.
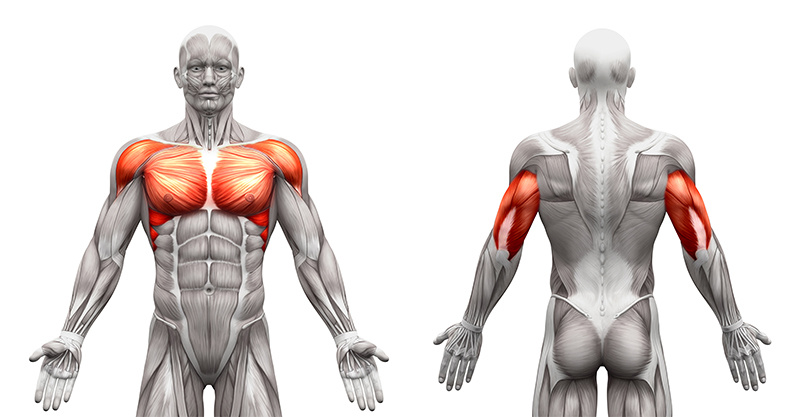
Targeted Muscles
Pectoralis Major and Minor (Pecs, Chest)
Assistance Muscles
Anterior Deltoid (Delt, Front Shoulder), Triceps Brachii (Triceps, Rear Upper Arm)
Bench Press Overview and Instruction

Set and Rep Scheme
3 sets of 4-6 reps
Rest Periods
2-3 minutes
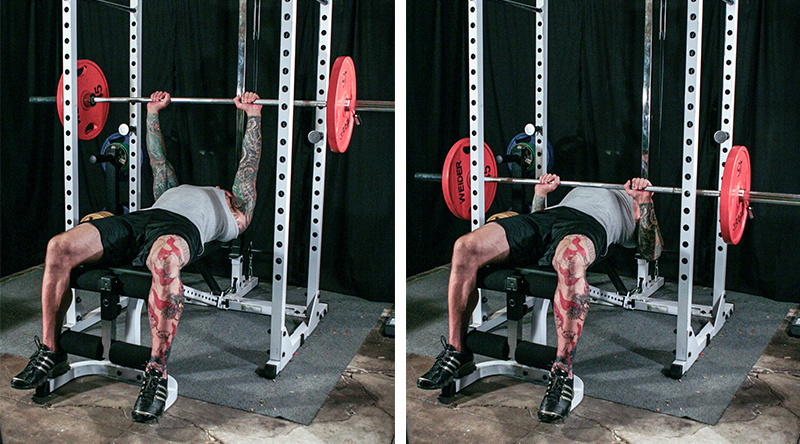
To perform the Bench Press, lie face up on a bench press bench with your feet flat on the floor. Grasp the barbell with an overhand grip, your hands slightly wider than shoulder-width apart.
Be sure to maintain five points of contact at all times: Each foot on the floor, and your hips, shoulders, and head on the bench. Additionally, retract your shoulder blades by squeezing them together. This will enable you to better stretch and engage the muscle fibers in your chest for better overall strength and impact.
With enough weight to limit you to 4 to 6 repetitions loaded onto the bar, unrack the bar and slowly lower it toward your chest. Keep your wrists aligned with your elbows and your elbows out to your sides at roughly a 45-degree angle. When the bar just touches your chest, press back up explosively, driving the weight away from you until your arms are almost completely straightened. Repeat until you’ve reached 4 to 6 reps, rerack the bar, and rest for 2 to 3 minutes before beginning your next set.
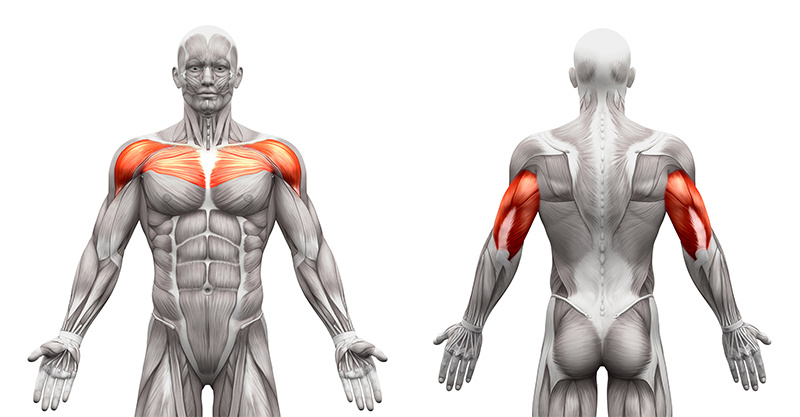
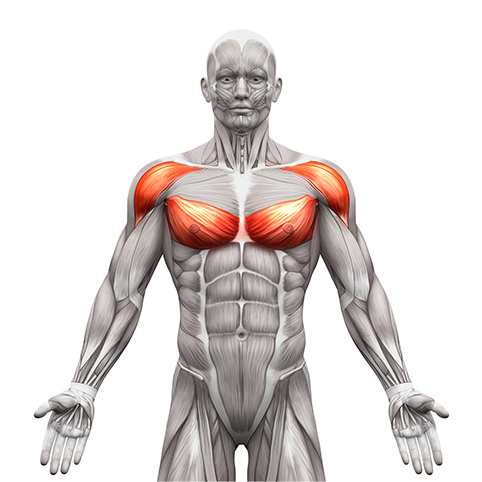
Targeted Muscles
Upper Pectoralis (Pecs, Chest)
Assistance Muscles
Anterior Deltoid (Delt, Front Shoulder), Triceps Brachii (Triceps, Rear Upper Arm)
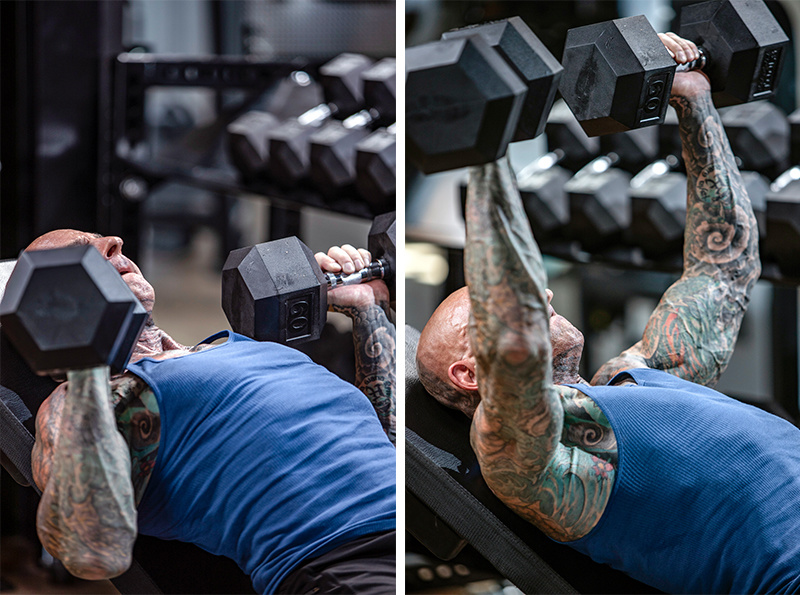
Incline Dumbbell Bench Press Overview and Instruction
Set and Rep Scheme
3 sets of 6-8 reps
Rest Periods
2-3 minutes
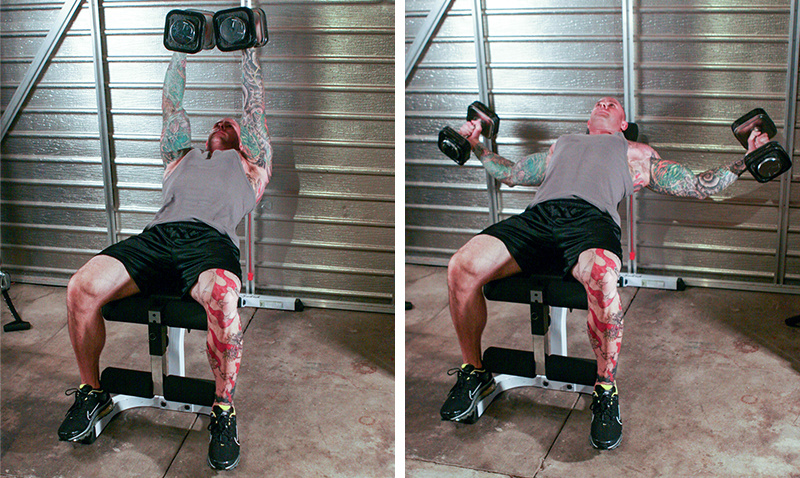
To perform the Incline Dumbbell Bench Press, select a weight that will limit you to 6 to 8 reps. Lie squarely on an incline bench, which should be set at a fairly low angle. Hold the dumbbells just outside your shoulders with your elbows out to your sides and your feet planted flat on the floor.
Forcefully press the weights up in an arc (coming toward each other at the top) until your arms are fully extended above your chest. Reverse the motion, being sure not to lower the dumbbells below chest level. Repeat until you reach 6-8 reps, then rest for 2 to 3 minutes before moving on to your next set.
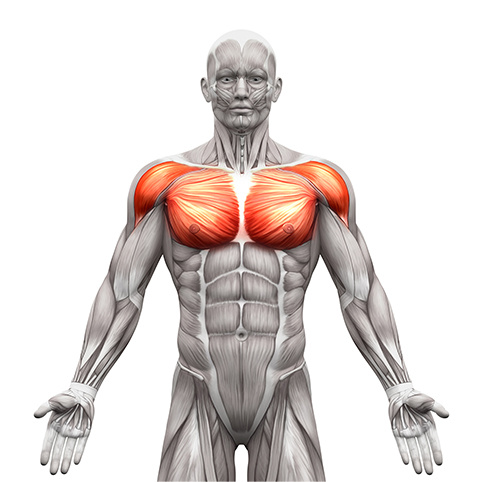
Targeted Muscles
Pectoralis Major and Minor (Pecs, Chest)
Assistance Muscles
Anterior Deltoid (Delt, Front Shoulder)
Incline Dumbbell Flye Overview and Instruction
To perform the Incline Dumbbell Flye, select dumbbells at a weight that will have you reaching failure within 15 to 20 reps, and set an incline bench at a 30-45-degree angle. Lie on the bench with your feet flat on the floor and your back pressed against the pad. Begin holding the dumbbells with your arms straight up from your shoulders and the dumbbells directly over your upper chest. Your palms should face each other and your elbows should be slightly bent. This angle of your elbows should be maintained throughout the entire exercise.
Slowly lower your arms out to your sides until your wrists come to about shoulder level or slightly above. Bring your arms back toward the midline of your body, focusing on using your pec muscles to draw them back together. Repeat for 15 to 20 reps, then rest for 1 minute before moving on to your next set.
Targeted Muscles
Lower Pectoralis (Pecs, Chest)
Assistance Muscles
Anterior Deltoid (Delt, Front Shoulder)
Cable Crossover (High Pulley) Overview and Instruction
Set and Rep Scheme
3 sets of 15-20 reps
Rest Periods
1 minute
The Cable Crossover is very similar to the dumbbell flye, in that it involves the same basic movement engaging the chest muscles to bring your arms from an outward extended position to one in front of the body. However, due to the difference in the direction of force, which in the dumbbell flye is dependent on gravity, more tension can be maintained during the full range of motion of the cable crossover. This leads to better overall muscle fiber activation through the duration of the movement.
Additionally, the height of the pulley changes the angle of the movement, meaning you can better emphasize different regions of the chest muscle. In the high pulley cable crossover, because the movement is performed at a downward angle it will incorporate the lower pec muscles to a greater degree.
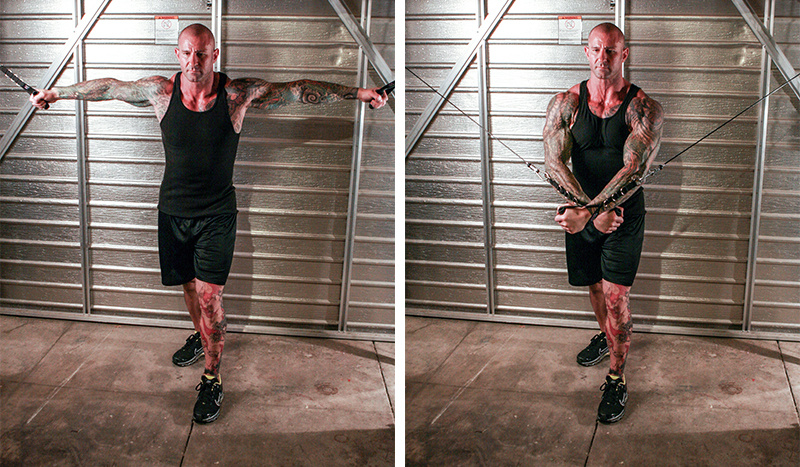
To perform the high pulley cable crossover, attach single-handle D-grip handles to the high pulleys on a cable crossover apparatus. Select a weight that will limit you to between 15 and 20 repetitions. Stand in the direct center of the machine with one foot in front of the other and with your knees slightly bent. Grasp the handles with your palms facing down and keep your elbows slightly bent and facing up toward the ceiling. Lean slightly forward at the waist.
In a simultaneous downward/inward motion, bring the handles to a point in the front of your midsection, keeping your arms slightly bent. Pause a moment and squeeze your pec muscles before slowly allowing the handles to return to the start position. Repeat until you reach 15 to 20 reps, then rest for 1 minute before continuing with your next set.
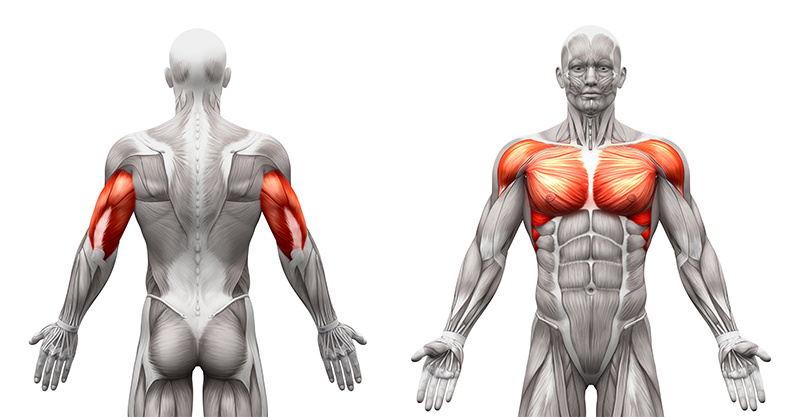
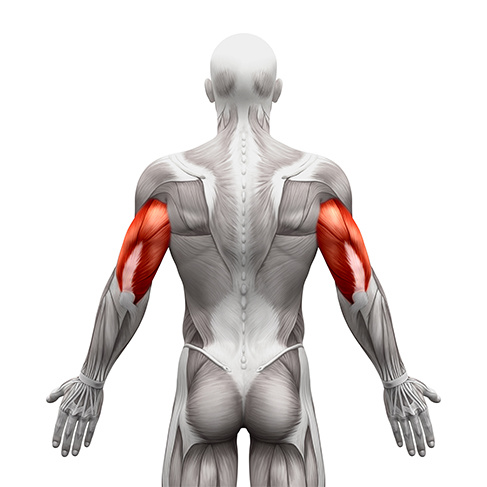
Targeted Muscles
Triceps Brachii (Triceps, Rear Upper Arm)
Assistance Muscles
Pectoralis Major and Minor (Pecs, Chest), Anterior Deltoid (Delt, Front Shoulder), Anconeus (Rear Elbow)
Close-Grip Bench Press Overview and Instruction
Set and Rep Scheme
3 sets of 4-6 reps
Rest Periods
2-3 minutes
To do the Close-Grip Bench Press, load the barbell with enough weight to reach failure in 4 to 6 reps. Lie face up on a bench press bench with your feet flat on the floor. Grasp the barbell with an overhand grip, your hands shoulder-width apart.
Unrack the bar and slowly lower it to your lower chest, keeping your elbows as close to your sides as possible. At the bottom of the movement, your elbows should be a little lower than your shoulders. Press the bar back up to the start position. Continue until you’ve reached 4 to 6 reps, then rest for 2 to 3 minutes before continuing on to your next set.

Targeted Muscles
Triceps Brachii (Triceps, Rear Upper Arm)
Assistance Muscles
Anconeus (Rear Elbow)
Dumbbell Overhead Triceps Extension Overview
Set and Rep Scheme
3 sets of 6-8 reps
Rest Periods
2-3 minutes
To perform the dumbbell overhead triceps extension, choose a weight that will limit you to 6 to 8 reps. Grasp a dumbbell with both hands and place it over your head. Once secure in position place the dumbbell behind the back of the head/neck and use both arms to evenly extend the dumbbell upward until the arms are completely straight and locked. Keep your head in a neutral position throughout the lift.
Once in extension slowly return to the starting position. Repeat until you reach 6 to 8 reps, then rest for 2 to 3 minutes before continuing to your next set.
Targeted Muscles
Triceps Brachii (Triceps, Rear Upper Arm)
Assistance Muscles
Anconeus (Rear Elbow)
Triceps Pressdown Overview and Instruction

Set and Rep Scheme
3 sets of 15-20
Rest Periods
1 minute
To perform the triceps pressdown, select a weight on the cable machine that you can lift for between 15 to 20 reps. Face the high-cable pulley with a pressdown bar attached to it, and stand with a slight bend in your knees. Your feet should be spread about shoulder-width apart. Grasp the pressdown bar with an overhand grip and hold the bar short at chest level with your elbows tight against your sides.
Keeping your elbows stationary, straighten your arms until they are fully extended. Pause at full arm extension and flex your triceps, then slowly return the bar to the start position. Repeat until you reach 15 to 20 reps, then rest for 1 minute before your next set.
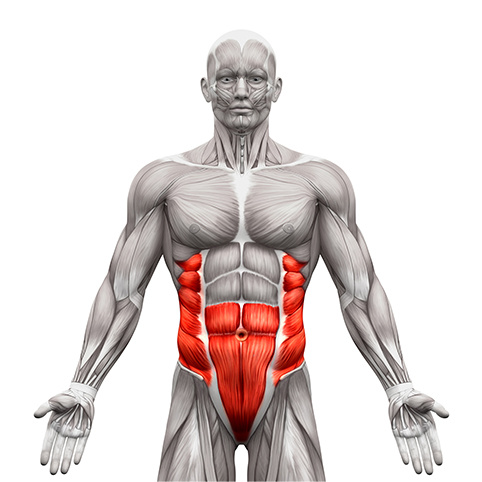
Targeted Muscles
Lower Rectus Abdominis (Abs, Stomach)
Assistance Muscles
Transverse Abdominis (Deep Abs, Stomach), Internal and External Abdominal Obliques (Abs, Side of the Stomach)
Hanging Leg Raise Overview and Instruction
Set and Rep Scheme
3 sets to failure
Rest Periods
1 minute
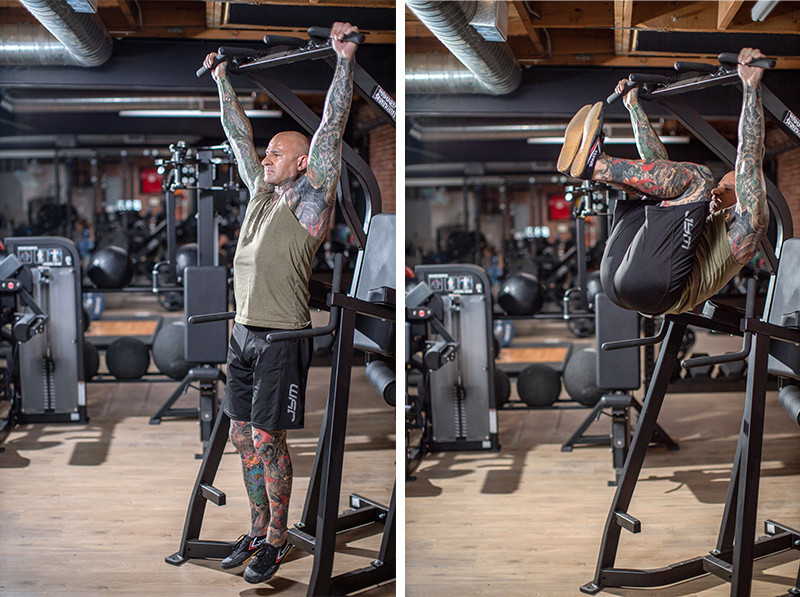
The Hanging Leg Raise functions in much the same way as the reverse crunch done in previous weeks, targeting the lower portion of your abdominal muscles. However, the level of difficulty is increased as the range of motion is greater, and the angle is changed so that the abdominal muscles must lift the full weight of the lower half of the body against the pull of gravity.
To perform the hanging leg raise, hang from a bar with your legs straight down. Alternatively, leg raises can be performed using a dip and leg-raise station, as seen below.
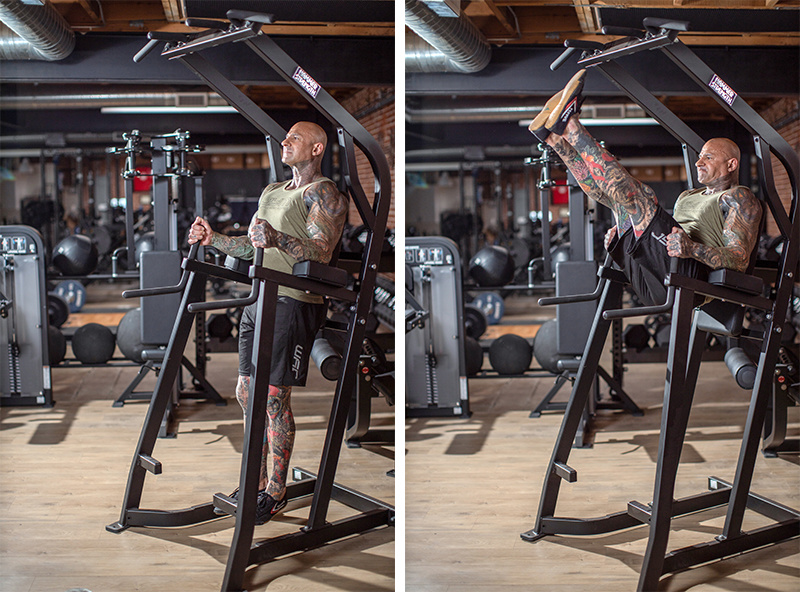
Raise your legs by flexing your hips while flexing your knees until your hips are fully flexed. Continue to raise knees toward shoulders by flexing your waist. Do not swing and use momentum. Go slow and concentrate on using your abs to pull your legs up. Return to the starting position.
Repeat until you can no longer lift your knees above your hips. Rest for 1 minute before continuing on to your next set.
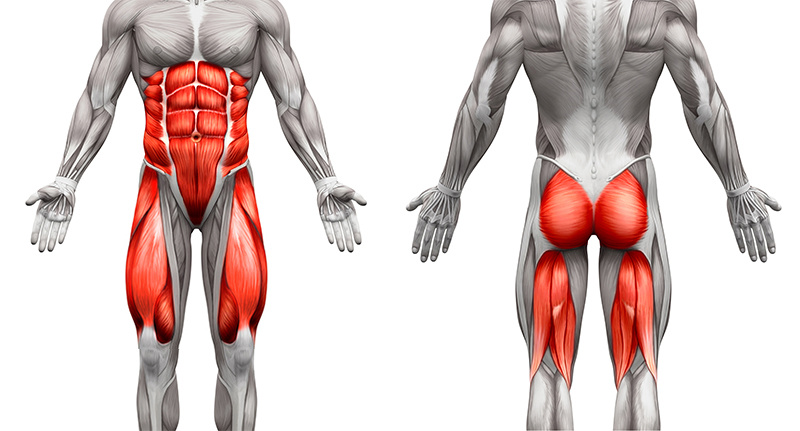
Targeted Muscles
Rectus Abdominis (Abs, Stomach)
Assistance Muscles
Internal and External Obliques (Abs, Side of the Stomach), Psoas (Hip Flexors), Rectus Femoris, Vastus Lateralis, Vastus Medialis, Vastus Intermedius (Quadriceps Femoris or Quads, Front Thigh), Gluteus Maximus (Glutes, Buttocks)
Bicycle Crunch Overview and Instruction
Set and Rep Scheme
3 sets to failure
Rest Periods
1 minute
The Bicycle Crunch is an excellent version of the crunch for targeting more muscle fibers in the abdomen. Unlike the standard crunch, the bicycle crunch incorporates the middle and lower abs as well, making for a more complete core exercise.
To perform the bicycle crunch, lie flat on the floor so that your lower back is pressed to the ground. Place your your hands behind your head & lift your knees to about a 45-degree angle. Go through a bicycle pedaling motion with your legs as you alternately touch your elbows to the opposite knees, twisting back and forth.
Repeat until you can no longer perform the movement, then rest for 1 minute before moving on to your next set.
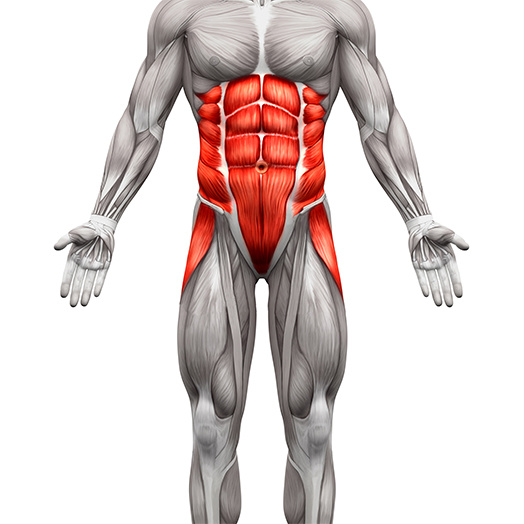
Targeted Muscles
Transverse Abdominis (Deep Abs, Stomach)
Assistance Muscles
Rectus Abdominis (Abs, Stomach), Internal and External Obliques (Abs, Side of the Stomach), Psoas (Hip Flexors)
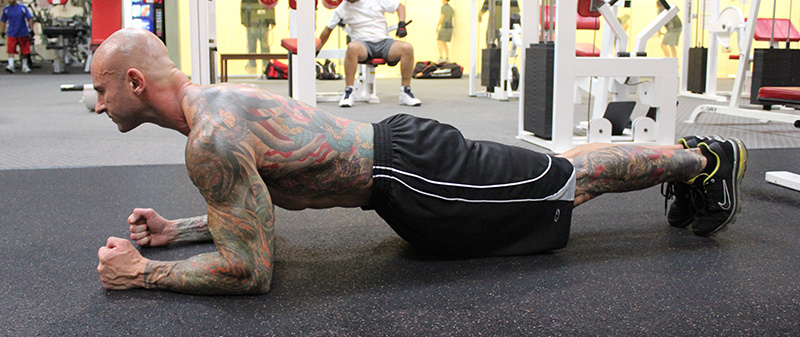
Plank Overview and Instruction
Set and Rep Scheme
3 sets of 1 minute each
Rest Periods
1 minute
Unlike crunches and other exercises that involve contraction of the abdominal muscles, the Plank is a static hold that places consistent tension on the core. This incorporates the transverse abdominis, the abdominal muscle that lies beneath the more visible rectus abdominis. Strengthening the transverse abdominis is essential to overall core strength, making the plank an essential tool in your core training.
To perform the plank, get into a modified push-up position by balancing your body on your forearms and toes with your body in a straight line from head to feet. Tense up the muscles along the front of your body and hold this position for the prescribed amount of time while pulling your abs and keeping your hips from dropping toward the floor. After 1 minute has elapsed, rest for 1 minute before moving on to your next set.
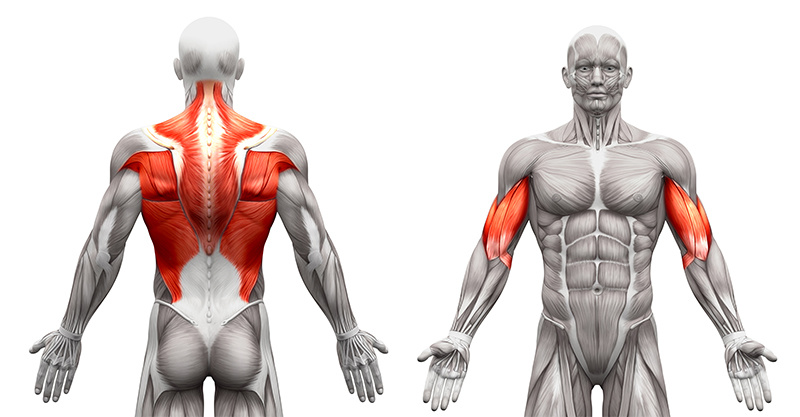
Targeted Muscles
Latissimus Dorsi (Lats, Sides of the Back)); Middle Trapezius (Traps, Top of the Back) and Rhomboids (Upper Back)
Assistance Muscles
Erector Spinae (Lower and Middle Back); Biceps Brachii (Biceps, Front Upper Arm)
Barbell Bent-Over Row
Related Articles

Pump up the volume to build more muscle mass!

This 3-week whole-body version of one of my classic programs will help you maximize muscle size AND strength.

This 4-week program modifies the classic drop set technique for better gains in muscle size and strength... while also torching body fat.

This 4-week training plan will boost your muscles in all areas – power, strength, and size - with one scientifically proven technique.
Foundations
Featured Meal Plans

Muscle Hypertrophy: Build Muscle Fast
Rethink Your Rep Range
The Science of Strength Bands
Training
Nutrition
Supplementation
Health