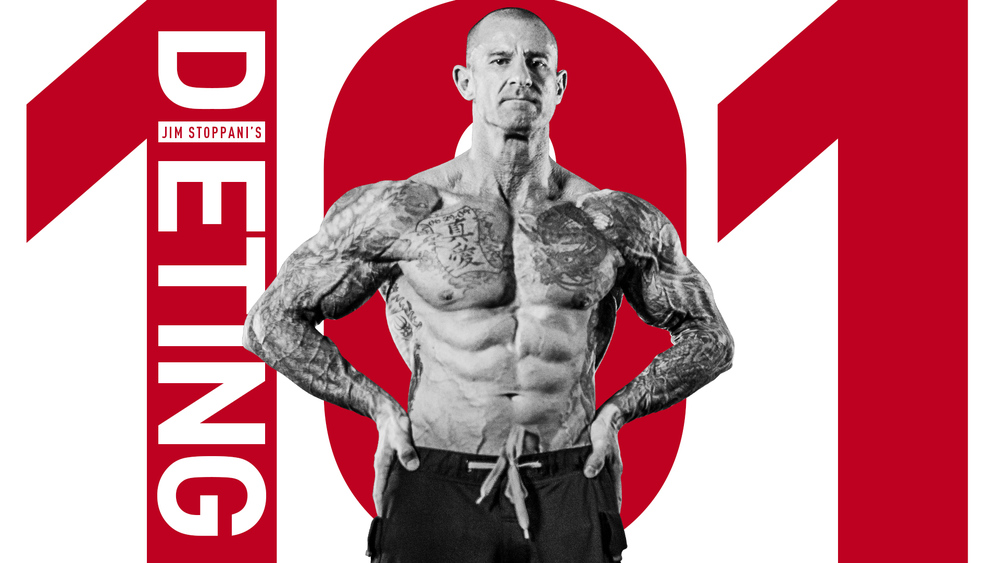
2018 New Year's Challenge Week 6 Live Tutorial Transcript
Transcript of the live rundown of the final week of the New Year's Challenge and my Small Angles Full-Body program.

Transcript of the live rundown of the final week of the New Year's Challenge and my Small Angles Full-Body program.

Happy Sunday, JYM Army. I'll try to stay out of the way here, but I want to demonstrate some of the exercise pairings for my Small Angles. Now, I'm heading into Week 6. This is Sunday so Monday, starting tomorrow, I'll be doing the first workout. I have the first 5 muscle groups which—5 times 3, 15 different exercises here for you to do just in that first half.
We're going to be doing 10 different muscle groups. There will be two workouts, Tuesday and Thursday, where we actually skip forearm training, so it'll only be nine muscle groups for those two days, but the Monday, Wednesday, Friday workouts include forearm training.
So now, with the Small Angles concept, last week we actually finished—for those of you who are following along with me, when I started this program—what was that, January 15th? I started Week 1 on the 15th—last week was Week 5, so last week we were doing my Oxford Drop Sets, which is a brutal technique as most people discovered.
Now we move into, as each week does during this New Year's Challenge, we move into what I call my Small Angles Training. And the Small Angles concept is basically changing up an exercise by making small changes on the grip or the type of equipment you're using. But it's typically sticking with the same type of movement—you're just making changes.
So for example, on the bench press in Workout 1, I have three bench press exercises that you're going to be doing. You're only going to be doing one set for each of those exercises because remember we're going to be hitting chest Monday, we're going to be hitting chest Tuesday, we're going to be hitting chest again on Wednesday, then we're going to hit chest again on Thursday, and finally we're going to hit chest again on Friday. So five days of training pecs back to back to back. You only need one set of all three of those exercises.
Instead of choosing—as most of my full-body workouts do—instead of choosing one exercise per muscle group and doing three sets of that one exercise, here you're doing three exercises but only for one set. The advantage here is that you're changing; you're making small changes. Like I said, with the bench press, we start with the bench press then the next exercise we do the reverse bench press, and then finally we finish with your choice of either a decline or an incline bench press.
So now what does that do? Three different exercises. Well, standard bench press—mainly hitting those middle pecs, middle and lower pec area. You switch over to the reverse-grip bench press, now we're focusing more on the upper pec muscle fibers. And then, on exercise three, you can decide whether or not your lower pecs need some work and do a decline, or if your lower pecs are well-developed compared to your upper pecs then—like mine—you can go right into another incline to hit upper pecs again because your flat bench is going to sufficiently hit the lower pecs as well as the middle pecs.
Each muscle, now—when we're talking about any muscle, whether it's the pecs, whether it's the biceps long head or short head, whether it's the deltoid front head, middle head, whether it's the triceps lateral head—each muscle has thousands and thousands, hundreds of thousands of muscle fibers. They're fine hairs that you can't even see, really, with the naked eye. So fine. And when you do an exercise, you're not recruiting all those muscle fibers.
So for the reverse-grip bench press, for example, your upper pecs—there's, like I said, thousands—I'm not just talking about the total pec, I'm talking about even in the upper pec area, thousands and thousands of muscle fibers. When you're doing a reverse-grip bench press, you're not activating all those muscle fibers in the upper pecs. No, you're activating a small percentage of them, and so by changing up your grip on the bar or the angle of the bench, going to an incline, you're recruiting different muscle fibers within that area of the muscle.
So for example, reverse-grip would hit the upper pecs differently than an incline bench press—slight difference in the muscle fibers that are being used. And when you make those small changes, what happens is after doing all three of those exercises, even though you're only doing one set each—one set to failure, of course—you're recruiting more total muscle fibers in that target muscle group—in this case, the pecs.
Then when we move on to back, we're going to be doing a variety of rows: Rows with a wide grip, that's going to hit more of the upper lats; rows with a narrow grip, and also a reverse grip, are going to focus more on the lower area of the lats. And reverse grip, and overhand grip, even though they both focus more on the lower lat area, because there's a difference in that grip there's a difference in the muscle fibers that are recruited in the lats, and particularly in the lower lats.
So it's just a way to maximize the recruitment of different muscle fibers, and remember we're trying to activate as many muscle fibers as possible. You're going to activate more of the growth processes in more of those muscle fibers, and when you're activating growth in more muscle fibers you get better overall muscle growth.
Also, for fat loss—remember I talked a lot about targeting those genes that activate the metabolic processes and keep metabolism up in each one of those muscle fibers. Each one of those muscle fibers, when you think about it as a thin, thin hair, but it's a cell—it's a single cell, with many nuclei. It's one of the only cells in the body that has more than one nucleus; it's multi-nucleated, as we call it. And that's one of the main ways that we grow.
If you've ever heard that muscle memory—when somebody, say, takes a long break from training but they've trained steadily for a while prior, even though they take a long break—maybe it's even a year, say you have an injury—when you get back to training it comes back a lot faster than someone who's just starting from ground zero.
That has to do with those nuclei. You've gained more nuclei now that you've trained, and those nuclei don't go away. The more nuclei you have the more anabolic processes happening within that muscle cell, you get better overall muscle growth.
Also, on the metabolic end, when you have more genes activated in more muscle fibers, you're burning essentially more calories and more fat. So there's the advantage here for muscle growth and also for fat loss, and hey—isn't that the whole goal of the New Year's Challenge? To increase lean muscle mass while we're shredding body fat and getting stronger, more athletic, better muscle endurance or what we call strength endurance.
Difference between running a marathon versus how many push-ups you can do. Push-ups is strength endurance; running a marathon is just overall endurance. Out of this New Year's Challenge, you're getting strength endurance, strength, better lean muscle mass, and dropping body fat.
So, with this Small Angles technique, you're maximizing the number of muscle fibers you're recruiting in each of those muscle fibers. Now, as you'll see on the board if I'm not blocking it here, we're going to be doing five workouts this week. Some of the weeks we did six workouts, like German Volume Training. Last week we did five. When we did my Supersets we did six workouts. Here we're back to just five workouts, you'll be done on Friday and then you can take your final After photo.
Now, those of you who aren't in the same week, don't worry—you can watch this now, or watch it when you get to Week 6 on your own. Remember, some people are starting the challenge behind me, and so you're just catching up. But go back and watch all these live sessions and the little video tips that I've been giving over each week, because when you get to it you're going to want to bone up, as we call it—study. Remember, the more you know about the technique the better your results.
So five workouts. Now, this workout week we're going to be using undulating periodization, meaning each workout the rep ranges change but they don't change in any specific pattern. It's not linear like getting heavier each workout, or getting lighter each workout with the reps increasing. No, this is random—we're going to jump all over the place.
Workout 1, we're doing 10-12 reps; Workout 2, we're doing 15-20, I believe; then Workout 3, we drop down to 6-8 reps; then Workout 4 we're back up to 10-12; and then in Workout 5 I've got a little asterisk here because Workout 5 is a bodyweight-only workout, so it's a lot of—I don't have the workout listed here, you can go—I put up the link prior today, it's a free link.
You guys who aren't doing this challenge, you can participate in any of these workouts at any time. It's on JimStoppani.com completely free. You can either look and search for each of these workout names like Small Angles or Oxford Drop Sets, or you can just find the New Year's Challenge overview—the program overview—and then when you scroll down you'll find each week listed by name—5x5 Full-Blown—those are clickable. You click on the 5x5, it'll take you to the 5x5 workout page. Talks about the technique, gives you the actual workouts—free. Free, guys.
The only reason you need to pay for my website is so you can have complete access to all the workouts on the app and take part in my challenges. Taking part in my challenges not only allows you to get the results but it allows you to be in the running for the grand prize which means you get to come out, train with me, hang out with me in L.A., eat donuts, get JYM swag, JYM Supplements—full treatment.
But for those of you who missed signing up for the challenge and you're going, "Well, what are these workouts Jim's doing?" I put up the links, it's there, it's accessible to anyone who wants to follow the workouts. Now, one thing you'll be missing out on as a non-member is you won't be able to use it on the app—you won't have the app—and you won't be able to click on the exercises.
So if you don't know how to do behind the back upright row—I'm going to demonstrate for you today, though—you're kind of out of luck. You have to do a little more hunting online to find how to do these exercises. Members of JimStoppani.com, not only do you have access to all of these workouts and the app, but you click on them you get how to do the exercise, you see me demonstrate it. So there are a lot of advantages to actually being a member.
But again, I want to make my workouts available to anyone so that anyone can get help, and so you can access them completely free. Like I said, go and check out my Small Angles so that you can see all the workouts.
Now, in Workout 1, I've got the first five muscle groups so that I can give you guys a demo on what you're doing here. Workout 1, we're going to be doing 10-12 reps per set. Your goal is to hit the 10-12 reps. You can't finish all 10-12, don't beat yourself up—it's going to happen. You might put on too much weight, you might put on too light weight and have to heavier. Just go to failure.
You can either stop if you went too heavy and say you only got 6 reps—you can stop it there—or you can have the option of doing rest-pause to complete all 10—at least 10, the rep range is 10-12, you want to try to get a minimum of 10 reps on all 3 of those exercises.
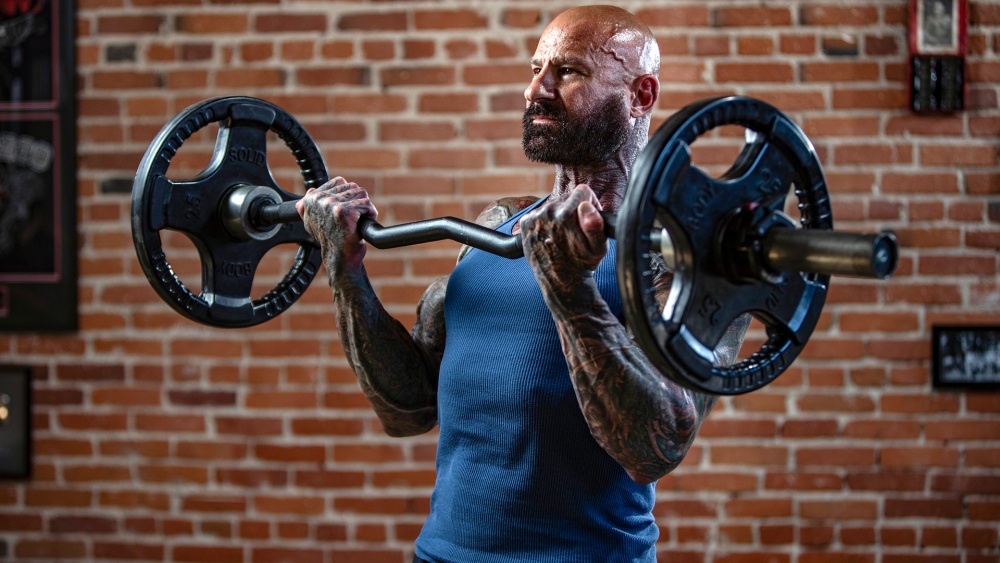
Now, unlike my Extended Set Training, where you're sort of switching up the exercises, here there's no real order of going from harder to easier. So, bench press is going to be your first exercise—you're much stronger on the bench press than you are on the reverse-grip bench press, typically, and on incline bench press, typically. There are some outliers there who find that they are stronger the other way around.
Anthony Clark was a famous teenage powerlifter who used the reverse-grip bench press in powerlifting meets because there was nothing in the rules and regulations that said you couldn't use the reverse-grip bench press, and he was able to do, I think, at a very young age, I believe prior to turning 20 something like 700lbs on a reverse-grip bench press. Impressive.
But typically speaking, most people are stronger on the flat bench. You also see those people who are strong on the incline bench for whatever reason—they have strong shoulders—but generally speaking, most people are stronger on the flat bench press. So this workout is actually getting harder as you go, so you're going to have to adjust the weight accordingly.
You're not going to keep the weight the same like with Extended Set Training, because the exercise switch that you're making doesn't make the exercise easier—it might actually make it harder. So you're going to have to adjust. And not every workout gets harder, it could actually get easier, so you'll have to adjust the weight for each one of those exercises with your best guess at a 10-12.
Like I said, don't kill yourself—you go to heavy because you're fatigued from the prior exercise, don't worry about it. Or if you really were too cautious and went too light, don't worry about it. Complete 15 reps, that's fine.
Now, rest periods—let's talk about rest periods. These are trisets. You don't have to do these back to back to back, but you could. In fact, that's how I do it. The only rest that I will take is to adjust the weights that I need to. I'm going to demonstrate for you guys here with very light weight. It's not 4 o'clock yet so I'm not in my training window, so I don't want to do a real workout.
I'll do another workout later today after 4 o'clock, later tonight, and then tomorrow I'll actually be doing the real bench press, reverse-grip bench press.So I'm going to just demonstrate the light weight, so we'll all pretend this is my working weight.
But you could rest a minute, two minutes—if you want to, rest three minutes—but remember you've got 30 exercises to complete, so I recommend if you want to keep your time in the gym as short as possible and your intensity of the workout up, keep the rest periods light.
However, if you're someone who really wants to maximize muscle strength, particularly—and even muscle growth to some degree, although you can debate whether or not shorter rest periods, because the intensity, is going to equate to better muscle growth, or if longer rest periods—because you can use more weight and complete more reps—is going to lead to more muscle growth.
Both work, which is why you want to switch up your rest periods just like weight, just like exercises. Variety is really the key to continued progress. There are many ways to grow, and many techniques to use, that'll help you achieve muscle growth and strength gains.
So let me jump right into Workout 1 here. I've only got the first five muscle groups up, like I said. I know it's hard for you guys to see on the whiteboard, especially when I'm trying to do a demo and reference the whiteboard. It just doesn't really line up well to be able to see both, and since I'm here I don't have my camera crew here.
It's a Sunday, I'm here by myself in my home gym, and I can't really see what you guys are looking at because to have the words legible for you guys to be able to read I can't see my screen. So I have no idea if I'm blocking this, so I apologize.
I just put on the first five muscle groups so that you can actually read the workouts versus the way I've been doing it before, where I was showing each workout. The font was so small.
So Workout 1, 10-12 reps, chest—we're going to do the bench press, you've got to hit 10-12 reps. Then you're going to switch to the reverse-grip bench press, likely you're going to have to drop the weight significantly because A. the reverse-grip bench press is harder than the bench press, and B. you're fatigued from going to failure on the bench press.
Whatever you normally do on the reverse-grip bench press for 10-12 reps, you're probably not going to be able to complete 10-12 reps today after going to failure on the regular bench press. So undershoot it a bit, 5-10lbs at least. Then you're going to switch over to your goal of whether you want to focus more on the lower pecs, by doing a decline bench press, or an incline bench press.
And so here I'm going to be doing this all on the power rack, but if you're at a normal gym the bench press and reverse-grip bench press you can do on one regular bench. But then to do the incline or the decline you're probably going to have to switch to a whole different bench, so your rest period is going to really be the time it takes you to set up that other exercise.
Here, the bench press and reverse-grip bench press—you probably don't need to rest that long. I mean, to adjust the weight, all you have to do is probably take off a few pounds. You could jump right into it. Here, you're going to have to leave the bench, put your weights away or at least do it after you do the decline, get to another bench, put the weight on—it's going to take some time. So you may have more rest between these two exercises than you have between these two, and that's okay.
However, if you want to keep your rest periods consistent between exercises—there's no real reason to do that, it can vary—but if you want to you could just say, "Okay, even though it's not going to take me that long, I'll rest one to two minutes here, and then I'll have one to two minutes to get to my decline or my incline."
So that's the rundown here: Chest, then back, then legs—I've talked about why I like to split it up, legs before shoulders to give the shoulders a break after doing chest. So you've got back and legs here in between. Because the shoulders are involved in chest, you're going to be a bit fatigued from the chest training. So doing back, which is a pulling and won't really influence the shoulders, going to give the delts some rest and then the legs will give it even more rest before you get to the shoulders.
Then we move into traps. After traps, we do calves, and in this workout we'll be doing standing calf raises with toes in different positions. Remember, what the research shows on calf training is that when you're training calves, if you turn your toes in so that the heels are out more, it focuses more on the lateral head, that outer head of the calves. If you turn your toes out, where heels are closer together, it's going to hit more of that medial portion, the inner portion of the gastroc. And then toes straight ahead, pretty much hits both lateral and medial head of the gastroc.
After traps we get into triceps, and I believe in this workout—what are we doing for triceps? I can't even recall right now—but with biceps, we then switch into wide-grip, very narrow grip, and then a standard shoulder-width grip, and here what we're changing up is the focus of which biceps head.
Remember, as I talk about in many of my videos and many of my other live sessions, when you use a close grip on a barbell it turns the arms in. That's called medial rotation, turning those arms in. Whenever we turn the arms in towards the body the biomechanics make the long head the more active mover here, over the short head. They're both—you can't isolate one or the other—but by changing, by turning in, it makes the long head the stronger pulling muscle, and so it takes the majority of the force.
When you're going to a very wide grip, turning your arms out, you are now using more of that short head, the inner head. Again, you're not using all of it, but it's just making that short head the stronger mover due to the biomechanics there, and you're getting slightly more of that inner head, the shorter head of the biceps. When you do a standard shoulder-width curl, you're pretty much hitting both heads fairly evenly.
After biceps, we get into some wrist curls, and then we finish up with abs. And so, again, each ten muscle groups we're hitting a variety of exercises to hit a variety of muscle fibers. So let's say today is Monday, let's say I'm in my feeding window, and I just walked into my gym. Here's what the beginning Workout 1 is going to look like.
Now, as far as a warm-up goes, using very light weight here just for demonstration purposes and it's not my workout window, but I would probably warm-up at least one set with 135lbs. Light weight that I could bang out 10 reps with, simple as that. And because it's—you know one of my rules on warming up is basically it depends on the weight that you're using.
If you're using a weight that's going to allow you to get 20-30 reps, if that's the rep range—let's see, what's the highest? We've got 15-20, Workout 2. So even 15-20, if you're using a weight that you can complete 15-20 reps that's pretty much a warm-up weight.
[Video Difficulties]
Now, I go and, like I said, it's my option—I could rest as long as I want or I can simply reduce the weight. I really don't need to here, because it's still light and I truly didn't go to failure, but pretending I went to failure. So I simply reduce the weight, and then I go right into my next set. Again—or you could rest a little longer, it's up to you.
I like to keep moving, and again another thing you can do is you can add cardioacceleration in between these exercises. I can't, again, because of the knee, so I just keep my workouts moving. Those of you who don't have knee issues and can do cardioacceleration, you certainly can add cardioacceleration to these workouts.You could've done bench press, a minute of step-ups, then go into your reverse-grip bench press.
Now, a tip on the reverse-grip bench press, if you're training alone, is you don't want to try to unrack the bar with a reverse grip. This is pretty light, so it's not hard, but if I was going heavier it's pretty impossible. So for those who train alone like I do a lot, you're going to do the standard bench press, lower it to your chest, then with the weight supported on your chest you're going to switch each hand around and now you're going to do your reverse-grip bench press.
So let's say that was failure. I rack it—now, option: I could do cardioacceleration, I could rest a bit, or I could immediately go into my next, third exercise. I'm going to do incline. My lower pecs are fine; for me it's my upper pecs. That's why I talk to guys so much about reverse-grip and those tips because that's my weak area so I work a lot on bringing up that area for me. That's why I find all those tricks that help and share them with you.
I'm going to do just a slight incline here so that, for timing purposes, I don't have to change the height of the rack here. So I'll go into an incline. Now, even with your incline bench, you want to make sure that when you're bringing the weight down you're not allowing those elbows to flare out to the side—this is the last thing you want to happen, is this. I shouldn't even be doing this as a demonstration, I could actually feel the pain in my shoulder right now. Last thing you want to do.
This is what leads you to shoulder injuries on benching is letting those elbows flare. Instead, you see that tuck? I pull them in using my lats like I'm holding grapefruits or softballs in my armpits, and then I press up. This is going to help, particularly on the incline, focus more on those upper pecs. And let's say I hit failure.
Now, even with that light weight it's pretty decent—not a bad workout. I didn't go to failure, but my pecs pretty much feel it. So now I'm done with chest. I did those three exercises, that's it for chest today. They're toasted.
Like I said I didn't even go heavy, I didn't go to failure, but I can feel my pecs from the upper to the lower, pretty much all muscle fibers—obviously we're not recruiting them all, but pretty much hitting upper, middle, and muscle fibers in the lower pecs. I can feel it top to bottom in my chest. That's really the goal of this week, these workouts.
So now, again, we're going to move into another exercise for back. You have the option of doing cardioacceleration in between chest and back, or like I do I'm going to just literally drop the weight right here on this station and then—I'll keep the weight on the light side again here just for demonstration purposes—so now for back, I'm going to do barbell row with a wide grip, hit more of upper lats. Then switch to a narrow grip, more lower; and reverse grip, even more lower.
So here with the wide grip, I'll typically—go as wide as you can, but you don't want to go too wide. And again, here the other thing want to focus on is even though you're going wide don't bring it to your chest. You're bringing it to your abs, bring it in close to your hips, to focus more on hitting the lats. If you bring it up to your chest you're going to be focusing more on rear delts, teres major, and the middle traps. Bringing it down closer to the thighs—to the waist right here, lower abs—is going to hit more of the lats.
So, ten reps wide grip, and again this is extremely light for me. Now, ten reps—let's say that was failure—I'm going to move right into narrow grip. Now, the narrow grip I'm going to be a bit stronger on, so I may not even have to change the weight. Clearly I don't have to because I'm using lighter weight than I normally would, but even if I was using my actual weight here moving to that narrow grip may be—this is similar to Extended Set Training, where it's actually getting easier to do—and especially when we then go to reverse grip, now we're getting some biceps involvement so we'll be even stronger.
So Workout 1 for back, you may not have to adjust the weight at all. You might be able to stick with the same weight for all three moves because it's very similar to Extended Set Training. But again, it's also Small Angles.
So I go right into a narrow grip, here somewhere around shoulder-width. You don't need to go any closer than shoulder-width. Let's say that was failure, and then I would switch right into a reverse grip. Now you'll notice, one tip I'll mention here, is the bench: I've got—I had a motorcycle accident, so I have a crushed lumbar spine vertebra.
So I like doing my rows—either my power row version where you see I allow the weight to come all the way to the ground, or I'll do it in a power rack where I put the safeties so the bar can stop, or I'll do it on a bench like this. I'm still getting a full range of motion, but now the weight's not hanging on my body.
With that weight in front, it's putting a lot of stress—moving my center of gravity forward—putting a lot of stress on my lower back. Here, between each rep I get my lower back—it's a break, so the stress isn't on my lower back, and not only does that help to prevent injury but it helps me focus more on the lats because I'm not focusing on my aching lower back. So give it a try if you haven't done so.
And then the reverse grip—fairly narrow, but you can go a bit wider, and again it's going to still hit lower muscle fibers but a little differently than the overhand narrow grip. I'm now done, basically, with chest, back—now I'm going to give my upper body a break moving to legs.
For legs, we've got front squat followed by the back squat followed by a Zercher squat. If you don't know what a Zercher squat is, here's where membership to my site comes in really handy because you can click right on the app on Zercher squat, get a rundown of how to do it, and a demo from me. However, for those of you who are savvy on the internet, you could also find a YouTube video by me that shows how to do the Zercher squat.
Here, let's talk about the exercise order. With the bench press, we literally went from the basically strongest exercise to the weakest exercise, and then here depending on what you did—could either be weaker or stronger. Barbell row, we literally went from the weakest version—where you're the weakest—and then a little easier, meaning you're stronger and stronger, so very similar to extended set.
On legs, unlike chest we're actually going from the weakest—you should be able to back squat more than you front squat. Again, there are individuals who—I actually, back in the day, could front squat pretty close to what I could back squat. Now, it wasn't because my back squat was so bad, it was because my front squat was—pretty much I could do 600lbs for reps, back in the day on front squat.
Front squat is going to be harder than back squat, so you're going from the harder version to an easier version. Here, you probably won't have to change the weight—in fact, you might actually have to add weight here, going from front squat to back squat, depending on how fatigued you are after the front squat.
Then, from the back squat, we now go back to a harder version—the Zercher squat, which is even harder than the front squat because you're going to be holding it here in your arms. This order is a bit different, like I said. Each one of these is going to be a different order, just depending on how I set it up. They're all not ordered in the same way.
Let's see—you know, with my knee my range of motion and my strength are pretty low, so I'm just going to do 135lbs. I haven't done front squats in quite a while. So now, like I said, you've got the option of adjusting and going right into the squat, or you could do cardioacceleration. I can't do cardioacceleration so much cardio—my fat loss—is going to come from the constant movement of the workout and hitting all major muscle groups.
We would go right into the front squat, and let's see how this goes for my knee—not too bad. Front squat, I'm not going to be able to do all ten reps here, so let's say I did my ten. Rack the bar, now you probably won't need to lower the weight—but again, depends on how fatigued you are. You may need to adjust the weight, and again that's going to vary from person to person.
Go right into the back squat whether you use a high bar or a low bar, and I have a video discussing that. Make sure you watch that as well. And then the Zercher—I'll give you guys a little quick demo on the Zercher. There are a couple ways you can do the Zercher. Let me set this up.
Now, you could either use the rack or use the ground. If you're going to do it on the ground, which literally is what the Zercher was designed for was when you don't have a squat rack, because there was a time when there weren't squat racks. What you have to do here is essentially do a deadlift and then what you're going to do is take the deadlift, squat down—and again, this is tough because of my knee—then you're going to set up in the Zercher position, and that's basically carrying the barbell in the crook of your arms.
From here you're going to keep the weight just here, squat all the way down till the barbell basically hits your legs, and back up. Or, if you don't like that version, you could set up in the power rack—I'm a little off center here, now we're even—you could set the bar on the power rack and then what you're going to do is unrack the bar, and then you can do your Zercher this way. That's all I can do.
So, after Zercher, legs, we move into shoulders. I think you guys pretty much get the gist now, I don't need to demonstrate. But you would do your barbell shoulder press followed by barbell reverse-grip shoulder press—it's going to hit more of the front head—barbell shoulder press, front and middle. But again, it doesn't really focus on the middle delts until those shoulders come out to the side.
Now here's where you want to come up to the side, on overhead presses, unlike the bench press. You don't want those elbows out to the side. On overhead presses it's okay, bringing those elbows out to the side is going to help to hit more middle delts.
When you're doing a shoulder press with the bar in front your elbows aren't completely out to the sides, they're a little bit towards the front. So with that version of shoulder press, you get a lot of front delt and some middle delt. Doing the reverse-grip shoulder press really brings those elbows forward, and now we're really hitting a lot of the front delts, but also some of the upper pecs are involved.
Then when we do the behind the neck, what the behind the neck allows for is it keeps those shoulders out to the side and again you've got to be careful on this exercise because of the rotation of the arms in that position. You want to stop when the barbell is about top to mid ears, lower ears at the lowest—you don't want to go any lower because that's going to put stress on a lot of those smaller muscle groups, particularly the rotator cuff muscles.
If you do it light enough—and like I said, watch that range of motion, don't go too low—you'll be perfectly fine unless you have a shoulder injury. If you have a shoulder injury, what I would do here instead of the behind the neck shoulder press is use dumbbells. The dumbbells allow you that same freedom of getting those elbows out to the side but you don't have to keep the bar behind the head, so it's not rotating that upper arm as much, putting stress on those rotator cuff muscles.
If you find that the behind the neck barbell press bothers your shoulders—and remember the goal here is to maximize that middle deltoid head on shoulder presses with the behind the neck—use dumbbells, and make sure you're focusing on keeping those elbows out to your sides.
Then with traps, we get into the barbell shrug from the front. Then we go to barbell shrug behind. So here we're hitting upper traps with a normal shrug—behind the back, still upper traps, but also we start using those middle traps to some degree, and it works on what we call that upper-middle trap tie-in, helps to hit more of the back portion of the upper traps and then gets into the middle traps.
And then we have what I call the barbell behind the back upright row, which looks similar to an upright row but from behind—I'll see if I can do this much weight, this is a bit heavy. But basically what you're going to be doing is holding the barbell with an underhand grip behind the back, and then simply bringing it up as high as you can just like an upright row, but behind the back. This is hitting those middle traps, also the rear delts. A little heavy, though, to be able to demonstrate that one properly. You want to go a bit higher, so drop the weight, but for timing purposes, I'll leave it at that.
After the traps we'll do calves, then triceps, biceps, forearms, finally abs. Those are our ten exercises. So that's your Small Angles tutorial. For those of you just tuning in, remember I will make this live session accessible as a video right on my Facebook channel. It'll also be available on—for those of you who have Instagram—I think for 24 hours they'll keep it available. But on Facebook, you can go back.
For those of you who haven't gotten to my Small Angles training yet, whenever you get to it—wherever you are in the New Year's Challenge, or whenever you decide to go do it on your own—like I said, it's a free program, you can access it anytime—go back to today, my Facebook page, to find this live tutorial which will then be a video, and you'll be able to watch it again.
Also, for those of you who have questions, I can't see your questions right now because the screen doesn't face me when I do these live sessions. Unless I have someone here reading questions I don't get to see your questions, so I can't really answer them.
The best way to get your questions answered is to post your question right under—when I take this live session and save it to my Facebook page, you'll be able to go there, find that—it'll be a video that you can watch or just comment on—and right there you can make your comment on this post, and that question—I'll get you an answer, probably within the next 24 hours. So post your questions under this video, when I make it accessible on Facebook in about five minutes, and I'll be sure to get you an answer sometime by tomorrow.
Thank you guys for tuning in. I hope you had a great weekend. I hope you continue to enjoy your weekend and your Sunday, and you're ready to crush the week starting Monday. For those of you doing the challenge, I'm watching you guys. I see you guys posting your photos just like I'm doing—I'll be doing that later today. Get my newspaper for the day, take my progress photo, and post it up there so you can see that I'm accountable doing my workouts and posting my progress right along with you guys.
Proud of you guys, I see you guys every single day making great progress and enjoying the variety in this challenge. Happy weekend, JYM Army. I will see you guys real soon. Have a great weekend, and stay JYM Army Strong. See you guys.
Related Articles

The transcript of my live Facebook tutorial breaking down all the techniques in my New Year's Challenge

The transcript of my live Facebook video offering details and tips on Week 2 of my Countdown to Strength Challenge

The transcript of my live Facebook tutorial breaking down Week 3 of the Countdown to Strength program.

In between programs or taking a week-long break from the gym? Stay active at home with these 7 daily “mini-challenges.”
Foundations
Featured Meal Plans
Muscle Hypertrophy: Build Muscle Fast
Rethink Your Rep Range
The Science of Strength Bands
Training
Nutrition
Supplementation
Health