There's no denying how impressive a well-developed back can be. For many reasons, targeting the muscles of the back—particularly the lats—can be a challenge for some. In this workout breakdown you'll find my best tips for stepping up your back training, as well as workouts that will have your back looking thicker, wider, and stronger than ever.
Front Squats for a Stronger Core
The core muscles are those that wrap around the spine front to back. That means that the core is composed of not just the superficial and deep abdominal muscles, but also the spinal erectors in the lower back. Since core strength can aid your strength on most exercises, you want to be sure to hit this group of back muscles. While most trainers would recommend a core-strengthening exercise known as the Superman to hit the spinal erectors, another option appears to be the front squat.
That's right: The front squat—an exercise that I love to do to focus on the quads—may also be a way to train both your quads and your spinal erectors, according to researchers in the UK. That's my kind of multitasking! The UK researchers compared the muscle activity of the spinal erectors when strength-trained men performed the Superman exercise on an exercise ball and the front squat using an empty bar.
They reported in a 2011 issue of the Journal of Strength and Conditioning Research that the front squat increased muscle activity of the spinal erectors by 5% more than the Superman exercise. Despite the fact that the front squat was done with an empty bar, the muscle activity of the spinal erectors was greater than the Superman exercise. As you add weight to the bar, the muscle activity of the spinal erectors will be increased even further.
Jim's take-home point:
Due to the fact that the bar is placed on the front of the shoulders during the front squat, and therefore the torso must remain further upright during the front squat than the traditional back squat, the front squat is a lesser-known exercise for strengthening the spinal erectors.
While adding front squats to your leg workouts is a great way to focus more on the quads, it’s also a great way to simultaneously strengthen the spinal erectors of the lower back. Since it's tough to train all your major body parts, let alone find the time for specialized core training, I recommend using the front squat frequently to not only build bigger quads, but also a stronger core, which will help to further increase your strength on exercises like front squats!
Build a Bigger Back with Wrist Straps
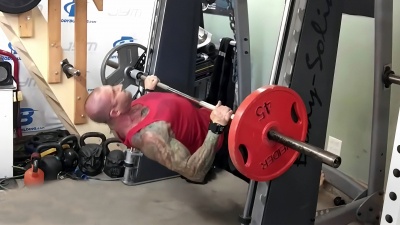
In the video below, I offer a ringing endorsement for using wrist straps when doing back exercises.The reason is simple: Because on so many upper-body pulling exercises—like pull-ups, as I demonstrated in the video—your gripping muscles of the hands and forearms fatigue quicker than your back muscles.
As a result, the muscles you're specifically trying to train (namely the latissimus dorsi, or lats) often aren't getting fully stimulated because you're forced to stop multiple sets when your grip gives out. In essence, at least where your back is concerned, you're stopping sets prematurely.
This defeats the whole purpose of training back! And that's precisely why I use wrist straps. The straps themselves literally help you hold onto the bar so that your hands and forearms aren't doing so much work and thus fatiguing before your lats do. The straps also make it easier to use the thumbless grip that I prefer for achieving full mind-muscle connection to target the lats.
But straps aren't just good for pull-ups: In the research study I mentioned in the video, and which I presented years back at a National Strength & Conditioning Association annual meeting, the trained subjects also used straps on lat pulldowns and seated cable rows, in addition to pull-ups, where they were consistently able to squeeze out 1-3 more reps per set without having to decrease weight or do rest-pauses. That's at least a 10% increase in reps performed by simply using straps—it's a total no-brainer on back day!
For a full back workout using wrist straps similar to the routine I used in my study, click below:
View and Download Workout Here
Use your choice of wrist straps for all sets of all exercises in the workout. (My preferred straps are Versa Gripps.) I like using techniques like rest-pauses and drop sets for back, but in this workout I chose not to because if you typically don't use straps, the extra reps you'll achieve with them will provide sufficient intensity and training volume. Be sure to take every set to failure.
Bodyweight Extended Sets for Back
Some of you may have seen my extended set finisher for chest. Now it's time for back.
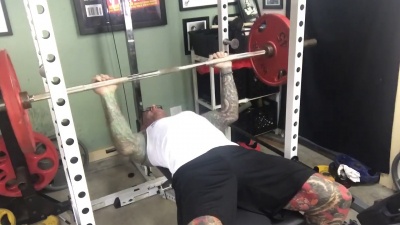
For chest, the extended sets involved three different variations of cable crossover. Here, you'll only be using two movements—both bodyweight exercises—to fully exhaust the large muscles of the back (namely, the lats, rhomboids and middle traps). Those two exercises being pull-ups and inverted rows. You could technically also call this a compound set: Two exercises performed back-to-back for the same body part. Conveniently, you'll do both exercises on a Smith machine to limit rest time between the two.
What I love about this particular extended set is that you're hitting the back with two distinct motions: A pull-up/pulldown movement, and a row. As I've mentioned numerous times over the years, pull-ups/pulldowns and rows are the two major types of compound exercises you can do for back. This extended set incorporates both, whereas the chest extended set only dealt with flye movements—no presses.
Here's how the back extended set is performed:
Set the bar of the Smith Machine at its highest possible setting for pull-ups. This won't be as high as a typical pull-up bar, but that's okay—just bend your knees to reach full arm extension at the bottom. Do a set of pull-ups to full muscle failure.
After hitting failure on pull-ups, immediately lower the bar for inverted rows. The bar height should be such that at the bottom of each rep your arms are at full extension with your back barely above the floor. Do a set of inverted rows to failure to complete the extended set. Rest 2-3 minutes, then repeat for a total of 3-4 sets.
Not much to it, right? This is a very straightforward workout, but it's also very challenging due to the simple fact that most people have a hard time doing bodyweight pull-ups for high reps to begin with—and now I'm adding inverted rows right after that! It's tough, but trust me, you'll love that "brute strength" feeling you get after doing this combination of exercises for a few weeks or so.
Because of the high degree of difficulty, I recommend doing these extended sets at the beginning of your back workout when you're fresh. (Recall that I advised doing the cable crossover extended sets at the end of your chest workout—this routine is a different beast.) In the below workout, I follow the extended sets with lat pulldowns and machine rows and finish things off with straight-arm pulldowns for some isolation.
Let me know how you like this workout by reaching out to me on Facebook or Twitter. And share your thoughts in the JYM Army Facebook group as well.
Download This Workout
Watch this YouTube video for a demonstration of me doing the pull-up/inverted row extended set on a Smith Machine:
And in this other video, I show you a trick for doing the pull-up/inverted row extended set on dual cable station that has a pull-up bar. You probably never thought you could do inverted rows on this machine!
Pull-ups Times Four
Interested in a wider, thicker back with no messing around and no frills? You've come to the right place!
I shot a video (posted below) The JYM showing you a few different variations of pull-ups and how to do them. Now, I want to offer you a workout utilizing this advice and taking it to the next level for a complete workout that will develop both width and thickness in your back by hitting this large muscle group from all angles.
The workout starts, of course, with pull-ups. Not only are pull-ups one of the best exercises for developing overall size and strength in the back, but because pulling your bodyweight up to a bar is such a challenging thing for most people, it's a good move to start with while your muscles are fresh.
In the video, I demonstrated wide-grip overhand pull-ups, close-grip overhand pull-ups, and negative rep pull-ups. Perhaps you'd typically pick one such variation and stick with it for all sets—but not this time. On each of four pull-up sets, you'll do a different variation—including one variation not covered in the video. Here's how it breaks down:
- Set 1—Wide-Grip Pull-Up: This will target the upper lats and overall back width. Make sure your grip is outside of shoulder-width.
- Set 2—Close-Grip Pull-Up: This version will emphasize the lower lats. Don't go too narrow on these; right at shoulder-width is fine.
- Set 3—Chin-Up (not shown in the video): Here, you'll flip your hands around to a reverse grip (palms facing you) to target the lower lats again—albeit from a slightly different angle—while also hitting the biceps a little bit more. Shoulder-width or slightly inside that will work here.
- Set 4—Pull-Up Negatives: Go back to a wide overhand grip for these. Negatives are a great way to finish an already intense back workout. On each set, lower down on the eccentric portion (negative) as slowly as possible, shooting for at least a 5-second negative. For the positive portion, either jump up to the top of the rep or step up to it using a bench, box, or bar in a power rack. I recommend not trying to do the positive as a standard rep because the point here is to save your muscles for the super-slow negative, which will be very taxing.
Rep counts are pretty simple with pull-ups in the workout: Take each of the first three sets to failure, and do 3-5 negatives on the fourth set. How many negatives you can do will depend largely on how fatigued your back is at that point and how slowly you do the first couple eccentric reps. Give yourself ample rest between sets so that you're strong on every one. I recommend rest periods of 2-3 minutes, but if you're good at pull-ups and want to pick up the pace, feel free to drop that to 1 minute between sets.
But the workout's not over—just the pull-up part of it is! As long as you're doing arguably the best mass-building exercise for back in the workout, you might as well do the other exercise that people argue is best for packing on size: The barbell bent-over row. (And yes, another exercise people say is the best for building the back is the deadlift, but that's more of a full-body/leg movement than a dedicated back exercise.) You'll do four sets of barbell rows to promote overall thickness in the back.
After four sets of pull-ups and four sets of barbell rows, your back (and probably your biceps, too) will be pretty spent. So you'll finish with lower volume (five total sets) of two cable back exercises—wide-grip lat pulldowns and one-arm seated cable rows. I made the rows unilateral because every other exercise in the workout is done two arms at a time; adding in some one-arm work will encourage balanced development from side to side. Rest 1-2 minutes between sets of lat pulldowns, and go back and forth between arms on the cable rows with minimal rest.
Normally I'd include some sort of intensity-boosting technique like rest-pauses or drop sets, but I don't think this workout needs it. Follow this workout with a smaller muscle group—biceps or triceps, for example—and/or some HIIT cardio, or let it stand on its own on a dedicated back day.
What you have here is a no-nonsense workout that's great for promoting upper body pulling strength as well as slabs of muscle. Let me know how you like it!
Download This Workout
Cable Crossover Pulldown: a Unique Move for a Wider Back
What happens when you combine a cable crossover and a wide-grip lat pulldown? You create bigger lats and a wider V-taper, that's what!
As anyone who follows me knows, I love to get creative and come up with new exercise variations to target specific—often hard to reach—areas. My latest move is the Cable Crossover Pulldown.
Don't let the "cable crossover" part of the name fool you—this is strictly an upper back exercise, not a chest/back combo move. The cable crossover pulldown targets the upper lats as well as the smaller teres major muscle that, when fully developed, helps create width in the back.
For a full demonstration of how to perform cable crossover pulldowns, check out the video below. As you'll see by watching it, the key technique points of the exercise are this:
Kneel down on the floor in the middle of the cable crossover station so you can reach complete arm extension and a full range of motion; I even recommend dropping your butt down toward the floor to lower yourself even further. The pulleys, of course, should be at the very highest setting on the cable column.
I prefer a "thumbless" grip on this exercise (and many other exercises, for that matter) to maximize upper lat and teres major involvement and de-emphasize the biceps. The movement involves initiating the motion with your lats and bringing your elbows into your sides as well as slightly behind you. If you do it right, you'll definitely feel those upper lats and teres majors getting worked. At the bottom of each rep, squeeze hard to really feel the full contraction.
Because weight stacks limit how much weight you can use, you'll be going relatively light on this exercise. Just make sure you keep the movement under control and really focus on a great mind-muscle connection and that "squeeze" I just mentioned. Due to the lighter weight, place cable crossover pulldowns near the end of your back workout and shoot for higher rep counts to take each set to failure.
Now that you see how to do the exercise, let's plug it into a back workout. The below routine finishes with cable crossover pulldowns after starting out with two big-time mass-builders for the back—pull-ups and barbell or T-bar rows. This is a great workout for developing both width and thickness in the back. Insert it into your training split wherever back comes up, and feel free to follow it up with whatever other body part(s) you'd normally pair with back.
Download This Workout
Reverse-Grip Pulldowns for Stronger Lats
One of the keys to maximizing specific muscle growth is to stress the targeted muscles with weight. The combination of sets, reps, and rest periods are still all factors for muscle growth as well, but the phrase “Go heavy or go home” is still a good rule to follow.
I’ll never sacrifice technique for weight, but I see many in the gym who don't really push themselves as much as they should—although some push too much and allow their ego to take over. This is not what I am suggesting of course, but your goal should always be to maximize the load. However, certain movements can sometimes limit the amount of weight that can be lifted, thus not stressing the muscles in ways that go beyond what they are capable of moving.
So looking at ways to still emphasize the muscles and give them the stimuli required for the growth you're looking for can be as easy as switching your grip or the angle in which you are moving the weight. In certain movements, having other muscle groups assist in lifting heavier weight can lead to more muscle growth in the target muscle.
When looking to grow your back, and more specifically the lats, the Reverse-Grip Lat Pulldown is a great exercise to target the lower lats. In combination with other lat movements such as the wide-grip lat pulldown, this is one of my favorites.
Wide-Grip Lat Pulldown
Reverse-Grip Lat Pulldown
Over and Under Back Workout
Try this workout, which utilizes both wide-grip and reverse-grip lat pulldowns. This little gem is yet just one more way to mix in a great back routine into an already existing program. Variation is key so even though you might be using some of my other routines, it is still very important every now and then to try something new. With this program, I designed it to be plug and play when integrated with a current program.
Download This Workout
Lat Pulldown Extended Set Workout
I get this question from time to time: “When I train lats, I can never feel them like I do when I train chest or biceps. Are there any good exercises that will really make me feel it in my lats?”
Thing is, the lats are generally a tougher muscle group to feel. For one, almost every exercise you do for lats is a multi-joint move involving numerous other muscle groups. Plus, it’s not one of the “mirror muscles” you can easily see like the pecs, biceps or abs, which creates something of a disconnect with this muscle. That said, I have just the exercise—actually, exercises, plural—you need to feel the lats, even if it’s the next day when delayed-onset muscle soreness (DOMS) is making them scream.
I’m talking about one simple movement, the lat pulldown, performed with multiple variations: behind-the-neck lat pulldowns, wide-grip pulldowns to the front and reverse-grip pulldowns. You’ve probably done all these variations without ever feeling them in the lats. The difference this time is that you’ll be doing them back-to-back-to-back (in the order I just listed) as an “extended set.”
Extended set training is a technique that involves variations of a single exercise to make the movement less difficult, which allows you to continue the set with the same weight and take your muscles far beyond their normal point of fatigue. Each successive variation of the exercise places your body in a biomechanically stronger position than the previous one, making the weight feel easier so that you don’t have to lighten the load.
To do extended sets on pulldowns, start off with lat pulldowns behind the neck. Then, when you reach muscle fatigue, immediately switch to wide-grip pulldowns to the front, an easier version than behind the head. Once you reach failure again, finish the set off with reverse-grip pulldowns, the easiest variation of the three. By the time you finish your first extended set, you should already feel your lats begging for mercy. Wait until you complete all three sets in this manner!
Watch this video see me perform this extended set:
As you'll see in the following workout, three grueling lat pulldown extended sets are followed by the remainder of your back workout. But don't worry, it's all straight sets after that!
Training Tip: I highly recommend wrist straps for this extended set. It will prevent your grip from being the weak link, which will allow you to more effectively take your lats to failure and feel a stronger contraction.
Download This Workout
Hex Bar Bent-Over Row
The hex bar is not only great for shrugs and deadlifts but for bent-over rows, too. When you do bent-over rows with a barbell, your range of motion is a bit limited at the top as the bar touches your abs. But with the hex bar, the bar clears your body, allowing you to pull your elbows up higher in the top position. This helps to increase the muscle-fiber involvement, especially in the lower lat muscle fibers. The neutral grip on the hex bar also allows for another difference from using the standard straight Olympic barbell and an overhand grip.
With the neutral grip, your elbows stay closer to the sides of your body to emphasize the lower lat muscle fibers better. So it's a bit more like doing dumbbell bent-over rows, but with both arms at the same time. Like with barbell bent-over rows, I prefer to do hex bar bent-over rows by returning the bar to the floor. So these are technically power hex-bar rows.
One other advantage of the hex bar is that the weight stays closer to the body, which places less stress on the lower back. This makes this version of rows better suited for those with lower back issues.
Supported Bent-Over Row
The barbell bent-over row is a great exercise for building thickness and width in the back. In fact, research shows that rows may be a better exercise for targeting the lats than pulldowns. That's why I always recommend doing a fair share of both rows and pulldowns in every back workout.
But for some people, the bent over row can place a lot of stress on the lower back. That can be counterproductive if you have lower back issues. If this is the case for you then let me recommend a new exercise that I call the Supported Bent-Over Row. Not only will this exercise remove stress from the lower back, but it can help you to place more focus on the lats. So I recommend that everyone gives it a try.
To do the supported bent-over row, set an incline bench so that the top of the bench is just below hip height. Grab a loaded barbell with an overhand grip and bend over from the hips to rest your chest on the top of the bench. Keep your knees bent and allow the barbell to hang straight down below your chest. Maintain the arch in your lower back and use your lats to pull the bar up into your stomach then slowly lower the bar back to the start and repeat for reps.
Not only does supporting your chest on the bench remove a good deal of stress from the lower back, but it also makes the bent-over row a much stricter move. It prevents you from using the legs and lower back to get momentum on the bar and forces your lats to do all the work throughout the entire range of motion. Although this will limit the amount of weight you can use, the stricter form will cause you to use more lat muscle fibers, which can help to build greater lat mass.
Alternative with Dumbbells
You can also do the supported bent-over row with dumbbells for an even greater range of motion on this exercise. To do the supported bent-over row with dumbbells get in the same position with your chest supported on the top of the bench, your knees bent, and your arms hanging straight down below your shoulders while holding the dumbbells. Pull the dumbbells up towards your hips, bringing your elbows up above your back as high as possible. Then slowly lower the dumbbells back to the start and repeat for reps.
Because you do not have to stop the movement when the barbell hits your stomach, as it does when you use a barbell, the dumbbells allow you to pull them higher in the top position of the row. This can help to stimulate even more muscle fibers in the lats, especially the lower lat muscle fibers.
So try the supported bent-over row the next time you train back. Head to my workout section and check out my Full Support Back Workout, to see how to incorporate this exercise into your back workouts.
Download This Workout
Power Rows for a Bigger, Stronger Back
To simultaneously train for strength and size in the upper back, no exercise beats the bent-over barbell row. This multijoint move demands the involvement of a boatload of muscle groups, including the lats, traps, rhomboids, delts, biceps, and forearms, just to name a few of the larger muscle groups that contract to heave a loaded barbell toward your midsection. Speaking of the midsection, bent-over rows are also great for developing core strength and stability.
One way to get even more back strength and mass from the barbell row is to do it in a power rack—a specific variation of the movement known as the Barbell Power Row.
Power Row Benefits:
The major benefit of the power row is overload. Pausing between reps with the bar supported on the pins allows you to pull more weight—and heavier rows translate to a bigger, stronger back. Not only will this look impressive, but it also carries over into other lifts. Don’t be surprised if your bench press strength goes up after doing power rows consistently for a matter of months or even weeks.
The other benefit of the power row is back safety. Many lifters suffer from lower back pain and injuries, but power rows allow you to relieve much of the stress on the lower back due to your body mechanics during the row and the support from the pins.
One quick caveat worth mentioning: Using the pins in the power rack does limit the amount of stretch your lats get with this exercise. When adding power rows into your routine, be sure to also include other rowing exercises like standard barbell rows, dumbbell rows, and seated cable rows to allow the lats to work through a fuller range of motion.
Power Row Technique:
- Set the safety pins in a power rack to a point where the bar rests on them in the bottom part of the row. To find the ideal pin position, stand in the rack holding an unloaded bar with a shoulder-width overhand grip. Bend at the knees as if you're doing a quarter squat, then bend at the hips until your torso reaches around 45 degrees with the floor. Allow the bar to hang straight down from your shoulders with your arms full extended. The pins should fully support the bar in this position.
- To perform the exercise, start with the loaded bar resting on the pins.
- Grab the bar with an overhand shoulder-width grip, assume the 45-degree torso angle, and make sure your lower back is flat (not rounded) before doing the lift.
- In a fast, explosive motion, pull the bar up to your waist, maintaining roughly the same 45-degree torso angle.
- Lower the bar back to the pins under control.
- Let the bar sit on the pins for a couple seconds while you settle yourself, then go into your next rep.
- Training Tip: Regarding weight selection, alternate between heavy and light loads. Use heavy weight in some workouts for overload, and light weight (stopping short of failure, still in the 5-8-rep range) on other days for more power.
Here's a sample back routine incorporating the power row. Perform this workout on its own or with smaller body parts (ie, biceps, triceps and/or abs) trained after.
Download This Workout
Four Inverted Row Workouts
In my four-part series of Video Tips of the Day on inverted rows, I broke down various aspects of this great compound exercise for building size and strength in the back. Here's the breakdown of those videos, all of which are embedded below as well as contained on my YouTube channel in case you missed them:
Video #1: Inverted Row Basics
Video #2: Inverted Row Body Position Tweak
Video #3: How to Make Inverted Rows Easier
Video #4: How to Make Inverted Rows Harder
Check out these videos for full demonstrations on proper technique on this exercise. Once you have your form down, it's time to work inverted rows into your training routine. Below are four different inverted row workouts I came up with exclusively for JimStoppani.com members. Plug any of them into your training split on back day and watch your pulling strength (and size) start to creep up.
Inverted Row Workout #1: Straight Sets
The inverted row is a no-nonsense, compound exercise for the back similar to a pull-up, but easier for most people and utilizing a rowing motion, so it's perfectly appropriate to use as your first exercise in a workout. When doing so, perform whatever variation of inverted row corresponds to your strength level and proficiency in the exercise. For example, if you're weak on inverted rows, do one of the easier variations (bar set higher in the Smith machine, knees bent, etc.), as described in Video #3 below. In that clip, I recommend doing inverted rows first in your back workout if it's a difficult exercise for you.
However, those strong on inverted rows can do it first as well; in this case, I recommend doing weighted inverted rows to make the exercise more difficult. See Video #4 below to see me demonstrate this and show you other ways to make inverted rows more challenging.
Download This Workout
Inverted Row Workout #2: Pre-Exhaust Finisher
This workout is intended for individuals who are strong on inverted rows. Two things make the exercise more difficult in this routine: (1) the fact that inverted rows are performed at the end of the workout when the back muscles are fatigued from earlier exercises, and (2) that the back is pre-exhausted with straight-arm pulldowns in the compound set with inverted rows. (Quick refresher: A compound set is simply a superset incorporating two exercises for the same muscle group.) Video #4 discusses this topic. And as with the first workout, do whatever version of inverted row that corresponds to your strength level on the exercise.
Download This Workout
Inverted Row Workout #3: Inverted Row Ladder
The inverted row ladder is essentially one big drop set, where raising the bar up the machine every time failure is reached makes the movement slightly easier—the equivalent to lightening the weight on a drop set of a typical lifting exercise. In this example, I'm using the inverted row ladder as a finisher to a back workout. However, the ladder could serve as an entire back workout if you're short on time, want to keep your back workout limited to one piece of equipment (a Smith machine), or just want a change of pace. If the inverted row ladder is the only exercise you're doing in your back workout, I recommend going through it 2-3 times, with 2-3 minutes rest between ladders, if time allows.
Here's how to perform the inverted row ladder: Using a Smith machine, start with the bar set at the lowest setting possible, where your arms are fully extended in the down position with your body completely off the floor and only your heels touching. Perform a set to failure with this body position. Once failure is reached, immediately raise the bar up one notch and rep out to failure at that slightly easier setting. Repeat in this manner, raising the bar one notch every time failure is reached, until you've completed one last set to failure with the bar at the highest setting possible (the easiest version of the exercise). That's one complete ladder.
Download This Workout
Inverted Row Workout #4: Weighted Inverted Row Extended Set
The extended set here is similar to the ladder in the previous workout—reaching failure and then immediately going to an easier version of the exercise and repping out again. In this case, you'll start with a weighted row and your feet elevated on a bench in front of you (the most difficult version; see Video #4 for demonstration).
When you reach failure, shed the extra weight by either taking off your weighted vest, getting out from under the elastic band, or taking the weight plate off your chest and setting it aside. Go right into the next part of the extended set: repping out to failure with no additional weight and your feet up on the bench. Then, take your feet off the bench and rep out again with your heels on the floor. After reaching failure, bend your knees to around 90 degrees with your feet flat on the floor and rep out to failure once again. Repeat two more extended set protocols in this manner, resting 2-3 minutes between each.
Download This Workout
Compound Your Growth with Compound Sets
If you're looking to add some thickness to your back, I've got a great rowing compound set for you (which I covered in the below video). Again, in case you're not familiar with compound sets, they’re the same as supersets (two exercises performed back to back without resting)—except that both exercises train the same muscle group, not opposing body parts.
In this compound set, you'll be pairing bent-over rows and (bodyweight) inverted rows. In the video, I demonstrated the bent-over rows on the Smith machine simply because that's where I prefer to do inverted rows; doing both exercises on the same piece of equipment minimizes time between exercises to maximize intensity. But if you'd rather do barbell rows (particularly if the Smith machine is close by or if you're doing your inverted rows using the same squat rack as your barbell rows), feel free to do so. For that matter, you could swap in bent-over dumbbell rows if you like—for example, if you're training at home and you have dumbbells and no barbell and you also have some TRX bands for inverted rows. Point being, there are any number of variations you can use for this compound set, but the general premise is to do a bent-over row and a bodyweight inverted row.
This is a fairly advanced compound set, since (1) bent-over rows are a big compound movement that can take a lot out of you, and (2) because inverted rows are an exercise not everyone can do well because they involve a level of strength that requires you to pull your own bodyweight up to the bar. To get the most out of this workout, you'll want to be sure you can do a decent number of inverted rows, to begin with, especially since you'll be doing them second in the pairing after bent-over rows. With the compound sets here, you'll want to be getting at least 5-6 reps on inverted rows on the first set. Another option if inverted rows aren't quite in your wheelhouse is to swap the order of exercises—do the inverted rows first, then the bent-overs.
As I briefly touched on above, to perform the compound set, do a set of bent-over rows to failure, then immediately go to inverted rows (without resting) and take those to failure as well. I recommend taking about a 2-minute rest before completing the compound set. Do 3-4 compound sets total, then finish your back workout with pulldown or pull-up movements, since the compound sets are very "row-centric."
Below is a sample workout I put together, where the bent-over row/inverted row compound sets lead off the routine. I mentioned exercise substitutions for the rows above, but you can also sub in exercises for the pulldown moves I list in the workout. If you prefer a Hammer Strength or Cybex-type machine for your lat pulldown, feel free to do that. Or, if you're strong on pull-ups and want to do those, that's fine too. I didn't write pull-ups into the workout simply because I figure most people will be so fatigued in the back (as well as the biceps to an extent) after the compound set that their pull-up sets later on would suffer.
Here's another option for advanced individuals who want to further add some intensity and volume to the compound sets: On the last 1-2 sets, do two-rest pauses on the inverted rows. So, after initially reaching failure on inverted rows, rest 10-20 seconds and go to failure again. Repeat this one more time for a total of two rest-pauses. Doing rest-pauses is a simple (yet brutal) way to get your inverted row reps up a bit. Instead of doing, say, 3-5 inverted rows, you'll be able to do more like 8-12 using rest-pauses depending on your strength and proficiency on rows.
Give this routine a try and let me know how you like it.
Download This Workout
Pre-Exhaust Back Workout
In the video below, I covered an effective modification for straight-arm pulldowns that allows you to go heavier than normal to overload the lats for greater stimulation and growth. Basically, you face out from the machine so that you can use the apparatus itself to brace you. Check out the video for a full demonstration and explanation.
This modification is a no-brainer to use when pre-exhausting the lats, as straight-arm pulldowns are one of very few single-joint/isolation movements for the back. Dumbbell straight-arm pullbacks are another, but there aren't very many such exercises. I really like pre-exhaust for back because a lot of people have a hard time minimizing biceps involvement on pulling exercises like pulldowns and rows—it takes a pretty strong mind-muscle connection to target the lats and fully exhaust them before the biceps give out, and a lot of beginning and intermediate trainers are still getting the hang of it.
That said, below is a basic pre-exhaust back workout with straight-arm pulldowns leading things off. Of course, I highly recommend using the video tip on that first exercise so you can go as heavy as possible to maximize fatigue in the lats before moving onto the other three exercises, all of which are multi-joint movements. Give it a try next time back day rolls around.
And for a slightly more advanced version of this workout, feel free to superset the first two exercises so that straight-arm pulldowns pre-exhaust the lats immediately before every set of standard lat pulldowns. (Since the two exercises train the same body part this is technically a compound set, but same difference.) Supersetting will also save you some time since you're only resting after the second exercise.
Push yourself on the straight-arm pulldowns in terms of weight—the objective is to go as heavy as humanly possible with strict form for all sets. Just make sure your back is fully warmed up before that first working set; I recommend doing a couple light warm-up sets of straight-arm pulldowns and lat pulldowns beforehand.
Seated cable rows can be done with either a wide grip or narrow grip—whichever you prefer, though I recommend switching back and forth from workout to workout to promote variety.
Rest 1-2 minutes between all sets of all exercises.
Download This Workout
Related Articles
-
 Back-Building Workout: Compound Your Growth
Employ this brutal compound set of bent-over rows and inverted rows to build greater width and thickness in your back.
-
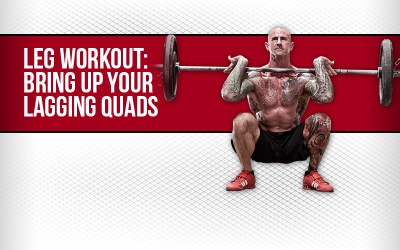 Leg Workout: Bring Up Your Lagging Quads
Get bigger, more defined quads with this brutal compound set routine of squats and leg extensions.
-
 Performing 21s on Bench and Back
A transcript of my tutorials on using the 21s method on bench press, back exercises, and beyond
-
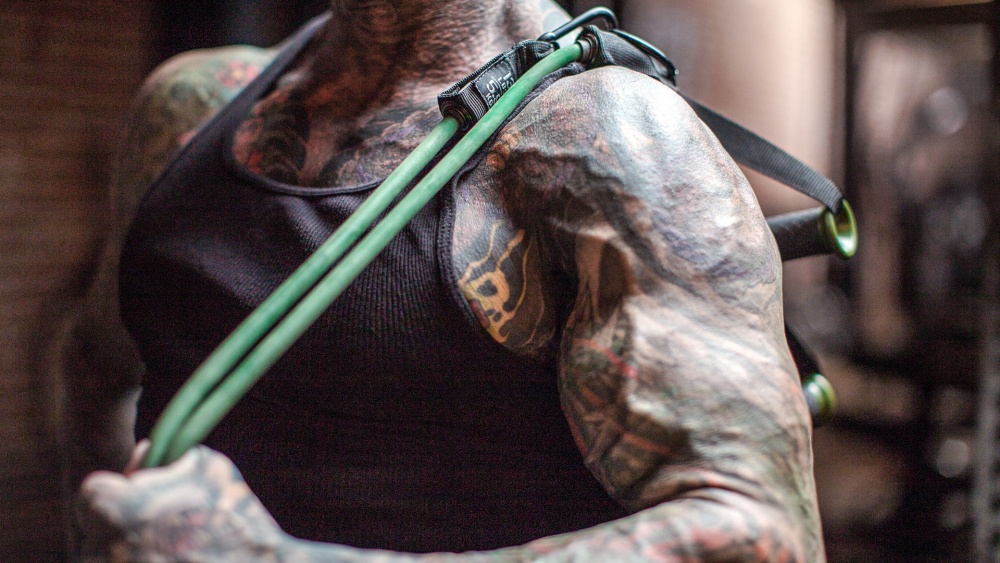
 JYM Band Workout Breakdown
Exploring the many ways you can utilize resistance bands alone or incorporate them into your current program to enhance your workouts—and your results.


Foundations
-
Featured Meal Plans
-

Muscle Hypertrophy: Build Muscle Fast
-
Rethink Your Rep Range
-
The Science of Strength Bands

Training
- The Best Shrug Variations for Building Bigger Traps
- How to Train After 35 to Keep Building Muscle
- How Often Should You Train Each Muscle Group For Size and Strength?
- The 5 Biggest Muscle-Building Mistakes Advanced Lifters Make
- Isometrics vs. Full ROM Training: New Research Challenges How We Think About Muscle Growth
Nutrition
- The High-Protein, Smart-Carb Strategy for Losing Fat and Keeping Muscle
- Broccoli’s Cancer-Fighting Benefits: Why Raw May Be Better Than Cooked
- Vitamin C for Gut Health: How It Boosts Your Microbiome and Immunity
- Does Drinking More Water Help You Lose Fat? Research Says Yes
- A Simple Bedtime Protein Ritual for Better Overnight Muscle Growth
Supplementation
- Should Women Take Creatine? Here’s What the Science Says
- Vitamin C for Gut Health: How It Boosts Your Microbiome and Immunity
- BCAAs for Fatigue and Performance: New Research Shows Major Gains
- Combat Brain Fog with Creatine
- Should You Take Creatine Every Day? Here's Why You Should!
Health
- What Is a Normal Testosterone Level for Men? Here’s What the Research Says
- 5 Ways to Burn Fat Today
- High-Protein Diets and Kidney Disease
- The Truth About Trenbolone
- Don't Pass It On: Taking COVID-19 to Heart