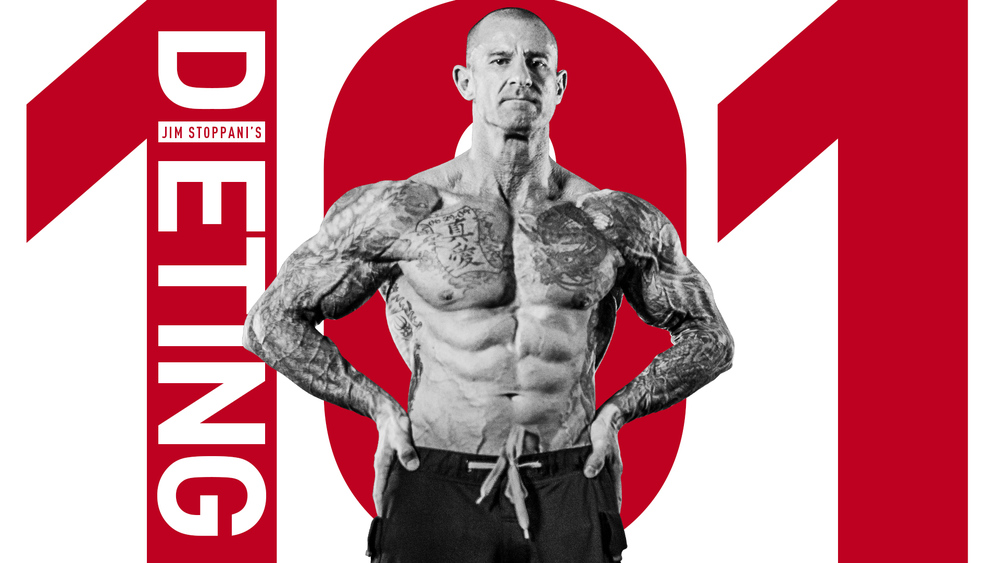
Full-Body MED Training Live Tutorial Transcript
The transcript of my live session breaking down my three-week strength, muscle, and fat-loss program Full-Body MED Training.

The transcript of my live session breaking down my three-week strength, muscle, and fat-loss program Full-Body MED Training.

Note: This tutorial video was recorded as a live Facebook event. The text below is an edited transcript of the tutorial intended to provide members with a convenient means of referring to and further researching the topics and content detailed in the video.
Alright, JYM Army. I've already done Workout 1 of my Full-Body MED Training. For those of you who are following along with my Train with Jim series—this is my free training series, I post these workouts every day. I just did the challenge—my Countdown to Strength Challenge—as the Train with Jim, so now I'm moving into my next training technique, which is going to be Full-Body MED Training. We'll break down what the MED is in just a minute.
This is going to be three weeks of doing MED training full-body style. You can see it'll be two different full-body workouts that we'll do, and we'll be doing these twice a week for a total of four workouts per week. So three weeks, four workouts per week, of these. You can do other workouts, stay active on those what I call "active rest days". I'll be doing some other working out as well like my Med Ball Training.
Now, with the MED Training, I'll break down what the M, the E, and the D stand for. The E—I'm going to start with the E, I'll get back to the M in a minute—the E stands for "Extended Sets". That's one of the intensity techniques that we're using in this program: Extended sets. It's the main intensity technique that we're using, that's really the main gist of this program.
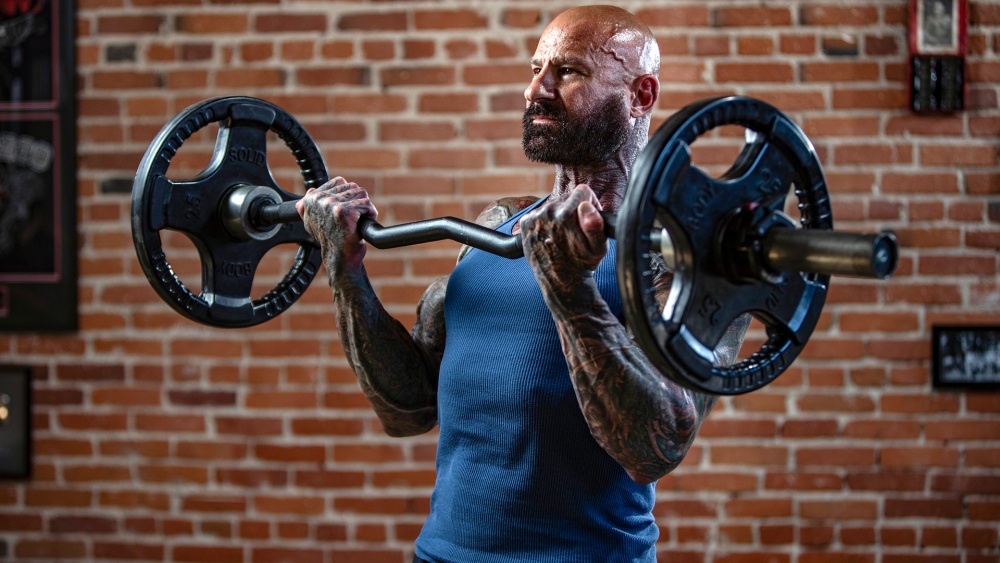
For example, you can see in yesterday's Workout 1, exercises for chest—chest being done first—reverse-grip bench press, right? So you did the reverse-grip bench press. You're selecting a weight that limits you to 8-10 reps. What you're doing is you do the reverse-grip bench press with a weight that limits you to 8-10 reps.
You hit failure, then you immediately flip your grip over to a standard bench press and continue doing reps because you'll be stronger with the overhand grip as you are with the reverse-grip. So when you hit failure using reverse-grip, flipping your grip is going to put you in a stronger biomechanical position, allowing you to continue getting reps with that same weight. That's the extended set part.
The D in MED stands for "Drop Sets". If you look, I put the link up—for those of you watching on Facebook—I put the link up for the Full-Body MED Training completely free for anyone. You don't have to be a member of JimStoppani.com. These are the workouts I'm doing right now. You can do them right along with me, completely free. Look for the link and put it in with the live session, should take you right to the Full-Body MED Training, break down the technique, explaining you're picking a weight that limits you to 8-10 reps on that first exercise. Then you're going to go right into the extended set.
So we're back on the bench press. We do the bench press the same way we did the reverse-grip bench press until we hit failure on the bench press. That's when the drop sets come in. What's a drop set? Well, when you hit failure, a drop set is when you immediately drop some of the weight—we usually do about 20-30% of the weight—and then continue doing reps.
So now you've finished with the bench press—hit failure—now you're going to do a drop set. Drop the weight 20-30% and go back, starting at reverse-grip bench press and doing an extended set with the bench press. That's our drop sets.
Now, the number of drop sets you're going to do depends on your training experience. For those with less than six months, you're only going to do two. If you have more than six months' training experience, you're going to do a third round so then you're going to do another drop set, go back to the reverse-grip bench press, and do the extended set with the bench press. If you have at least a year or more, you're actually going to do four of these if you have over a year of training experience. That's what I'm doing, four of these.
So, front squat—and that's brutal—front squat with the squat. You do your front squat, pick a weight that limits you to 8-10 reps, hit failure on the front squat. Immediately rack the weight—watch my video on doing the front squat on whether you're using the standard catch grip like you do with Olympic lifting, or you can use the cross grip which is more comfortable particularly if you don't have the wrist flexibility—front squat, failure, then into squat, right? Rack it, get under the bar, put it on the back of your shoulders, and do squats to failure.
Drop set 20-30% of the weight, back to front squat to failure. Rack it, back squat to failure. Then I go 20-30% less weight, back to front squat. Failure, extended set into back squat. More again, one last time, 20-30%, back to front squat extended set with back squat. Finally done with legs.
You can see, this is absolutely brutal, which is why I'm only having you do four workouts per week. For those of us with more training experience it's a brutal workout, but even with less training experience—even just doing two rounds of these is pretty brutal if you have less than six months of training experience. It's all relative, in other words, and that's why I have you doing more of these drop sets the more training experience you have. The more training experience you have, the more volume you need to get results.
Let's go back to where we are with the MED. The M means "Micro-Loading". I said this is a three-week program. We're going to do Workout 1 and Workout 2 twice each week. The first time we do Workout 1 and Workout 2, we're going to pick a weight that limits us to 8-10 reps on the first exercise. So in Workout 1, it's the reverse-grip bench press for chest. In Workout, 2, it's the low-pulley cable crossover that I'm picking a weight that limits me to 8-10 reps.
Workout 1, for legs, it would be front squat I'm picking 8-10—not the squat because I'm already fatigued, right? This is my extended set. When I get to the squat I'm just doing as many reps as I can immediately after doing front squats. We're not worried about the weight we're using for squat; we're all basing it on this first exercise for each muscle group.
When I get into Workout 2 for legs it's barbell hack squat with the deadlift; for back, it's lat pulldown and then reverse grip because you're stronger with the reverse grip. Great way to get a lot of variety and, with all of these extended sets and drop sets, you're getting a brutal workout.
But with the micro-loading—like I said, we do Workout 1 and Workout 2, let's say Monday and Tuesday, as I'm recommending them. You don't have to—it's any four days of the week you want. Let's just say, in an ideal world you're doing Workouts 1 and 2: Workout 1 on Monday and Thursday; Workout 2 on Tuesday and Friday. You get Wednesday off from this program. Do something else—go for a hike, just stay active. Do a different workout, if you want to do my Tabatas workout, do my med ball workout, numerous other workouts you can do but take a break from the Full-Body MED, and don't do anything too intense because we're doing a micro-loading. And so let me explain.
Monday, Tuesday, you do Workout 1 and Workout 2. Take Wednesday off, right? You were using the weight that limits you to 8-10 reps on this first exercise. Now, in Week 1, on Thursday and Friday when we do Workouts 1 and 2 we're going to increase the weight on every first exercise. We're no longer going to be using the 8-10 rep. We're going to take our 8-10 rep and increase the weight—by how much? By the smallest amount your gym allows.
Does your gym go down to 5 lbs or 2.5 lbs, or possibly even 1.25 lbs? I don't have 1.25s here yet, but if you go down to 1.25 lbs that means you can increase by 2.5 lbs. Workout 1, reverse-grip bench press: Let's say you were using 225 lbs on the reverse-grip bench press for your 8-10 reps. On Thursday, when you do reverse-grip bench press again, you're going to add 2.5 lbs to each side of the barbell, meaning you're increasing the weight by 5 lbs. If you've got 1.25s, use the 1.25s and increase it by just 2.5 lbs.
With Dumbbells we have 5 lbs increments, so on each exercise—lateral raises, if you did 20 lbs on the first half of the week, the second time we're going to do this—the second half of the week—you're going to use 25 lbs for each dumbbell. So 5 lbs increments, but really it's a 10 lbs increase because you're using both arms. For example, if you're doing a dumbbell bench press and you're increasing 5 lbs in each arm, if that was a barbell it'd be 5 lbs on each side of the bar but it's a 10 lbs increase. Go as small as your gym allows—micro-loading.
So the first time we do this—and make sure that—I put the link on the live session [post]; I added the link to the MED Training so you could pull it up, so you can see how this goes—so the first time we increase it we increase it the second time of the week. On Week 2, the first time we train—Workouts 1 and 2—you're going to increase again by the same amount that you increased the previous week. So, if you went up by 2.5 lbs on the reverse-grip bench press on each side, you're going to go up another 2.5 lbs. Then, when we get into Week 2—the second half, when you're doing Workouts 1 and 2—we now drop back down one level.
So on the reverse-grip bench press, if you were doing 225 lbs the first time you did the workout, second time you're doing the workout you're going to do the reverse-grip bench press—it's 2.5s—it's going to be 230 lbs. Then, in Week 2 when you do the reverse-grip bench press for the first time you're going to increase again by 2.5 lbs—that's 5 lbs total on the bench press—that's up to 235, right?
Then in Week 2, the second half of the week when we go back to doing Workout 1 again, we're now going to step down one level, so we're going to drop 5 lbs—2.5 lbs from each side on the barbell—we're going back to 230 lbs. So now we're at 230 lbs—not all the way back down to where we started at 225. Then, in the final Week 3, we go back up—again, same amount, it'll be 5 lbs total here, and then the second time you'll go up once again.
What this does is sort of waved progression of loading where you go up, and then back, and then up, so it's basically two steps forward, one step back. You can do this pretty much indefinitely, though. I wouldn't recommend doing any one program or any one technique for too long, but you could definitely do this for longer than the three weeks. I'm just having you give it a go for three weeks. So we'll take this for three weeks because then we want to get on to different exercise selection.
We don't want to limit ourselves, although we have two different workouts—four different exercises, remember. Even though it's just two different workouts you're doing two different exercises for each muscle group. So, total, you're doing four different exercises for each muscle group. That's typically what a split-training program—you pick four exercises, do three to four sets total—you're getting plenty of variety as far as exercise selection even though there are only two workouts.
But again, you don't want to stick with anything for too long so after Week 3, when we complete this, we'll move on to the next training technique. I won't tell you what that is just yet, but you can plan on checking that out soon.
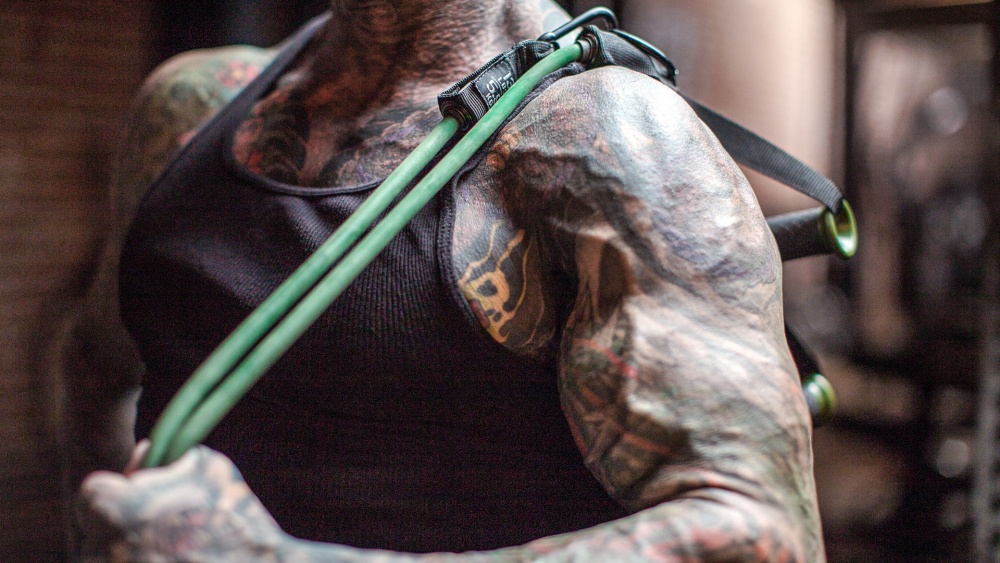
I'm going to show you real quick here, because I'm actually in the middle of doing Workout 2 here, and I'm up to doing the shrugs. I'm going to be doing—just going to demonstrate for you here, I'm actually going to do—although I did this yesterday—barbell behind-the-back shrug. I'm onto Workout 2, so I really should be doing prone incline dumbbell shrug and dumbbell shrug, but it's a little easier to show you in this live session with the standing version versus having to use the bench.
We simply—barbell behind-the-back shrug—choose a weight that limits you to about 8-10 reps, and so I'm going start right off—we'll say I warmed up; I warmed up prior, loading the weights up, even though I got a break here because I've been talking to you guys. Let's say I had my warm-up. Now I'm going to get into the behind-the-back shrug. I'm using wrist straps because remember, I want to maximize my trap use. I don't want to fatigue when my forearms fatigue. If I hit fatigue at those 8-10 reps when my forearms fatigue, well then my traps didn't get the full workout. I want the traps to fatigue, not my forearms. Use your wrist straps here.
You're simply going to do your 8-10 reps, put the weight down, and now I immediately will go into an extended set. I'm going to use the same weight, but now I'm going to do shrugs in the front—standard barbell shrugs—because I'm much stronger in this version and I can continue doing reps even though I hit fatigue on the behind-the-back version. Then I hit failure on the standard shrugs, so now I'm going to do my drop set and then immediately go back to behind-the-back shrugs.
Once I hit failure in the back, then go back to the front. I would just be flipping around, but I want to face you guys while I'm doing these shrugs. Extended set right into regular shrugs, and then I would continue from there dropping weight, going back to the behind-the-back, until I've done that for four—with my training experience—four rounds of that. Four drop sets are going to finish my trap workout. I just did two quick ones, and even going to full failure there for you, you can see I'm already breathing hard.
Great workout, because you keep the movement going. It's intense. It's quick. It's brutal, and it's effective for both muscle growth—because we've got all these intensity techniques: The extended sets and the drop sets—and for muscle strength. So if you followed my Countdown to Strength Challenge and you want to continue building on that muscle strength here's the perfect program because with that micro-loading and that wave cycle that we're doing it's going help to further increase muscle strength.
That's really how I design all my programs, to give you all those benefits: Increasing muscle strength, increasing muscle size, dropping body fat, conditioning—increasing endurance—you're literally getting it all with these workouts.
So that's my Full-Body MED. Like I said, use the link that I put up—if you're on Facebook check out the link that I put up with the live session. Click on that, it'll take you right to the workout, explain the whole program—all for free. And then you can follow me along on my social media as I go through it. I'll be posting tips along the way as well.
If you're on Instagram watching right now, you can go to my bio page, click on that link right there that takes you to a nice what we call the "link tree". It's got a bunch of different links, just look for the one for Full-Body MED. It'll take you right there, all for free. Again, my personal—this is exactly what I'm doing each and every day, you'll be training right along with me.
Check for the tips, and don't forget to go to the JYM Army Facebook group page for all the other JYM Army members. You're training partners. We're all doing this, we're all there putting up our tricks, our troubles, trying to find answers, helping others get the answers, and help everyone stay inspired and motivated to keep continuing to get results and change their lives. Pay it forward, guys. As always, stay JYM Army Strong. I'll see you guys.
Related Articles

I explain how to do the various bodyweight-focused final workout in my Small Angles Full-Body program.

This 3-week whole-body version of one of my classic programs will help you maximize muscle size AND strength.

Instruction and tips for some of the unique exercises used in Week 2 of my Full-Body MED Training program.

A guide to the best men’s workout schedule to build muscle, burn fat, and stay fit.
Foundations
Featured Meal Plans

Muscle Hypertrophy: Build Muscle Fast
Rethink Your Rep Range
The Science of Strength Bands
Training
Nutrition
Supplementation
Health