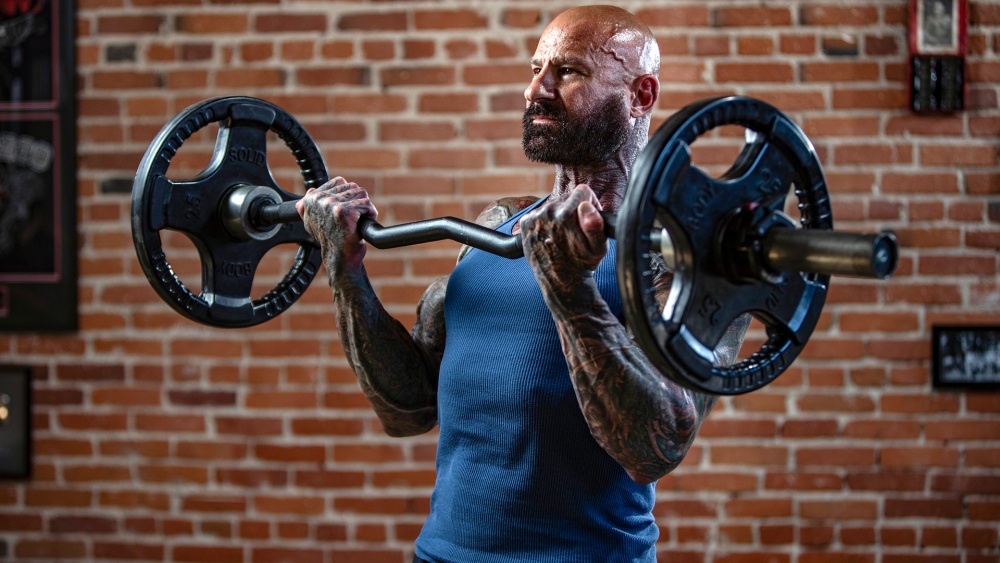
12 Best Exercise Tips & Workouts for Bigger, Better Shoulders
Want bigger, more impressive boulder shoulders? here you’ll find 12 exercise tips and workouts for getting bigger delts fast.

Want bigger, more impressive boulder shoulders? here you’ll find 12 exercise tips and workouts for getting bigger delts fast.

Building bigger shoulders isn’t easy – but if you truly want a muscular-looking physique, they’re a must. Luckily, there are plenty of ways to get bigger, stronger shoulders that emphasize the jacked look you’re after.
The toughest part about working your shoulders is that they play such a huge role in working other muscle groups, like chest and back. By the time you get to focusing on your shoulders, they’re already worn out, but haven’t gotten the focus they need to truly grow.
For most people, this is the biggest reason they just can’t seem to get the shoulders they want. Luckily for you, I’ve got several answers to this problem
Below you’ll find a series of shoulder exercises, training tips, and complete shoulder workouts aimed specifically at building bigger delts so you’ll not only look more muscular, you’ll also be able to better focus on those larger groups that used to rob you of those shoulder gains.
The great thing about delts is that you never have to worry about running out of shoulder exercises. Being a ball-and-socket joint—and a rather unstable one at that, at least compared to the hip—the shoulder moves across multiple planes, initiating such exercises as front raises, lateral raises, rear raises, upright rows and overhead presses.
Multiply that by all the different types of lifting equipment available these days (barbells, dumbbells, cables and so on) and the possibilities for shoulder workouts are endless. Yet, somehow, there are still tons of guys whose delts are unbalanced, whether it’s the front delts overpowering the rear delts or the middle delts getting all the attention.
Even if you're stuck without equipment, I've got you covered with my At Home Equipment-Free Shoulder Workout here.
In this article, you’ll find some of my best tips and shoulder workouts for targeting all three heads of the deltoids, helping you to truly maximize your shoulder development for bigger delts and overall strength and size.
With the first of these workouts, you won’t have to worry about any of your three deltoid heads getting the shaft. You’ll start with a standard overhead barbell press to promote overall shoulder mass across multiple heads—namely the middle and front heads. The reps here (8) are on the low end of the hypertrophy range (8-12), and rest periods are somewhat lengthy (two minutes), so go as heavy as you can while still maintaining good form. A spotter is certainly encouraged when doing any barbell press, both for safety and for helping you get a forced rep or two on your last couple sets.
After presses, you’ll move onto a tri-set of raises—one for each deltoid head. Move from one exercise to the next, resting only as long as it takes you to walk to the next piece of equipment, and take two minutes between each tri-set. The finishing move will be Arnold presses, which will hit both the front and middle delts. By this time, your shoulders will be screaming, so two sets of Arnolds will suffice. If you can’t lift your arms as you’re leaving the gym, that’s a good thing. Don’t worry, they’ll recover.
| Exercise | Sets | Reps |
|---|---|---|
| Barbell or Dumbbell Shoulder Press | 3 | 8 |
| Tri-Set: | ||
| Dumbbell Front Raise + | 3-4 | 12 |
| Dumbbell Lateral Raise + | 3-4 | 12 |
| Dumbbell Rear Delt Raise | 3-4 | 12 |
| Arnold Press | 2 | 10-12 |
Rest 2 minutes between sets of overhead presses and between tri-sets; rest 90 seconds between sets of Arnold presses.
Exercise Options:
Barbell press, dumbbell press, machine press—all versions of shoulder presses you commonly see people doing at the gym. Yet hardly anyone uses the cable station for overhead pressing. Why not?
I have no clue. One-arm cable shoulder presses are a great multi-joint exercise for the delts, and they're especially useful for people with existing shoulder injuries, as you're typically able to adjust the pulley height on the column to limit the range of motion so you don't go too far down at the bottom of the rep.
This isn't just an exercise for people with bum shoulders, though. Cable shoulder presses are a great finishing move for anyone looking to cap off a delt workout with high intensity to spark new muscle growth. Make sure you watch the video below first to learn proper form, then plug the following workout into your training schedule when it's time to hit shoulders.
On one-armed shoulder presses, alternate between sets of each arm without resting—do a set with the right arm to failure, immediately switch arms and rep out to failure with the left, then immediately go back to the right arm, and so on, until four sets per arm are completed.
Also, pick a weight that allows you to get 10-12 reps on the first set (to failure). You probably won't be able to hit 10-12 reps on subsequent sets because of the continuous back-and-forth nature of the sets, which minimizes rest. That's okay. Just go to failure on every set, whether it ends up being 8 reps, 5 reps or however many.
Do whatever version of two-arm shoulder press you want to start the workout—barbell, dumbbell, Smith machine, selectorized machine, etc. To promote variety, do a different version each time. Likewise for upright rows and lateral raises; sub in Smith machine or dumbbell upright row, cable lateral raise or dumbbell bent-over lateral raise as you wish.
I answer questions on training, nutrition and supplements literally everyday from countless JYM Army members and other inquiring minds via social media. But let’s face it, the 140 characters I’m limited to on Twitter isn’t always enough to get my point across. And even when I’m able to elaborate, some of my responses get lost in the Facebook madness. So what better place to answer more questions for JimStoppani.com subscribers than right here at my virtual home base?
Q: When I do upright rows, I feel it mainly in my traps. Is there a trick to targeting the delts more with upright rows?
A: If you do the barbell upright row with a close-grip—inside shoulder-width—it places a lot of the focus on the front delts and upper traps, since this hand position keeps your elbows in front of your body as you lift the bar (which targets the front delts) and allows you to end with your elbows much higher than shoulder height (which targets the upper traps). That’s why I recommend gripping the bar outside of shoulder-width on upright rows.
This hand position allows the elbows to flare out to the sides more in a similar manner to lateral raises, hitting the real meat of the shoulders: The middle deltoids. It also limits you from bringing your elbows much higher than shoulder height, thus limiting the involvement of the upper traps. Unlike lateral raises, however, because you are pulling the weight up you can use more weight to place more overload on the middle deltoid head for greater muscle growth.
Researchers from the University of Memphis had trained subjects perform the upright row with a close grip (half of shoulder width), a shoulder-width grip, and a two-times-wider-than shoulder-width grip on the bar. They measured muscle activity of the front, middle, and rear deltoids, as well as the upper and middle traps, and biceps during upright rows.
They reported in a 2013 issue of the Journal of Strength and Conditioning Research that when the subjects performed the upright row using the two-times shoulder-width grip, the muscle activity of both the middle deltoid and even the rear deltoid increased by over 20% compared to using the close grip. They also reported that the wider grip increased muscle activity of the upper traps while decreasing muscle activity of the biceps.
As you should already be doing, this study confirms that doing the upright row—whether with a standard barbell or in a Smith machine—with a wider than shoulder-width grip increases muscle activity of the middle deltoids. It also increases muscle activity of the traps, which is somewhat surprising. But also surprising is the fact that the wide-grip upright row also increased muscle activity of the rear (posterior) deltoid head. So use the upright row in this manner for better development of both the middle and rear delts, as well as the traps.
However, when many guys do wide-grip upright rows, it feels awkward and painful in the shoulder joint. To avoid this, I recommend doing the Smith Machine One-Arm Upright Row. This movement places the majority of the focus on the middle head of the deltoid and minimizes pain and injury risk in the shoulder. Another benefit of this exercise is that, because you’re only using one arm, you can isolate each deltoid to promote balanced development.
Here’s how to do it: Stand in the middle of a Smith machine with the bar set at about mid-thigh height. Grab the bar with your right hand a few inches outside of your right thigh, using an overhand grip. Unrack the bar and pull it up to chest height, leading with your elbow flared out to the side as much as possible. After finishing all reps on the right side, repeat with the left arm.
I highly recommend eliminating rest periods, since the non-working side is always getting a rest, and just going back and forth between arms. So, when you reach muscle failure with your right arm, switch immediately to your left arm. When you reach failure on the left, immediately switch back again to your right arm and continue in this manner until you’ve completed all sets for each arm.
Down position:
Up position:
If you’ve ever seen my Tip of the Day video on dumbbell upright rows (particularly the alternating version), you should have a good grasp on proper technique of this exercise as well as some new ideas for utilizing different rep speeds—powerful, explosive reps plus slower, more controlled reps. The video is posted below for those who haven't seen it yet.
As I touched on in the video, the next step after nailing your form is incorporating dumbbell upright rows into your workouts. Generally speaking, any time you see "upright row" show up in one of my programs, feel free to do the dumbbell version as I demonstrated in the Tip of the Day. But if you don't feel like waiting until the next time it shows up in a program, here's a stand-alone shoulder workout I designed exclusively for members of JimStoppani.com to accompany the video. Give it a try if you're in the mood to fry your delts and build bigger shoulders!
Perform the first 5 reps of your Dumbbell Alternating Upright Rows explosively (see video for demonstration), then immediately switch to slower, more controlled reps and take these "normal speed" reps to failure. I listed 15 reps for this, which means you'd be reaching failure on about the 10th slow, controlled rep. If you find you're able to complete significantly more reps than this before reaching failure, increase the weight on the next set.
This shoulder workout can be done either on its own or with another muscle group (ie, as the shoulder portion of a chest/shoulders workout or a shoulders/triceps/biceps workout).
For an added cardiovascular and fat-burning boost, do cardioacceleration between all sets. On the supersets of lateral raises and bent-over raises, do the cardioacceleration after each superset, not between the two exercises.
On shoulder day, one of my main objectives is to overload and thoroughly exhaust the middle head of the deltoids to create maximum width up top. So naturally, I do lateral raises quite often.
And although it's a great exercise, there's just one minor issue with it: When you do standard dumbbell lateral raises, during the first 30 degrees of movement (starting with your arms by your sides) the supraspinatus muscle of your rotator cuff takes the majority of the load. The delts don't really kick in until after you've gone through this portion of the range of motion.
So what does this mean? It means that this smaller and weaker rotator cuff muscle is limiting the amount of weight you can do—and quite possibly your results. But there's one simple way to get around this: Do leaning dumbbell lateral raises.
This variation of the lateral raise helps to limit the use of the supraspinatus muscle to place more of the emphasis on the middle head of the delts. To perform the exercise, simply hold onto a solid structure (like a power rack) with one arm and lean away at about a 30-45-degree angle. Hold a dumbbell in the other hand so that it hangs straight down below your shoulder. For each rep, raise your arm until it's parallel with the floor. Slowly lower the dumbbell back to the start position, then repeat. After finishing all reps with one arm, do the same on the opposite side.
Here, I’ve mapped out four weeks of shoulder training to show how you can incorporate leaning dumbbell lateral raises into your program. Notice that I also included standard dumbbell lateral raises in these workouts. It's still a great exercise—just one that needs to be tweaked every now and then for maximum effectiveness.
Doing the cable lateral raise hands-free by attaching an ankle-strap attachment to your upper arm helps place more focus on the deltoid middle head, which gives your shoulders more width and roundness. By placing the strap above the elbow on your upper arm, it removes both the elbow joint and the wrist joint from the movement. This not only helps place better focus on the middle deltoid head, but also allows you to use a much heavier weight because the lever arm is shorter than when you're holding a cable attachment in your hand. This helps place more overload on the deltoid for greater muscle growth. Plus, the change-up allows you to target slightly different muscle fibers in the deltoid for best results. This version of the lateral raise is also great for those with an injury of the wrist or elbow joint, or an injury of the biceps or forearm muscles.
To do this exercise, adjust the ankle strap on your upper arm just above the elbow. The attachment to the cable pulley should be positioned on the inner part of your arm. If the cable pulley is adjustable, set it to a position just below hip height. If the pulley position isn't adjustable, use the pulley from the floor position. With the ankle strap attached to your right arm, stand so that your left side is facing the weight stack and the pulley is just in front of your body. To start, bend your arm at the elbow with your upper arm straight down at your side. Use your deltoid to lift your upper arm until it is just above parallel with the floor. Then slowly lower your upper arm back to the start position and repeat for reps. When all reps are done on one arm, repeat on the other arm.
Try doing 2-3 sets in this fashion, followed by 2-3 sets done the standard way. Or swap this version in on occasion for standard lateral raises. If you do have an injury that prevents you from doing standard lateral raises with a cable or dumbbells, use this version as your replacement.
In the below program, try using the hands-free cable lateral raise in place of the regular cable lateral raise!
Lateral raises are a great exercise to build big round shoulders. That's because they place the emphasis on the middle deltoid head, which is the head that gives the shoulders width and roundness.
While dumbbell lateral raises are a great way to build major size on the middle deltoid head, I also love to use machine lateral raises. If your gym is equipped with this machine I highly encourage you to use it.
The nice thing about the machine lateral raise that differs from the dumbbell version is due to the cams on weight machines, you have constant tension on the deltoids. That means you have plenty of resistance right from the start of the movement, which helps to build the muscle fibers in the bottom of the middle deltoid where the shoulders meet the arms. That can help to create the definition between the arm and deltoid that makes the shoulders pop right off of the arm.
Check out my Mirror Image Shoulder Workout below to see how I often use the machine lateral raise when I train shoulders.
The Mirror Image Shoulder Workout is a workout that I designed to build big, round shoulders. This workout utilizes two types of exercises to hit each of the three deltoid muscle heads. The first half of the workout (the first side of the mirror) uses free-weight exercises to maximize the overload on the muscles for maximal growth. You will do heavier weight and lower reps for the free-weight exercises.
You start with the dumbbell shoulder press, then move to the dumbbell lateral raise, and finish with the dumbbell rear delt raise. The second half of the workout (the other side of the mirror) is a reverse image of the first half of the workout. In this part of the workout you will do all machine exercises to place greater focus on each head of the deltoid, which also helps with muscle growth. You start with the machine rear delt flye, then move to the machine lateral raise and finish with the machine shoulder press.
You will use much lighter weight in this half of the workout. But the real key to this half of the workout is doing drop sets. You will choose a weight that allows you to do 15 reps on the first set. Leave this weight on all three sets. On the third and final set you will do a major drop set by reaching muscle failure and then reducing the weight by one plate. After you reach failure again, you reduce the weight by another plate. Continue in this fashion until you dropped all the way down to the last plate on the weight stack.
On the final set of each machine exercise, do drop sets until you drop all the way down to the lightest plate on the machine.
Most of my shoulder workouts include ample exercises for not only the front and middle deltoid, but also the posterior or rear deltoid.
Since the deltoid is composed of these three heads that converge onto a common tendon, for better balanced shoulder development, you want to make sure that your shoulder workouts include work to target all three areas. Plus, even strength development of all three deltoid heads can help to reduce the risk of shoulder injuries. Shoulder presses and upright rows will hit the middle and front delts. Lateral raises target the middle delts and front raises target the front delts.
I use a variety of exercises to target the rear delts. These include: Bent-over lateral raises, prone dumbbell rear delt raises, lying cable rear delt flyes, high cable rear delt flyes, machine rear delt flye, band pulls and face pulls. The last two exercises listed use a pronated grip. That means that the palms face down to the floor. With the rest of the exercises you have the option of using a neutral grip (palms facing each other) or a pronated grip.
Some arguments in gyms have been in regards to the best hand position for better targeting the rear deltoids. There are many who believe that the pronated grip is better for targeting the rear deltoids. Others swear that the neutral grip is best. My take is always variety and that using both grips has value. However, for the sake of ending the debate and picking a winner, a new study suggests that it is the neutral grip.
Researchers at Lehman College in New York had recreational lifters perform the machine rear delt flye with a neutral grip and with a pronated grip. They used EMG (electromyography) to measure muscle fiber activity of the rear deltoid, middle deltoid, and the infraspinatus (one of the four rotator cuff muscles) during both versions of the machine rear delt flye.
They reported in the Journal of Strength and Conditioning Research that the neutral grip led to significantly greater muscle activity of both the rear deltoid and the infraspinatus.
This is likely due to the fact that one motion that the rear delts are used for is external rotation of the arms, such as when you turn your arms to use a neutral grip. Although the differences were significant, there were not huge differences in the muscle activity of the rear deltoid or infraspinatus based on the different hand grips used. In other words, using the neutral grip allowed for a moderate increase in muscle activity of the rear delts and infraspinatus. This may be due to the fact that one motion of the rear deltoid is to rotate the arm out like what happens when you turn your arms out to take a neutral grip. Meanwhile, there was no difference between the grips for middle deltoid muscle activity.
When doing rear deltoid exercises, such as the high cable rear delt flye, or machine rear delt flye, or bent-over lateral raise, focus on using a neutral grip the majority of the time to target the rear delts and infraspinatus better. Of course from time to time you can switch it up and use a pronated grip on these exercises, as well as switch to exercises that use more of a pronated grip, such as the face pull and band pulls.
Just because one version of an exercise has been shown in the lab to increase muscle activity greater than another version of that exercise does not mean that you should only use the exercise that has the greater muscle activity and neglect to use the version with less muscle activity. Each of those exercises hit some unique muscle fibers in the target muscle. In the case of pronated or neutral grip rear delt flyes or raises, the pronated grip will target some muscle fibers in the rear delts that the neutral grip does not and vice versa. Variety always wins in weight lifting.
As I said above, if you want to build well-rounded shoulders you need to focus on your rear delts, not just your front and middle delts. So in addition to doing shoulder presses, lateral raises, and upright rows, you need to do some rear delt exercises as well. But if you've found that you are doing plenty of rear delt moves such as bent-over lateral raises, yet aren't getting making any gains, I know why that may be. Most rear delt exercises—like the bent-over lateral raise—are single joint exercises, which severely limit the amount of weight you can use.
But an exercise known as the face-pull, mentioned above, is a multi-joint exercise that you can do with some real weight to pack on some serious mass on your rear delts, as well as your middle traps.
To do the face pull, attach a rope attachment to the pulley of a lat pulldown station. Grab the ends of the rope with an overhand grip so that your palms are facing each other. Place your foot up on the seat or knee pad post of the pulldown station. This will help to anchor your stance better and allow you to use more weight to place some serious overload on the rear delts. With your arms extended directly in front of you, lean back so that your upper body forms a 45 degree angle with the floor. Using your rear delts and middle traps, pull your arms back and out to your sides, bringing the rope to the sides of your ears. Then return your arms to the start position and repeat for reps.
Because this exercise involves movement at both the shoulder joint and the elbow joint, it's considered a multi-joint exercise. That means that you can really load up on the weight. And the more weight you can use, the more overload you place on the rear delts, and that helps to create greater muscle growth in the rear delts and the middle traps. Since this exercise hits both the rear delts and middle traps, I like to do it at the end of my delt work as a segue exercise between shoulders and traps. I usually follow this exercise with some form of shrugs, such as dumbbell or barbell shrugs, or my one-arm, or hands-free Smith machine shrug.
To see a demonstration of the cable face pull, watch this video:
If you're currently neglecting your posterior deltoids (aka "rear delts") in the gym, it's time to take a page out of the powerlifters' playbook.
If you look at the training program of pretty much any serious powerlifter, you're likely to see dedicated rear delt work—usually some sort of reverse flye movement with dumbbells or on a rear delt flye machine. The reason for this is simple: When bench-pressing extremely heavy weight, you want the muscles on the posterior side of the body to be strong and provide stability while the pecs, front delts and triceps exert tremendous force to press the bar off the chest. A weak pair of rear delts can spell trouble when you're trying to bench press 400+ pounds; a failed attempt is the likely result, and maybe a serious shoulder injury, too.
It's not much different for the non-powerlifter who likes to go hard on chest day with a variety of presses and flyes. You may not be hitting 400 pounds on bench, but it doesn't matter—if you're training chest with high intensity and high volume, the muscles on the posterior side of your body need to be strong to balance out your physique and keep your shoulder joints healthy. And if you think the pull-ups, pulldowns and rows you do for back will sufficiently hit the rear delts... think again. One of the reasons the rear delts are so neglected by people in the gym (other than the fact that they're not a muscle like the pecs that you can see in the mirror) is because they're relatively small muscles that are hard to reach. You really need to zero in on them on a regular basis.
That's why I always include isolated rear delt work in my training programs. And one of the most effective ways to hit the rear delts is one arm at a time—like with one-arm cable rear delt flyes, which I covered in the video below.
What I really love about this exercise is that it maximizes range of motion, where you're able to bring the working arm way behind your body. With any two-arm rear delt flye, you won't be able to reach back quite so far. The increased range of motion with one-arm flyes produces an extremely strong contraction in the posterior deltoids, due in part to a stronger mind-muscle connection. The exercise also offers the fringe benefit of some added core work due to the standing position and asymmetrical load (one side working and the other not, which impairs balance during the set).
As I mentioned in the video, one-arm rear delt cable flyes make for a great finishing exercise in a shoulder workout. And it doesn't take long when you go back and forth from right arm to left without resting—you should be able to get three sets per arm done in less than three minutes. For a complete shoulder workout that finishes with one-arm rear delt cable flyes, click below.
Obviously, when it comes to hitting shoulders I’m never short on options. But for those whose shoulders are really lagging, or anyone who wants to bring their delts out even more, I’ve designed an entire program around doing just that. Much like the way my Six Weeks to Sick Arms is designed to deliver truly massive arms, this 8-week hypertrophy program can help you add serious mass to your shoulders. So if you’re looking to maximize the size and width of your delts, you need to check out my 8 Weeks to Boulder Shoulders program.
Related Articles

Mixing periodization schemes and rep ranges is the key consistent gains.

Why having a clear, structured workout plan is essential for successful fat loss.

Effective at-home routines for beginners to advanced, and how to maximize results with minimal equipment.

I took Challenge winners Travis, Colby, and Rachel through a brutal biceps and triceps workout they won’t forget — here’s how it went down.
Foundations
Featured Meal Plans
Muscle Hypertrophy: Build Muscle Fast
Rethink Your Rep Range
The Science of Strength Bands
Training
Nutrition
Supplementation
Health