Beginner to Advanced: Phase 2 Overview
Breaking down Phase 2 of my Beginner to Advanced training program

Breaking down Phase 2 of my Beginner to Advanced training program

In the first phase of the program, you were introduced to 8 basic resistance training movements to allow your nervous system to develop the coordination necessary to perform those exercises with proper form. In Phase 2, you’ll now move on to training for muscle development and split-style training.
Whereas the workouts in Phase 1 were full-body, over the next 3 weeks you'll train half of your body in alternating workouts: Torso exercises in Workouts 1 and 3 of each week, and limb exercises in Workouts 2 and 4. This will allow you to double the number of exercises you perform each workout, while still allowing for plenty of rest between each split to allow for adequate recovery.
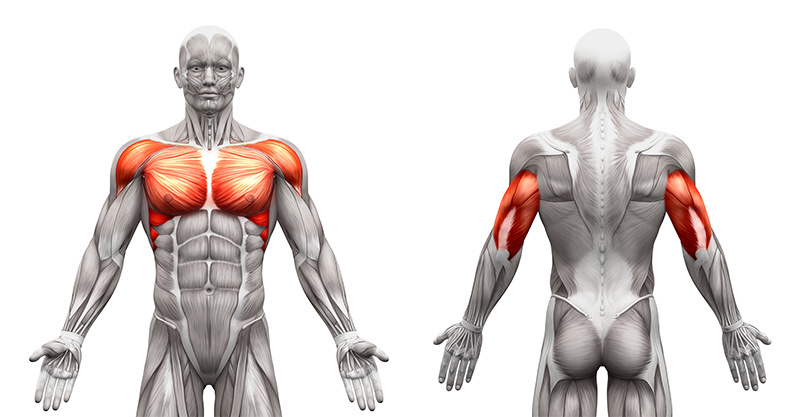
Targeted Muscles
Pectoralis Major and Minor (Pecs,Chest)
Assistance Muscles
Anterior Deltoid (Delt, Front Shoulder), Triceps Brachii (Triceps, Rear Upper Arm)
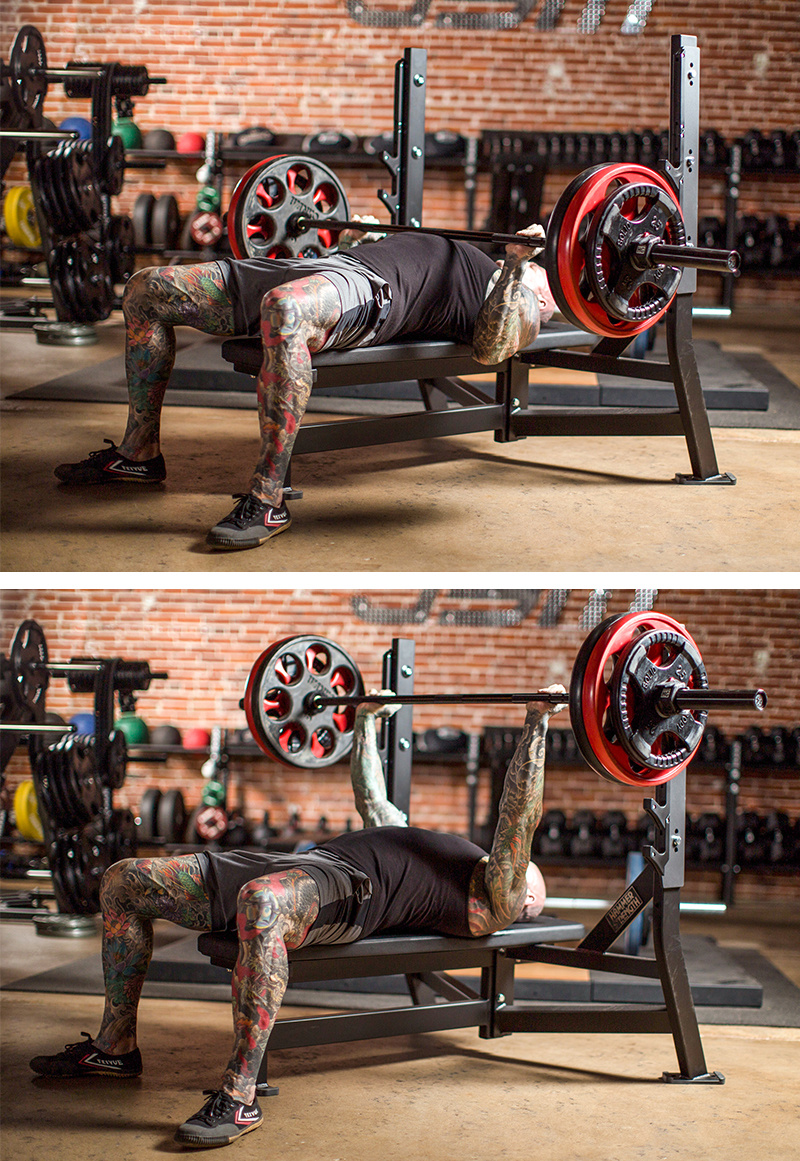
Bench Press Overview and Instruction
Set and Rep Scheme
3 sets of 8-10 reps
Rest Periods
2-3 minutes
The mechanisms of the body’s skeletomuscular system can be divided into two categories: Compound or multi-joint movements, and isolation or single-joint movements. Compound movements typically precede isolation movements working the same muscle group.
The Bench Press is a multi-joint movement, as it involves both the flexion or contraction of pectoral muscles manipulate the shoulder joint and the extension of the elbow joint courtesy of the triceps muscles.
To perform the bench press, lie face up on a bench press bench with your feet flat on the floor. Grasp the barbell with an overhand grip, your hands slightly wider than shoulder-width apart. (Learn more about ideal bench press grip width here.)
Be sure to maintain five points of contact at all times: Each foot on the floor, and your hips, shoulders, and head on the bench. Additionally, retract your shoulder blades by squeezing them together. This will enable you to better stretch and engage the muscle fibers in your chest for better overall strength and impact.
With enough weight to now limit you to 8 to 10 repetitions loaded onto the bar, unrack the bar and slowly lower it toward your chest. Keep your wrists aligned with your elbows and your elbows out to your sides at roughly a 45-degree angle. When the bar just touches your chest, press back up explosively, driving the weight away from you until your arms are almost completely straightened. Repeat until you’ve reached 8 to 10 reps, rerack the bar, and rest for 2 to 3 minutes before beginning your next set.
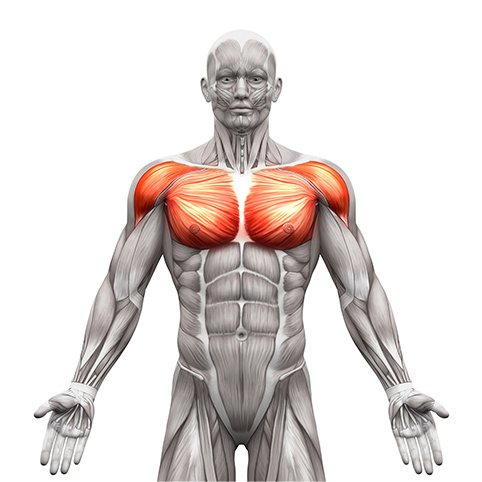
Targeted Muscles
Pectoralis Major and Minor (Pecs, Chest)
Assistance Muscles
Anterior Deltoid (Delt, Front Shoulder)
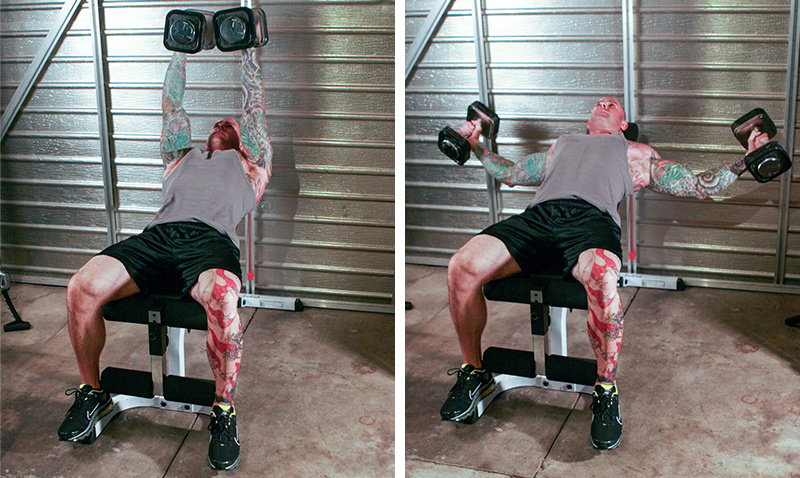
Incline Dumbbell Flye Overview and Instruction
Set and Rep Scheme
3 sets of 10-12 reps
Rest Periods
2-3 minutes
Following the compound movement of the bench press is the Incline Dumbbell Flye, which is a single-joint exercise focusing on the pectoral muscles with an emphasis on the upper portion of the pecs. Due to the fact that this is a single-joint movement and fewer muscles are used, the amount of weight you use will be lighter than you would choose for a compound lift.
To perform the incline dumbbell flye, select dumbbells at a weight that will have you reaching failure within 10 to 12 reps, and set an incline bench at a 30-45-degree angle. Lie on the bench with your feet flat on the floor and your back pressed against the pad. Begin holding the dumbbells with your arms straight up from your shoulders and the dumbbells directly over your upper chest. Your palms should face each other and your elbows should be slightly bent. This angle of your elbows should be maintained throughout the entire exercise.
Slowly lower your arms out to your sides until your wrists come to about shoulder level or slightly above. Bring your arms back toward the midline of your body, focusing on using your pec muscles to draw them back together. Repeat for 10 to 12 reps, then rest for 2 to 3 minutes before moving on to your next set.
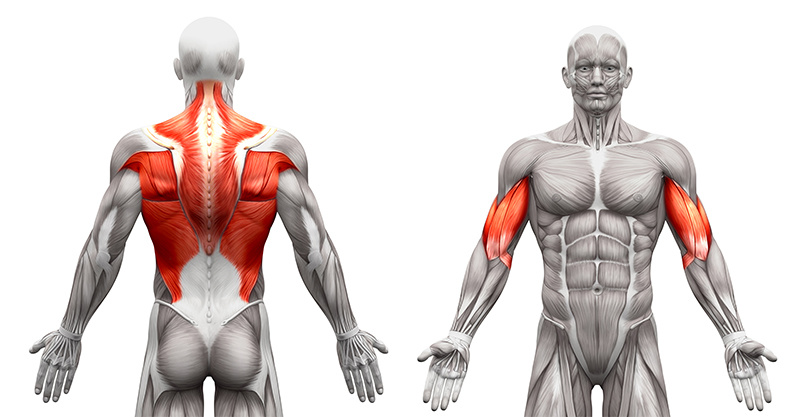
Targeted Muscles
Latissimus Dorsi (Lats, Sides of the Back)
Assistance Muscles
Middle Trapezius (Traps, Top of the Back), Teres Major and Minor, Rhomboids (Upper Back), Erector Spinae (Lower and Middle Back), Biceps Brachii (Biceps, Front Upper Arm)
Barbell Bent-Over Row Overview and Instruction
Set and Rep Scheme
3 sets of 8-10 reps
Rest Periods
2-3 minutes
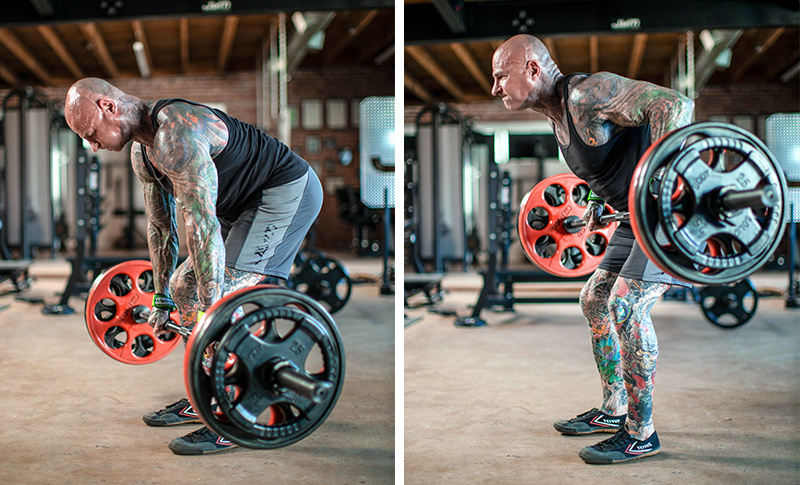
Like the bench press, the Barbell Bent-Over Row is a compound, multi-joint movement, involving a number of muscles to perform the lift. In Phase 2 of the program the barbell bent-over row will be performed just as it was in Phase 1, except now you’ll increase the weight so that you’ll be limited to 8 to 10 reps.
To perform this movement, start with a barbell on the floor or positioned low in a power rack if you prefer. Stand with your feet about shoulder-width apart with a slight bend in your knees. Bend forward from the hips, keeping your torso just above parallel to the floor and your chest lifted to maintain the natural arch in your back. Take an overhand grip on the bar, hands just outside shoulder-width.
Pull the bar into your lower abs, contract your lats and middle-back muscles hard, then slowly lower the bar all the way down to full arm extension. Repeat the movement until you’ve hit 8 to 10 reps, then rest for 2 to 3 minutes before starting your next set.

Targeted Muscles
Latissimus Dorsi (Lats, Sides of the back)
Assistance Muscles
Middle Trapezius (Traps, Top of the Back), Teres Major and Minor, Rhomboids (Upper Back), Erector Spinae (Lower and Middle Back), Biceps Brachii (Biceps, Front Upper Arm)
Wide-Grip Lat Pulldown Overview and Instruction
Set and Rep Scheme
3 sets of 10-12 reps
Rest Periods
2-3 minutes
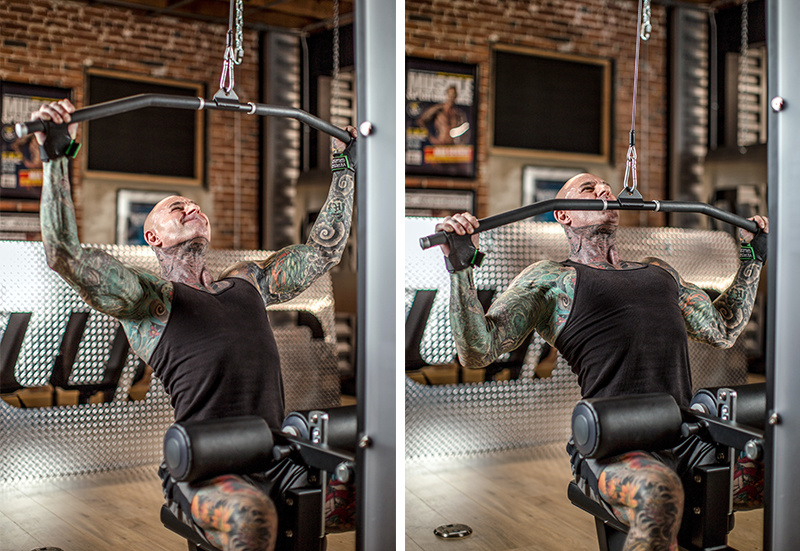
Another compound movement that involves flexion at both the shoulder and elbow joints, the Wide-Grip Lat Pulldown relies more heavily on the lats in comparison to the assistance muscles’ usage in performing the barbell row. Additionally, using a wide grip will better target the upper lats, nearest to where they meet the shoulder.
To do the wide-grip lat pulldown, select a weight on the pulldown machine that you can perform between 10 and 12 reps with. Grab a long bar placing both hands on the end of each side. Sit on the bench facing the machine with your knees bent, feet placed securely and firmly on the ground and your arms vertically above you. Pull the bar towards you chest keeping your body steady and do not use momentum. Squeeze your lats and back tight and pause for a second and slowly return the arms to extension.
Make sure that as you pull down you do not angle your elbows to go behind your torso. Move the bar down in front of your chin just below the neck line. You do not have to touch the base of the neck or top of the chest. As you extend back up, do not relax the bar so that your torso or any other part of your body comes up off of the seat.
Repeat the movement for 10 to 12 reps, then rest 2 to 3 minutes before beginning your next set.
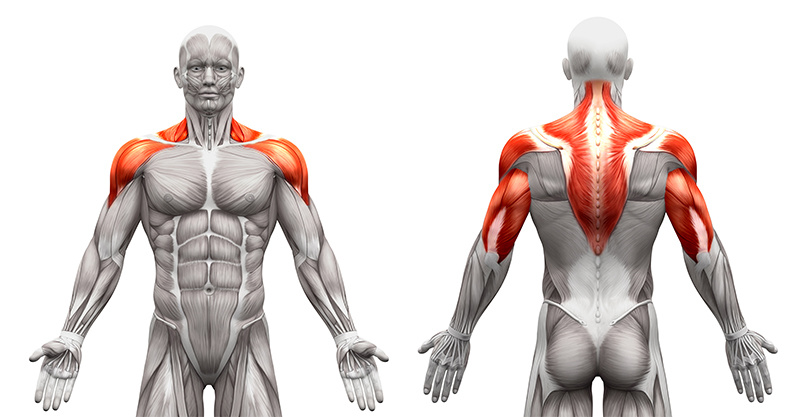
Targeted Muscles
Anterior and Lateral Deltoids (Delts, Front and Side Shoulder)
Assistance Muscles
Supraspinatus (Rotator Cuff, Back and Shoulder), Trapezius (Traps, Top of the Back), Triceps Brachii (Triceps, Rear Upper Arm)
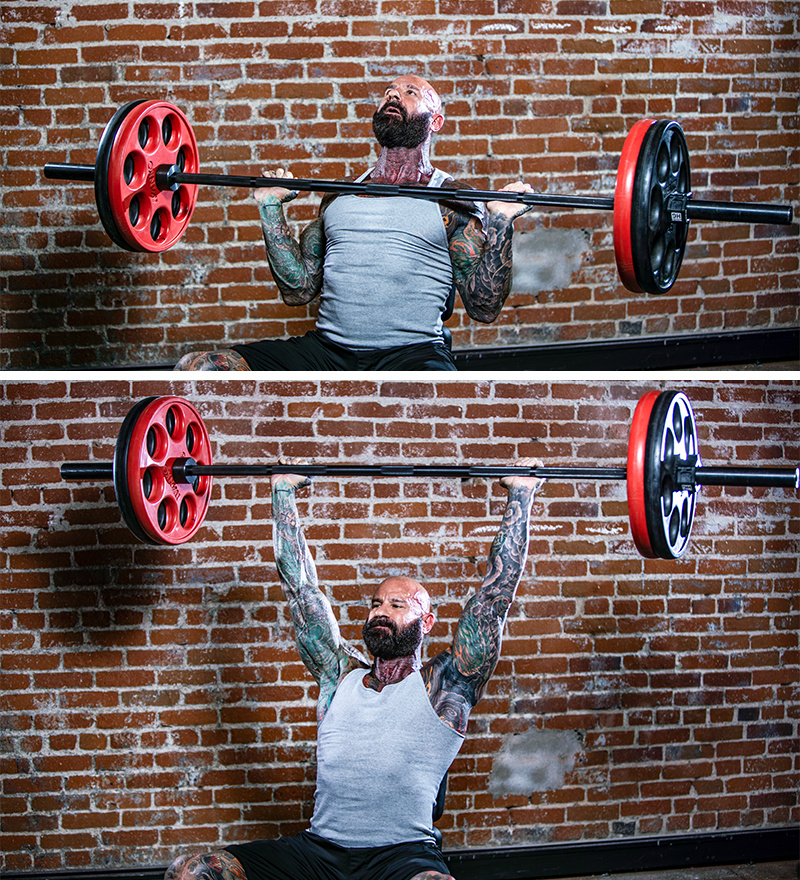
Barbell Shoulder Press Overview and Instruction
Set and Rep Scheme
3 sets of 8-10 reps
Rest Periods
2-3 minutes
The Barbell Shoulder Press and its variations are all multi-joint movements that involve not only the deltoid muscles of the shoulder but also the trapezius and triceps muscles, among others. This collective effort delivers more overall strength than you would have in an isolation movement. As was the case with the bench press and barbell row, this movement is performed the same as it was in Phase 1, only with enough weight to now
Related Articles